Notifications
Installation and Configuration
Copyright ©
Mindbreeze GmbH, A-4020 Linz, 2024.
All rights reserved. All hardware and software names are brand names and/or trademarks of their respective manufacturers.
These documents are strictly confidential. The submission and presentation of these documents does not confer any rights to our software, our services and service outcomes, or other protected rights.
The dissemination, publication, or reproduction hereof is prohibited.
For ease of readability, gender differentiation has been waived. Corresponding terms and definitions apply within the meaning and intent of the equal treatment principle for both sexes.
Introduction
The notification service makes it possible for users to be notified of changes to hits.
For example, a user searches for a particular search word, for instance "Mindbreeze Folder", and calls up all PDF documents for display. He gets 50 search hits
Now he would like to be notified by e-mail (for example, every Monday at 8 a.m.), if the number of hits has changed.
Preparation
Create a database for notifications
In order to use notifications, you need a corresponding database.
Tip: Create a database as follows:
create database notifications;
CREATE USER user WITH PASSWORD 'password';
grant all privileges on database "notifications" to user;
Configuration
In the "Client Services" tab, configure the "Alerting Service Settings" and the "Resource Persistence Settings".
Notification service settings
Enable | Enables alerts –default: true |
Allow Email subscriptions | Unavailable in the default Insight client, so it should not be activated. |
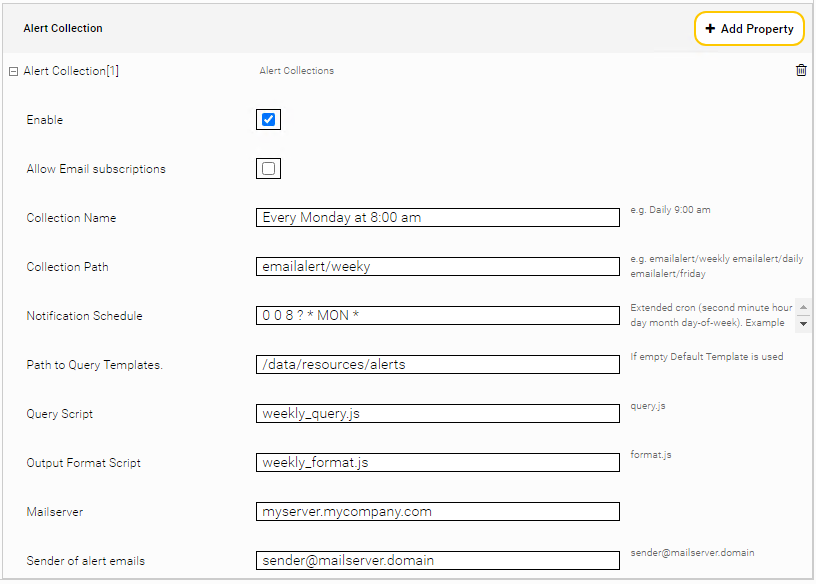
Collection Name | Name of the collection – is needed for display on Client. |
Collection Path | Path to the collection. Format: emailalert/clear_name – example: emailalert/daily |
Notification Schedule | A extended cron expression that specifies when to run this task. Specification of the execution time – examples:
Documentation and another examples of cron expressions can be found here. |
Path to Query Templates | Path for the "Query Script" and "Output Format Script" templates. |
Query Script | File name of the query script. |
Output Format Script | The file name of the script for formatting the output. |
Mailserver | Specifies the mail server from which the e-mails are sent. |
Sender of alert emails | Specifies the e-mail address from which the e-mails will be sent. |
Dedicated Alerting Principal Resolution Service
By default, the notification service uses the search and therefore also the configured Caching Principal Resolution Services of the data sources.
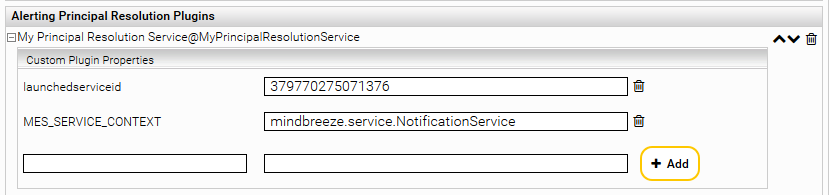
For extended use cases, additional Caching Principal Resolution Services can be configured in the client service. This is configured in the section "Alerting Principal Resolution Plugins". Additionally a Custom Plugin Property "MES_SERVICE_CONTEXT" with value "mindbreeze.service.NotificationService" must be added (Advanced Settings). These services are called first before the search is performed on the individual data sources.
The following options are also available in "Alert Service Settings":
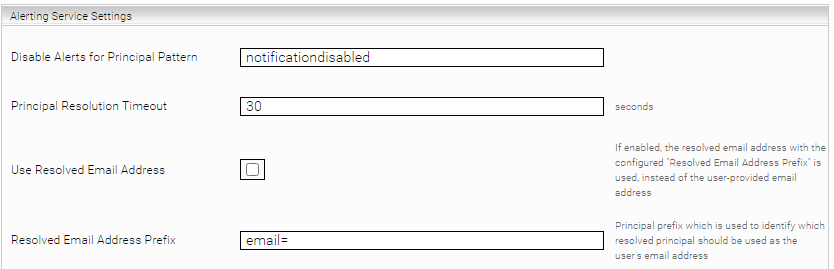
Principal Resolution Timeout | Defines how long (in seconds) to wait for the response from a Caching Principal Resolution Services. If a timeout or other error occurs, no notification is sent out |
Disable Alerts for Principal Pattern | With this option, notifications can be dynamically disabled for certain users. This is done depending on the user's current principals (which are determined by the Alerting Principal Resolution plugins). With this option, a regular expression (Java, case-insensitive) can be defined. If a principal matches the regular expression, the alerting for the user is disabled. |
Use Principal Email Address | When active, the receiver e-mail address for the notification is selected using the configured Caching Principal Resolution Services. Which principal is selected as the e-mail address can be determined using the “Principal Email Address Prefix” option. |
Principal Email Address Prefix | The principal that starts with the prefix configured here is used as the email address if the "Use Principal Email Address" option is enabled. Example: The user max.mustermann additionally has the Principal "email=max.mustermann@example.com" via a Principal Resolution Service. So, if "email=" is configured as prefix here, "max.mustermann@example.com" will be selected as receiver email address when sending the notification. |
Automatic setting of the email address based on the identity
When a user sets up a notification for the first time, the user can specify an e-mail address to which the notifications will be sent.
Under certain conditions, the e-mail address can be set or corrected automatically. In the client service, a user login via Trusted Peer must be used. The e-mail address must be available as user attribute. (See Trusted Peer Authentication documentation)

Options:
Use Email Address from Identity | If active, when creating the user, the user's e-mail address is used from the user attribute provided by the trusted peer login (default value: not active) |
Email Address Identity Property | Name of the user attribute used for the e-mail address. (default value: mail) |
Resource Persistence Settings

Settings:
Enables persisted resources - default: false. | |
User Administrator Users | Specifies the user administrators. |
JDBC URL | Specifies the database URL. |
Max Number Of Database Connections | Maximum number of database connections. Default value: 10, minimum value: 2. |
User | Specifies the user for the database. |
Password | Specifies the password for the database. |
Database Table Prefix | Specifies the table prefix in the database. |
User interface
User Administration
If the notifications are enabled and set correctly, a new entry "Users" is displayed under "Insight Apps" in the Management Center, which lists all existing users.
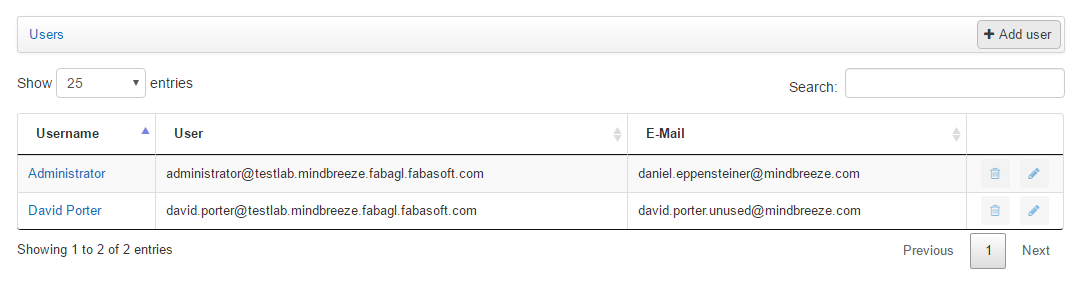
All user administrators that were previously configured are now authorized to create new users ("Add user" button), to edit all existing users ("Edit"), or to delete them.
![]()
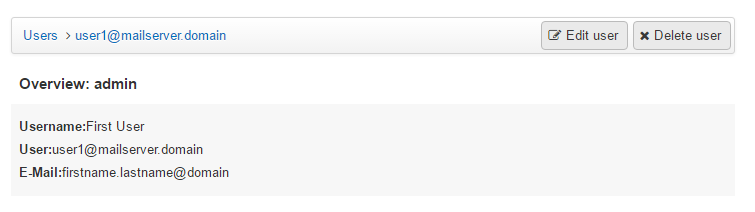
To delete an existing user, click on the user name, navigate to the overview of the user, and then click "Delete user".
Alert Administration
If the notifications are enabled and set correctly, a new entry "Alerts" is displayed under "Insight Apps" in the Management Center, which lists all existing alerts.

The Administrator has permissons to view details and edit the description of all alerts.
To delete an existing alert only a click on the delete button next to the altert in the overview is needed.
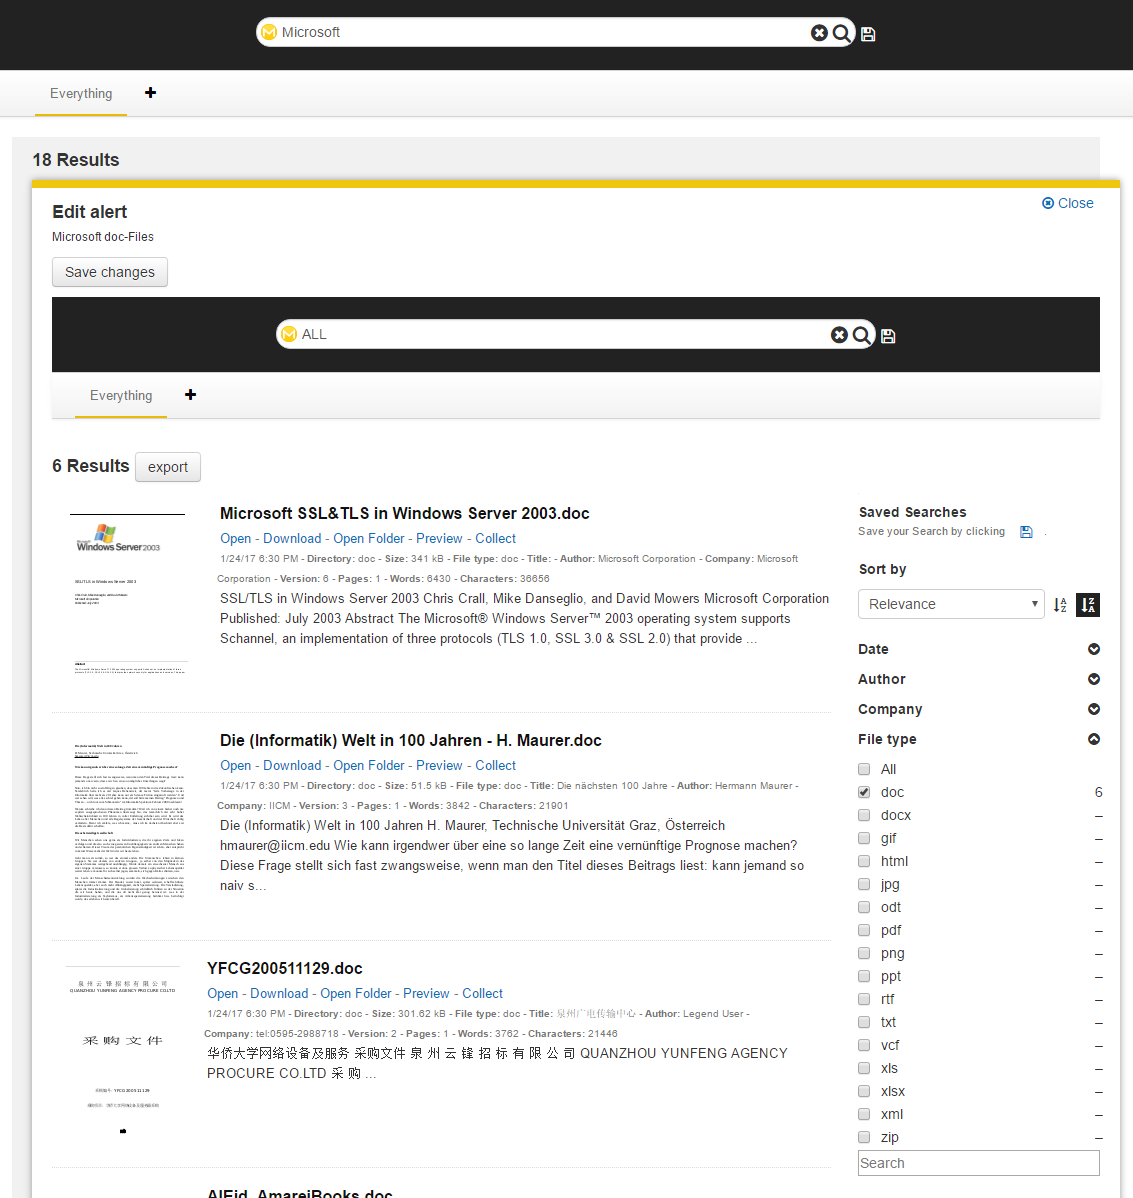
Change Alerts on the Client
To edit an existing alert simply click on the desired alert. A preview opens with the corresponding search. You can change the search query, all the filters and so on. To save the changes just click “Save changes”.