GitHub Connector
Installation and Configuration
Installation
Before you install the GitHub connector, you must ensure that the Mindbreeze server is installed and that the GitHub connector is included in the license. Use the Mindbreeze Management Center to install or update the connector.
Plugin installation via Mindbreeze Management Center
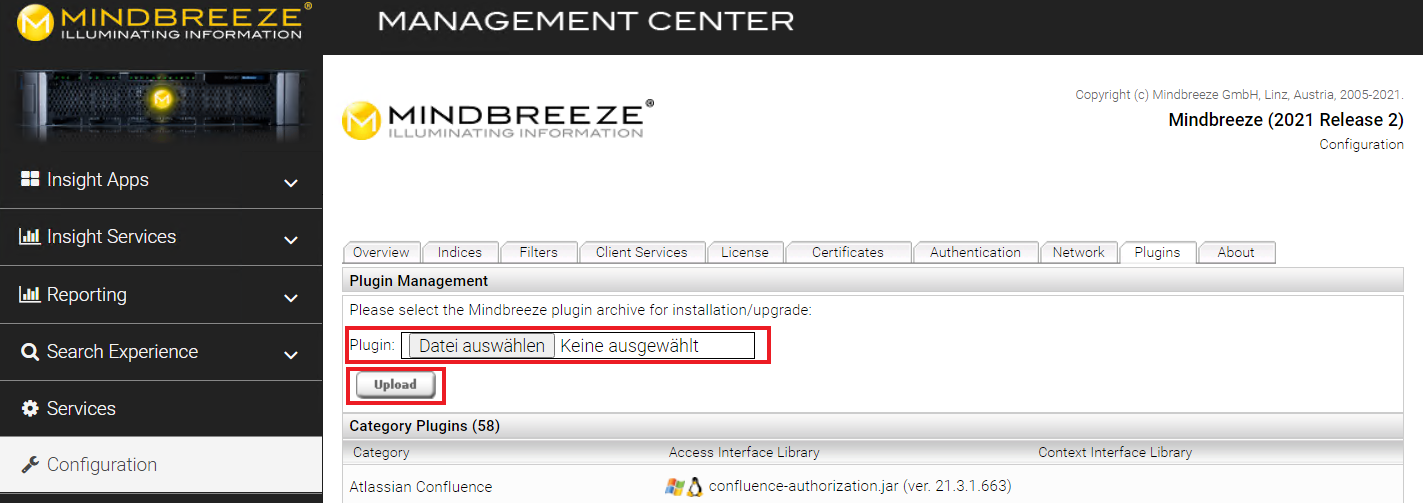
To install the plug-in, open the Mindbreeze Management Center. Select "Configuration" from the menu pane on the left-hand side. Then navigate to the "Plugins" tab. In the "Plugin Management" section, select the appropriate zip file and upload it by clicking the "Upload" button. This automatically installs or updates the connector, as the case may be. In this process, the Mindbreeze services are restarted.
Configuring Mindbreeze
Configuring the index and crawler
Navigate to the "Indices" tab and click on the "Add Index" icon in the upper right corner to create a new index.
Change the display name as necessary.
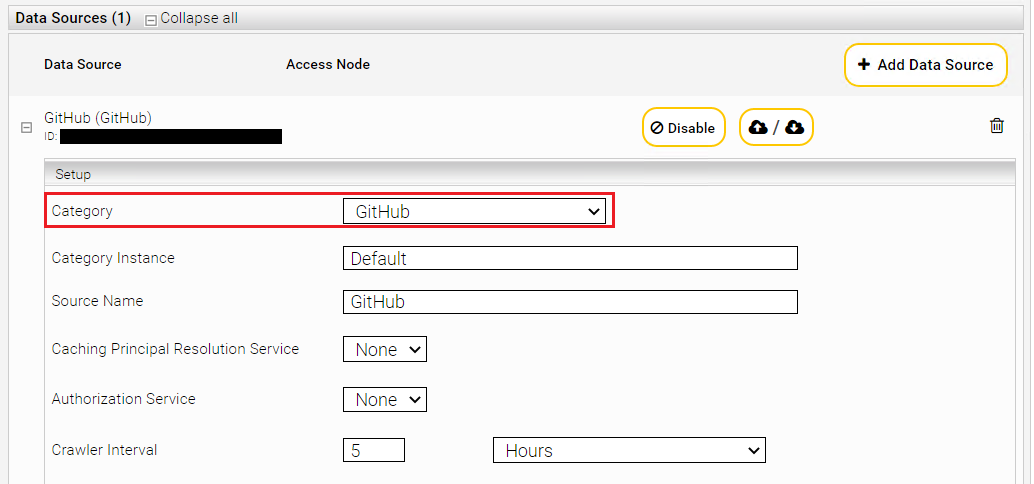
Add a new data source by clicking the "Add Data Source" icon at the top right and configure the data source according to your needs.
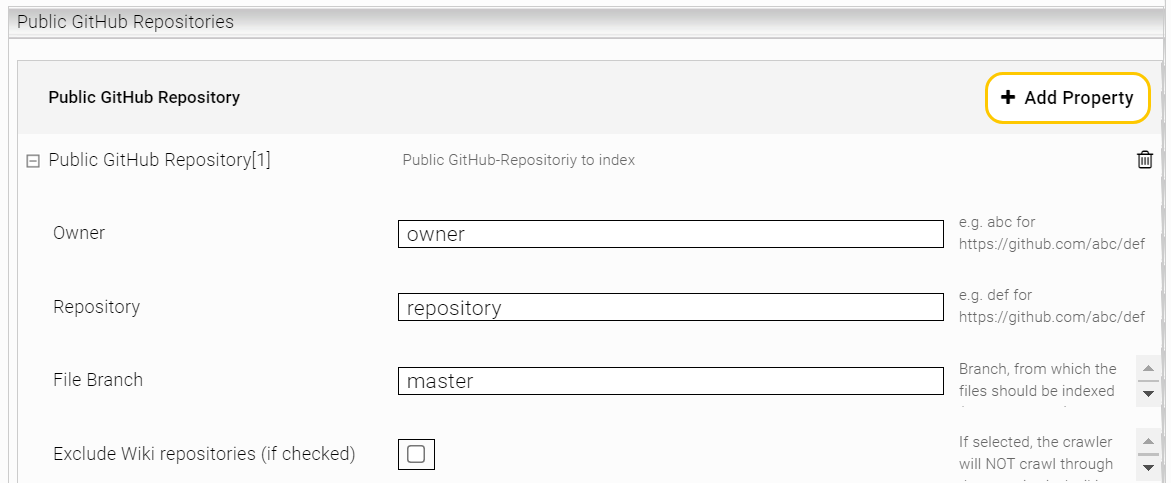
In the "Public GitHub Repositories" section, you can specify Public GitHub repositories that the GitHub connector should index. To do this, click the "Add Property" icon in the upper right corner and enter the relevant information about the repository:
Setting | Description |
Owner | The owner of the repositories. |
Repository | The name of the repositories. |
File Branch | The branch used for indexing the files. Usually the master branch is used for this. |
Exclude Wiki repositories (if checked) | If checked, wikis of the repository WON’T be indexed. |
To index multiple repositories, repeat the process.
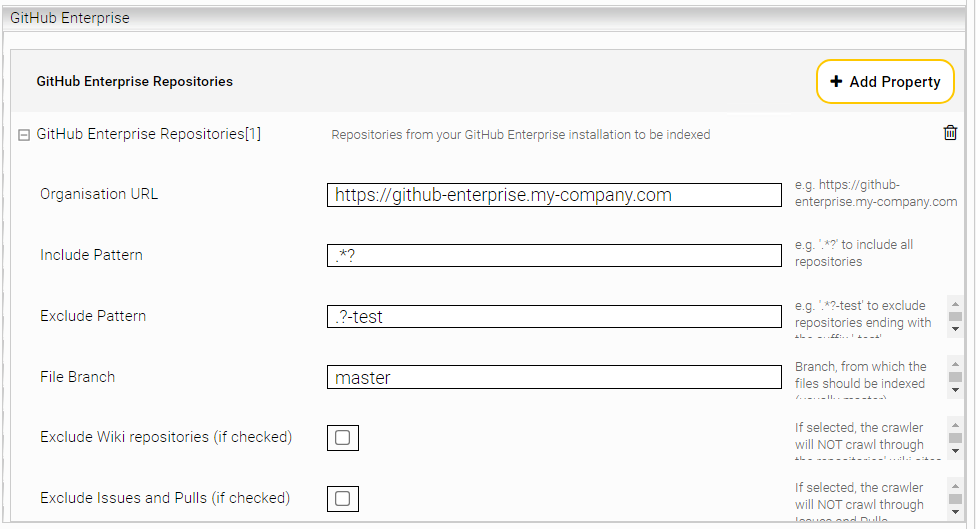
In the "GitHub Enterprise" section, you can specify repositories of your GitHub Enterprise installation to be indexed. To do this, click the "Add Property" icon in the upper right corner and enter the relevant information of the desired GitHub Enterprise repository:
Setting | Description |
Organisation URL | The web address of your GitHub Enterprise. |
Include Pattern | Which repositories of the GitHub Enterprise instance should be indexed. |
Exclude Pattern | Which repositories of the GitHub Enterprise instance should not be indexed. |
File Branch | Which branch should be used for indexing the files. |
Exclude Wiki repositories (if checked) | If checked, wikis of the repositories WON’T be indexed. |
Exclude Issues and Pulls (if checked) | If checked, issues and pull-requests WON’T be indexed. |
To index multiple GitHub Enterprise installations, repeat the procedure.
Select "Advanced Settings" to change the following setting.
Enable the “Use ACL References” option to enable the use of ACLs.
In order to index repositories of your GitHub Enterprise instance, the access data must be specified. Navigate to the "Network" tab. In the "Credentials" area, click on the "Add Credential" icon to add a new credential. Enter a name for it and choose the type "Username/Password". Enter the access data for your GitHub Enterprise installation in the respective fields.
Then add a new endpoint for the created credential. Click the "Add Endpoint" icon and enter the URL for your GitHub Enterprise instance in "Location". In "Credential", select your previously created credential.
If you want to crawl public GitHub repositories, it is advisable to specify your own credentials, as this increases the request limit. To do this, create appropriate credentials and endpoints for the public repositories. You can specify your own credentials per repository, or you can crawl each repository with the same credential.
For a repository-specific credential, create an endpoint with the GitHub URL of the repository as the location. For a general credential, select "https://github.com" as the location of the endpoint.
If required, you can define a custom path for GIT-repositories. To do this, turn on the "Advanced Settings" checkbox inside the “Indices” tab at the top right and the desired path can be now entered under "Storage path".


