Salesforce Connector
Installation and Configuration
Installation
Using the Salesforce connector, your data from Salesforce can be indexed.
Plugin installation via Mindbreeze Management Center
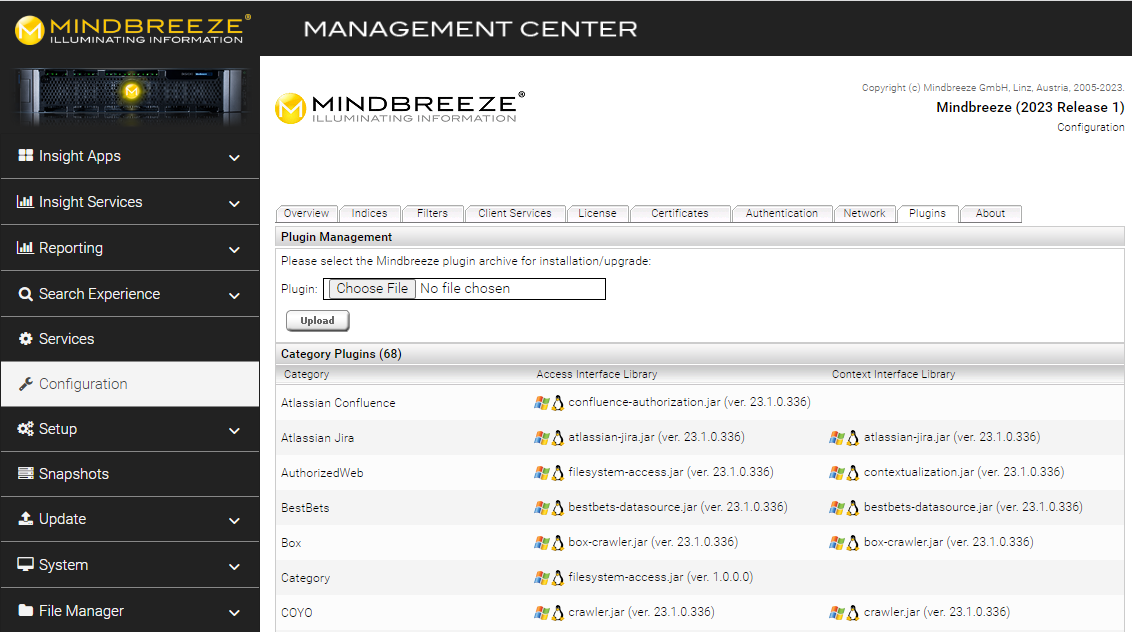
To install the plug-in, open the Mindbreeze Management Center. Select “Configuration” from the menu pane on the left-hand side. Then navigate to the “Plugins” tab. Under “Plugin Management”, select the appropriate zip file and upload it by clicking “Upload.” This either automatically installs or updates the connector to the selected version. In the process, the Mindbreeze services are restarted.
Configuration of Salesforce 
To be able to index Salesforce, a crawling user with an associated "Mindbreeze Crawling" profile must be created.
Creating a Crawling Profile
A crawling profile is required to define the objects and data that a user can access, as well as the permissions they have within the application.
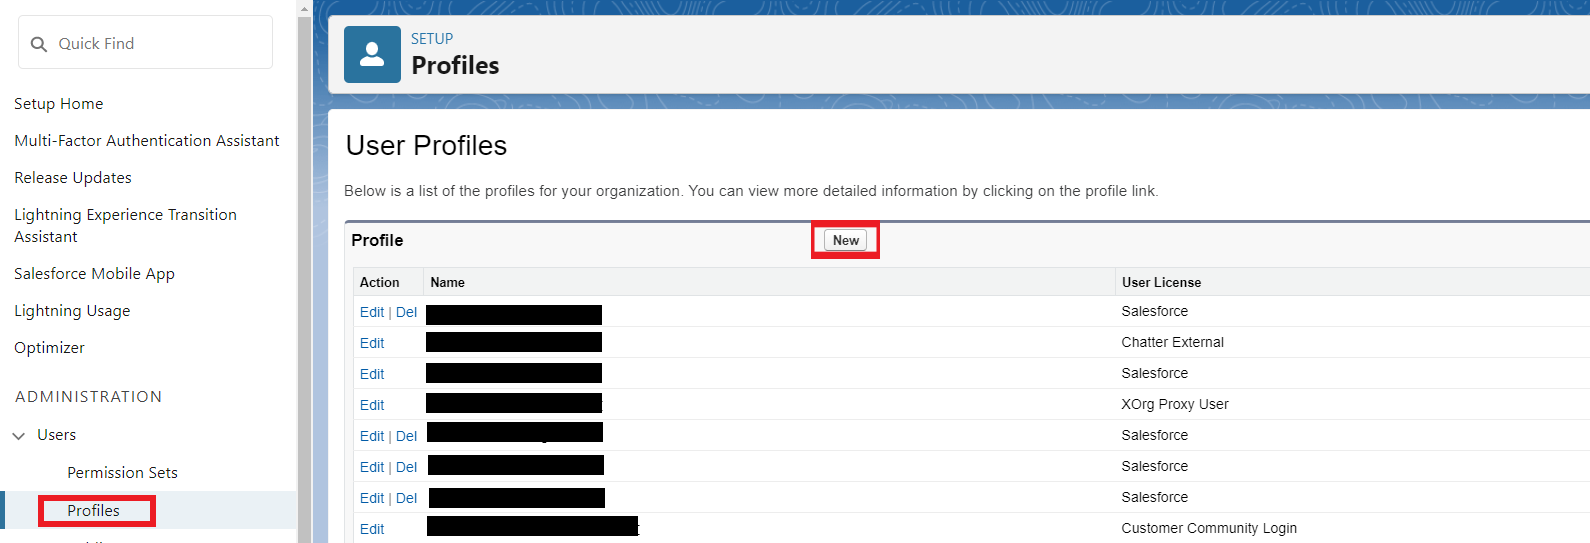
Open “Setup“ – “Administration“ – “Users“ – “Profiles“ and click “New“
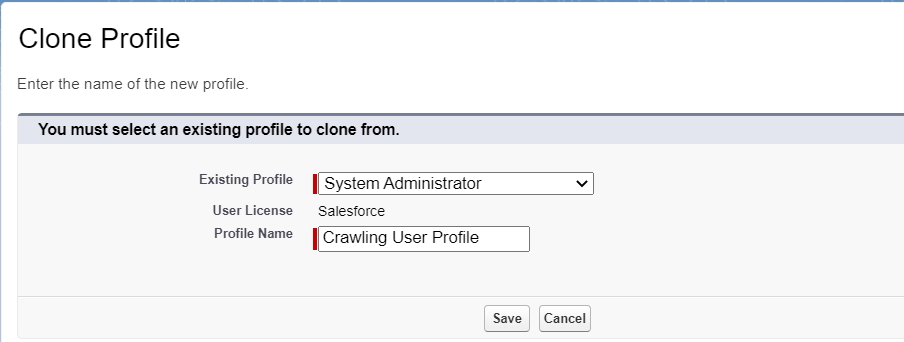
In the next step, create a new profile that is a copy of the existing System Administrator profile.
When this is complete, edit the profile to have the desired permissions.
It is recommended to give the profile as many permissions as possible, otherwise there may be issues resolving ACLs or principals in the "Salesforce Principal Resolution Service".
The permission "View All Data" must be enabled, otherwise the principal resolution will not work properly.
Creating the Crawling-User
After the crawling profile has been successfully created, the crawling user can now be created.
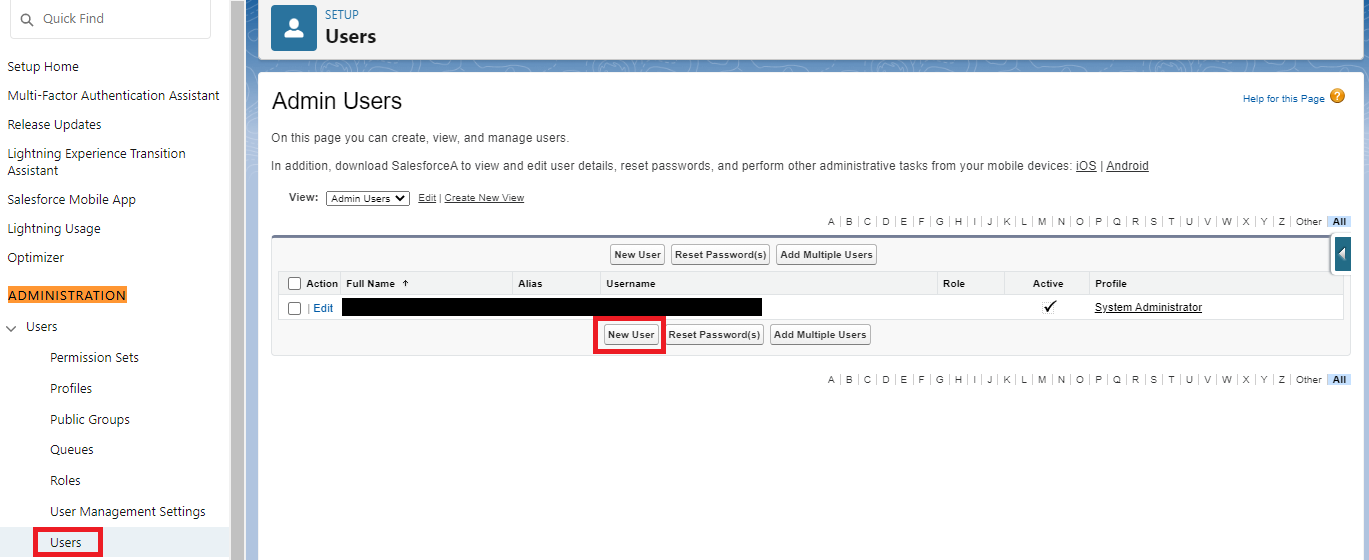
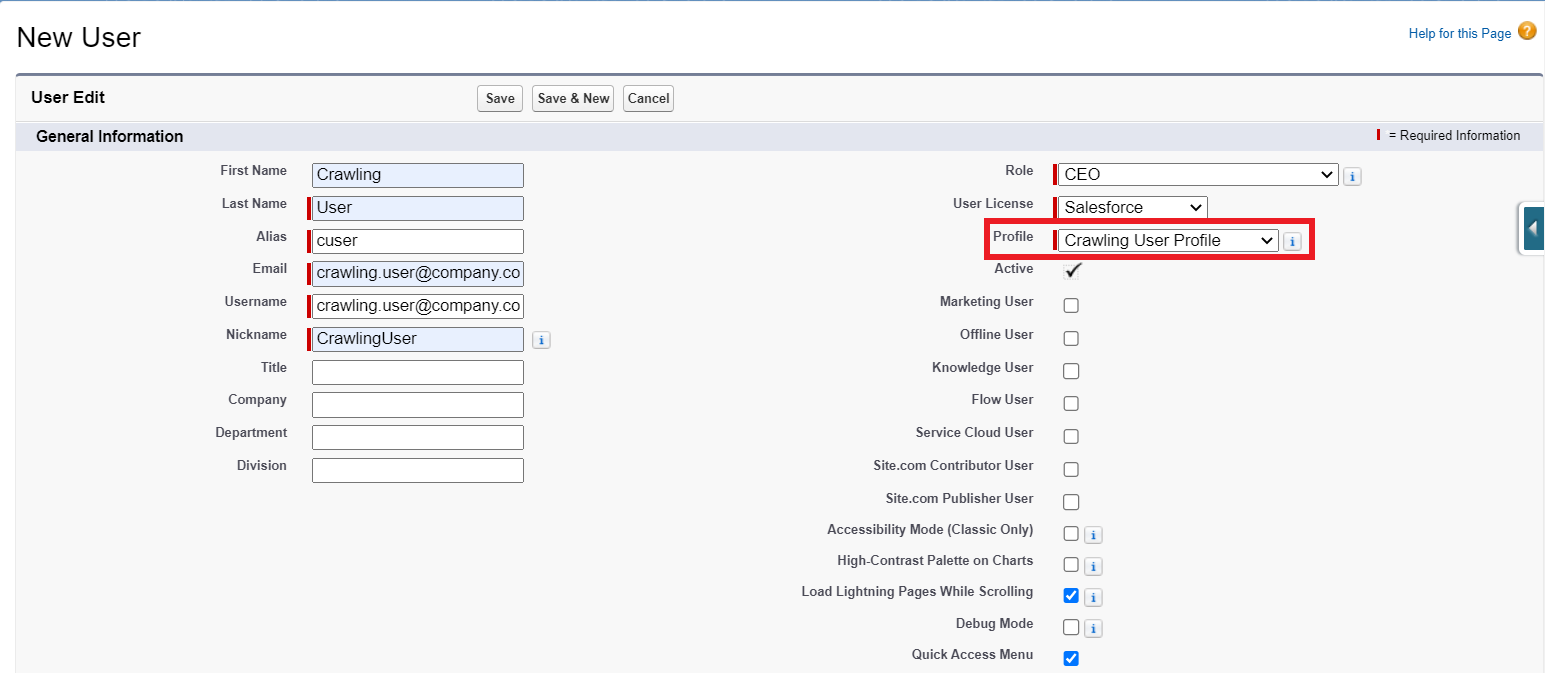
Open “Setup“– “Administration“ – “Users“ – “Users“ and click “New User“.
When creating the new user, make sure that the previously created crawling profile is selected. Furthermore, no specific user type (e.g. "Offline User") may be specified.
Filtering Users Without Profile
Users who do not have an assiociated profile (e.g. programmatically created users) pose are problematic because important authorization information cannot be retrieved from the profile.
This is especially the case if an attempt is made in the Principal Resolution Service to determine the user's authorization for various objects. If this is the case, the following error message will appear in the log:
No such relation 'Profile' on entity 'User'.
If this is the case, the Salesforce Developer console can be used to filter for users without a profile and assign them a profile. An administrator user can use this console.
In the Developer Console, you can use the following command to find all active users and their profiles:
SELECT Username, ProfileId, Profile.Name FROM User WHERE IsActive=true
Users who have no profile assigned to them can be identified by the "null profiles" value.
Configuring Mindbreeze
Configuring the Index
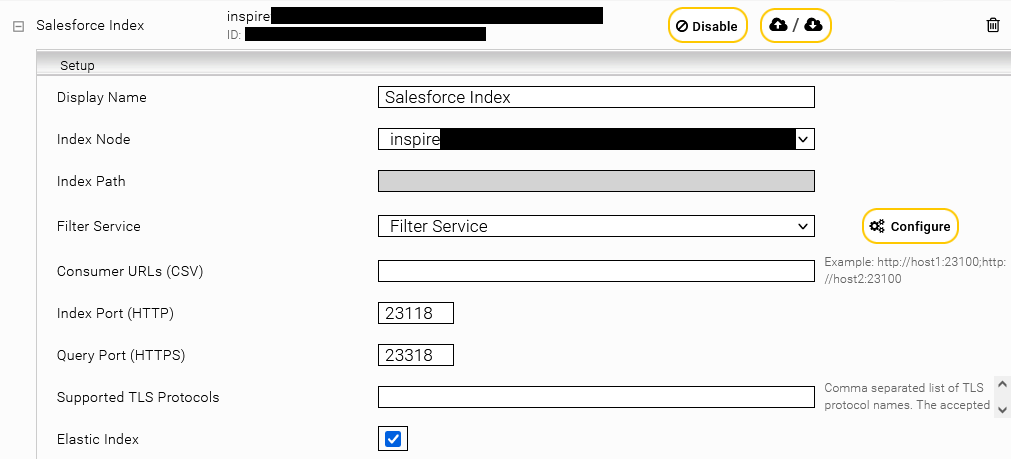
Click on the “Indices” tab and then on the “Add index” symbol to create a new index.
Enter the index path. Adapt the Display Name of the Index Service and the related Filter Service if necessary
Configuring the data source
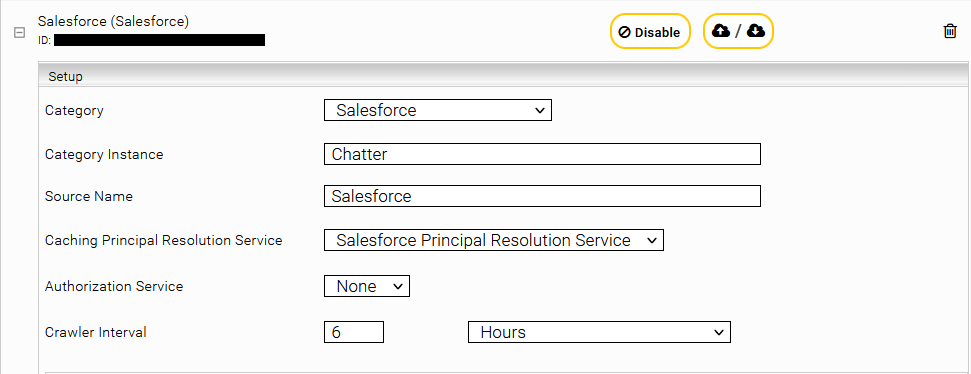
In the "Data Sources" tab, select the category "Salesforce" and, if necessary, a Caching Principal Resolution Service. With the button "Add Data Source" further instances can be added and configured.
Connection Settings (Crawler)
The Salesforce instance which should be indexed.
| |||||||||
Custom Endpoint URL | The URL of the Salesforce Instance which should be indexed. | ||||||||
TLS Version | The TLS Version which should be used. Auto is recommended. | ||||||||
Username | The Username of an User with read-only Permissions. | ||||||||
Password | The Password for the Crawling User. |
Authorization Settings (Crawler)
In order to authorize search results, either a Caching Principal Resolution Service or the Authorization Provider is required. In case of a Caching Principal Resolution Service, the following settings can be skipped. The Authorization Provider in the tab “User Email Resolution” needs to obtain search user principals which are Object Type Permissions in Salesforce associated with that user (identified by email address) in ObjectPermissions. Therefore it is necessary to obtain the search user’s email address first if it is not provided by client service.
Disables the resolution of the Username using LDAP. | |
Username | The email of the searching user. If "Disable User Email Resolution" isn’t selected, the Username can also be specified. |
Domain | The domain over which the Username should be resolved. |
Password | The password to register to the domain. |
After authenication in client service if the username is not the email address than it is necessary to resolve email through LDAP. The required credentials can be provided directly in “Username”, “Domain” and “Password” fields. Alternatively its possible that Kerberos is used for authentication. In this case only “Domain” field should be configured. If domain field is also empty than the first configured domain in Network settings will be used.
In order to obtain the search user’s object type permissions the configured crawler user (see Connection Settings above) should have the “View Setup and Configuration” permissions in Salesforce.
Sources Settings
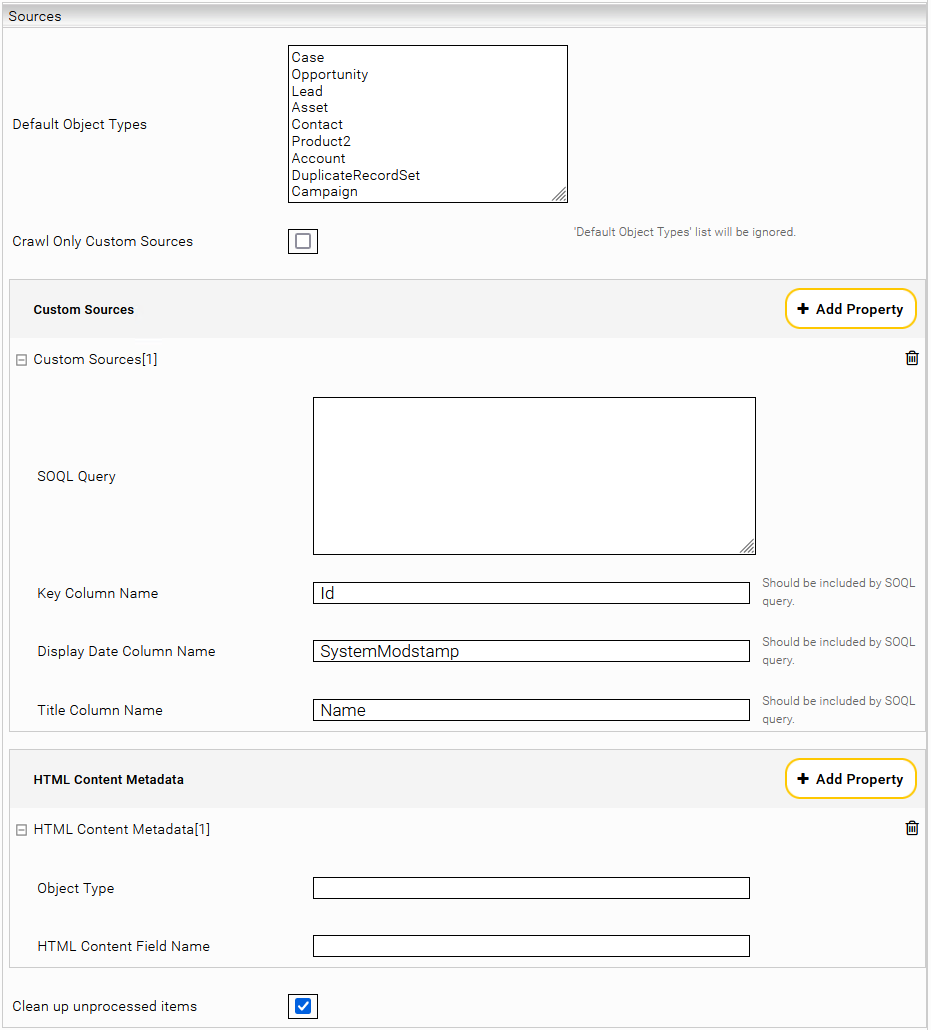
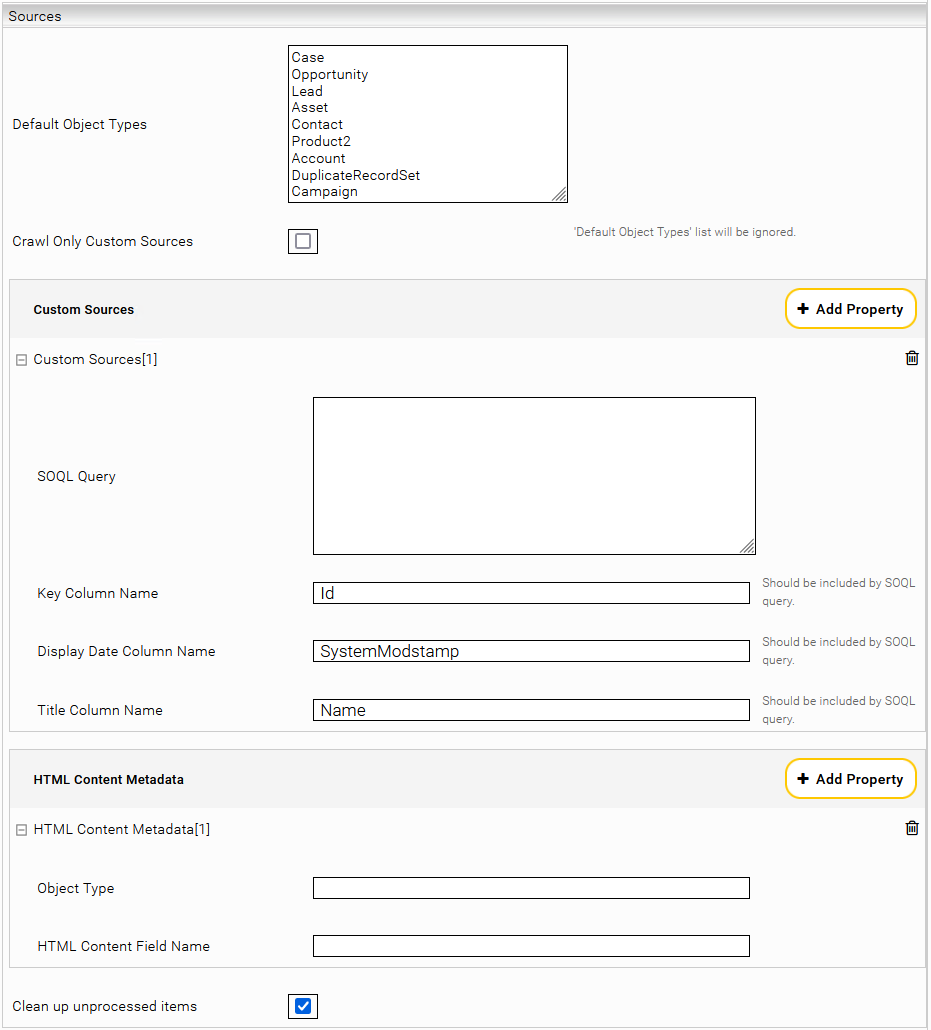
Per default the connector provide a list of object types “Default Object Types” which will be indexed when the crawler is started. For crawling other object types the query in “SOQL Query” field will be used. This query must contain the key column name, display date column name and title column name.
E.g. with the following SOQL query the documents of the type Idea are indexed with the Body metadatum.
SELECT Id, SystemModstamp, Title, Body FROM Idea
By customizing the descirptors one can select individual properties of the tables.The connector detects the fields by iterating the describeSObject Metadata in the Salesforce API.
In addition to the preset "Default Object Types", the parameter "FeedItem" can be specified to index the chatter posts. However, this possibility requires a configuration of a "Salesforce Caching Principal Resolution Service".
All Object types except “Document” and “ContentDocument” that contain a HTML field are crawled with the content of that HTML field as the document content. If there is more than one HTML field, then the field to be used as document content can be configured using “HTML Content Metadata” property, where “Object Type” and “HTML Content Field Name” should be provided. For “Document” objects the content of the “Body” field is crawled as document content. For “ContentDocument” objects the content of corresponding the latest “CurrentVersion” object is crawled as document content.
Configuring the index for custom objects
The configuration of an index for custom objects is explained with the following example.
Setup
Two custom objects were created in Salesforce. Those custom objects are:
- Node (API Name: mindbreeze__Node__c)
- Task (API Name: mindbreeze__Task__c)
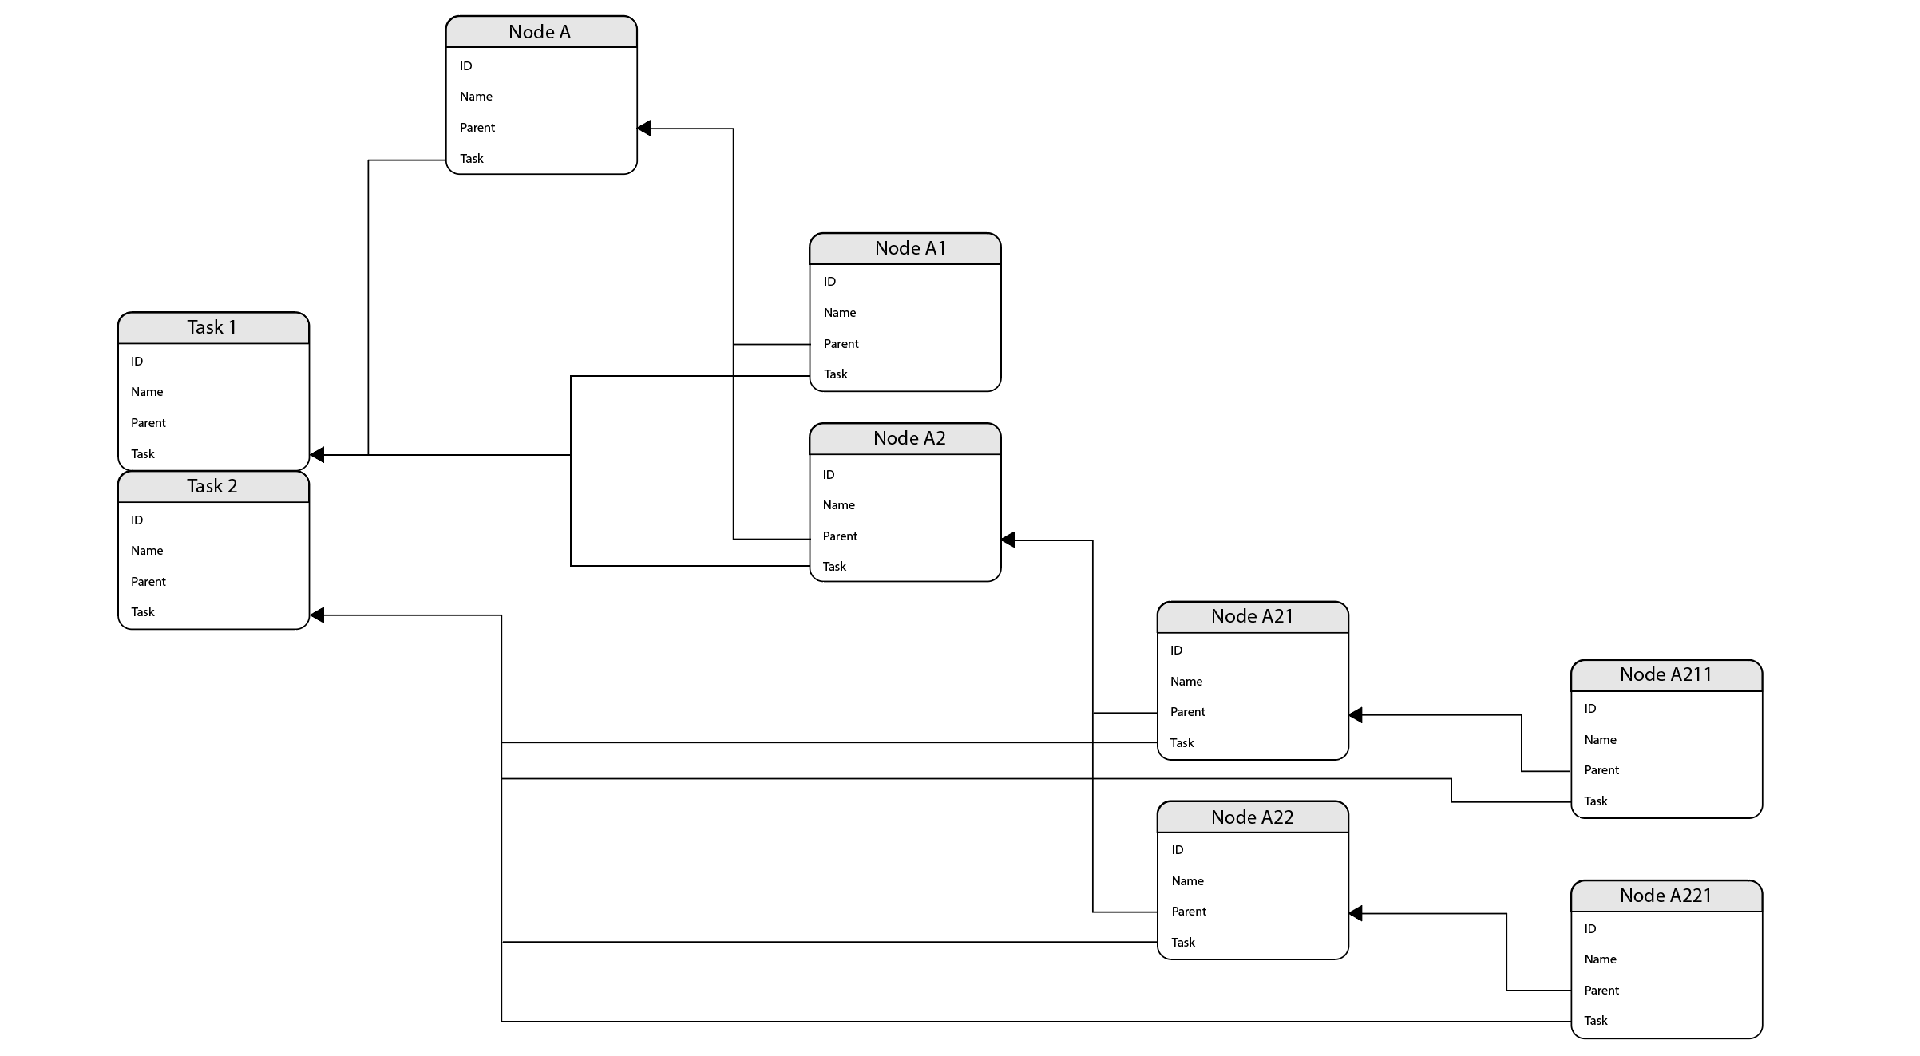
The custom object “Node” has a lookup field to the objects “Node” (self-reference) and to the second custom object „Task“.
The structure of the two custom objects is built as displayed in the following diagram:
Indexing of standard objects and custom sources
To index standard objects, it is not necessary to add “Custom Sources” in the section “Sources” in the “Configuration”. Retrieving all sectors with the parent sector can be done by adding the two custom objects to the setting “Default Object Types”.
The setting “Custom Sources” can be used to select specific metadata that is to be indexed.
If a referenced object is to be included, it must be indexed independently. This can be done by adding it to “Default Object Types” or to “Custom Sources”. Depending on how the object was indexed, the query that refers to the object will show all (Default Object Types) or custom (Custom Sources) metadata.
The referenced object is included with a query like this:
SELECT Id, Name, mindbreeze__Parent__c, mindbreeze__Task__c
FROM mindbreeze__Node__c
It is not possible to refer to specific metadata from the referred object with queries like:
SELECT Id, Name, mindbreeze__Parent__r.Id, mindbreeze__Parent__r.Name
FROM mindbreeze__Node__c
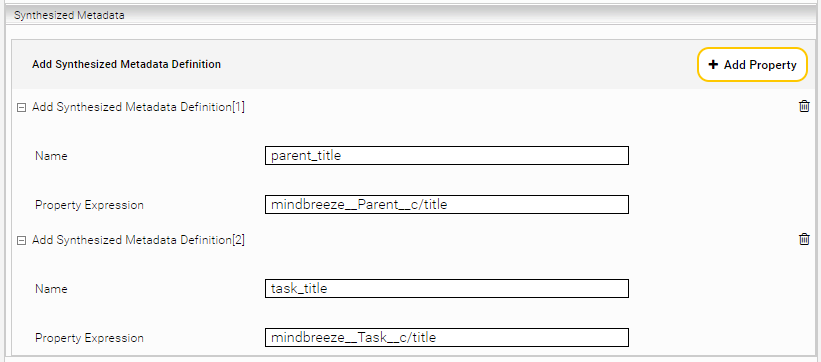
To fetch referenced metadata, add the Synthesized Metadata Definition in the section “Synthesized Metadata”:
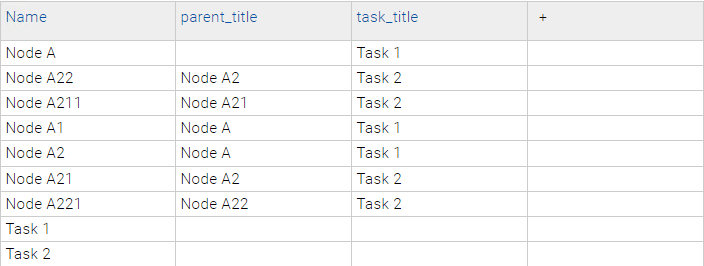
Finally, by indexing with the specified settings, the following documents are the result:
Configuring the Caching Principal Resolution Service
In the new or existing service, select the Salesforce Principal Resolution Service option in the Service setting. For more information about additional configuration options and how to create a cache and how to do the basic configuration of a cache for a Principal Resolution Service, see Installation & Configuration - Caching Principal Resolution Service.
Connection Settings (Principal Resolution Service)
The settings for the connection to Salesforce in the Principal Resolution Service are identical to those in the Crawler listed here.
Authorization Settings
If a resolution of the user name is desired, this can be implemented via a "Parent Service".
For more information about the section Parent Service, see Installation & Configuration - Caching Principal Resolution Service - Parent Cache Settings. For a practical example of a use case for Parent Cache settings, see Installation & Configuration - Caching Principal Resolution Service - Special Use Cases.

