
Sure, you can handle it. But should you?
Let our experts manage the tech maintenance while you focus on your business.
Let our experts manage the tech maintenance while you focus on your business.
Dropbox Connector
Installation and Configuration
Installation
Before installing the Dropbox Online connector, make sure that the Mindbreeze server is installed and the Dropbox connector is included in the license. Use the Mindbreeze Management Center to install or update the connector.
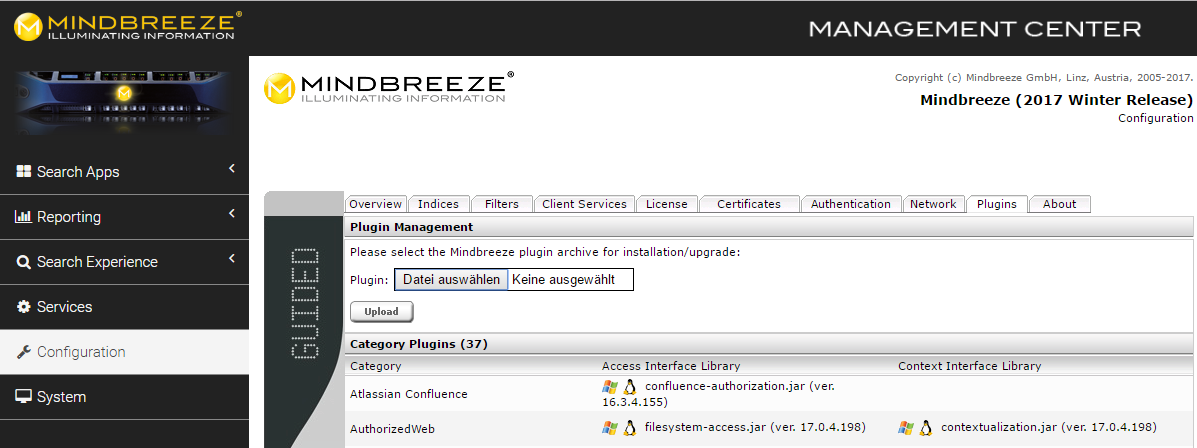
Plugin installation via Mindbreeze Management Center
To install the plug-in, open the Mindbreeze Management Center. Select “Configuration” from the menu pane on the left-hand side. Then navigate to the “Plugins” tab. Under “Plugin Management,” select the appropriate zip file and upload it by clicking “Upload.” This automatically installs or updates the connector, as the case may be. In the process, the Mindbreeze services are restarted.
Configuring Mindbreeze
Configuration of the index
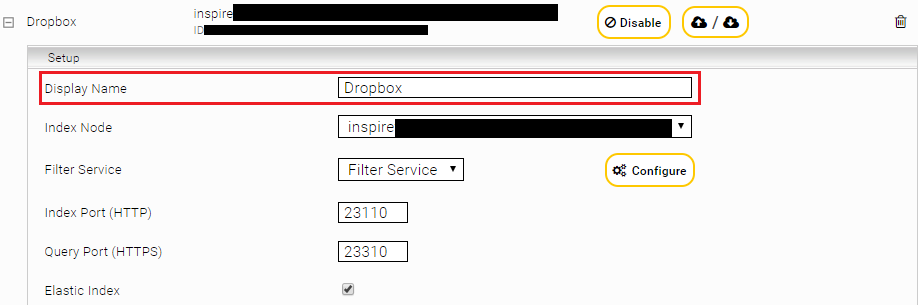
Navigate to the "Indices" tab and click on the "Add new index" icon in the upper right corner to create a new index. Select Dropbox as the data source.

If necessary, change the display name.
Configuration of the data source
Scroll down to the Data Sources tab. There you can configure the data source according to your needs.

Section „Dropbox Settings“
In the "Dropbox Settings" section you can define your dropbox installation to be indexed. The following options are available:

Setting | Description |
Admin Email Address | The email address of the admin user with which the dropbox should be crawled. Only documents to which this admin user has access can be indexed. |
App Credential | For this setting, you need to create an OAuth2 credential in the Network tab, in which you configure the app key and the app secret of your Dropbox app as the client ID and client secret. Since the Access Token URL in Dropbox is fixed, it does not need to be configured. How to create a Dropbox app for the Dropbox crawler is described in the chapter Creating a Dropbox App. |
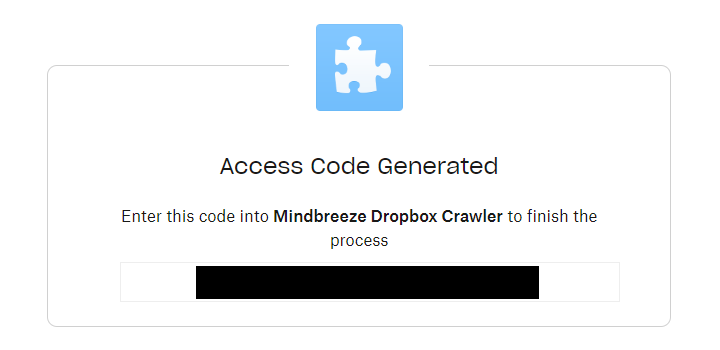
Access Code | The access code for the Dropbox app. How to obtain this is described in the chapter Generating an Access Code. |
Access Token Credential | Since Dropbox no longer supports the issuing of long-lived access tokens, it is not recommended to use this option. If you still have an old, long-lived access token available, you can configure it here as a password credential. Otherwise, you should use the App Credential & Access Code configuration options. |
Maximum Page Size | Block size of a metadata request. |
Parallel Request Count | Maximum number of HTTP requests that are sent simultaneously. |
Connection Timeout | Time in seconds to wait for a response before the API call is aborted. |
File Size Limit | Maximum size of the files to be downloaded in MB. Files larger than the specified value will not be downloaded or indexed. |
Team Folder Include Pattern (regex) | Regular Expression, which indicates which team folders should be crawled. |
Folder Include Pattern (regex) | Regular Expression, which specifies which regular folders should be crawled. |
Team Folder Select Pattern | Regular Expression, which specifies for which Team Folders the Folder Include Pattern should be applied. |
Use Server Modified Date for Deltacrawl (Advanced Setting) | This option should no longer be changed. |
Creating a Dropbox App
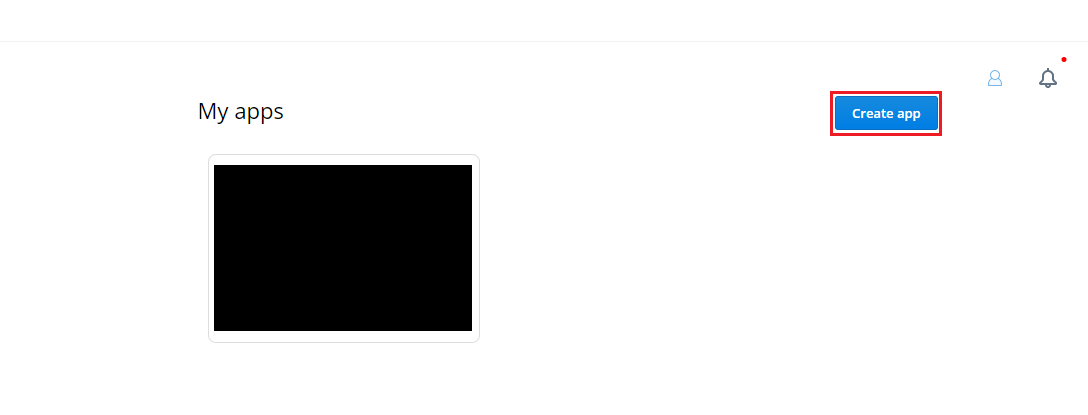
Go to https://www.dropbox.com/developers/apps and use the "Create App" button to create a new app.
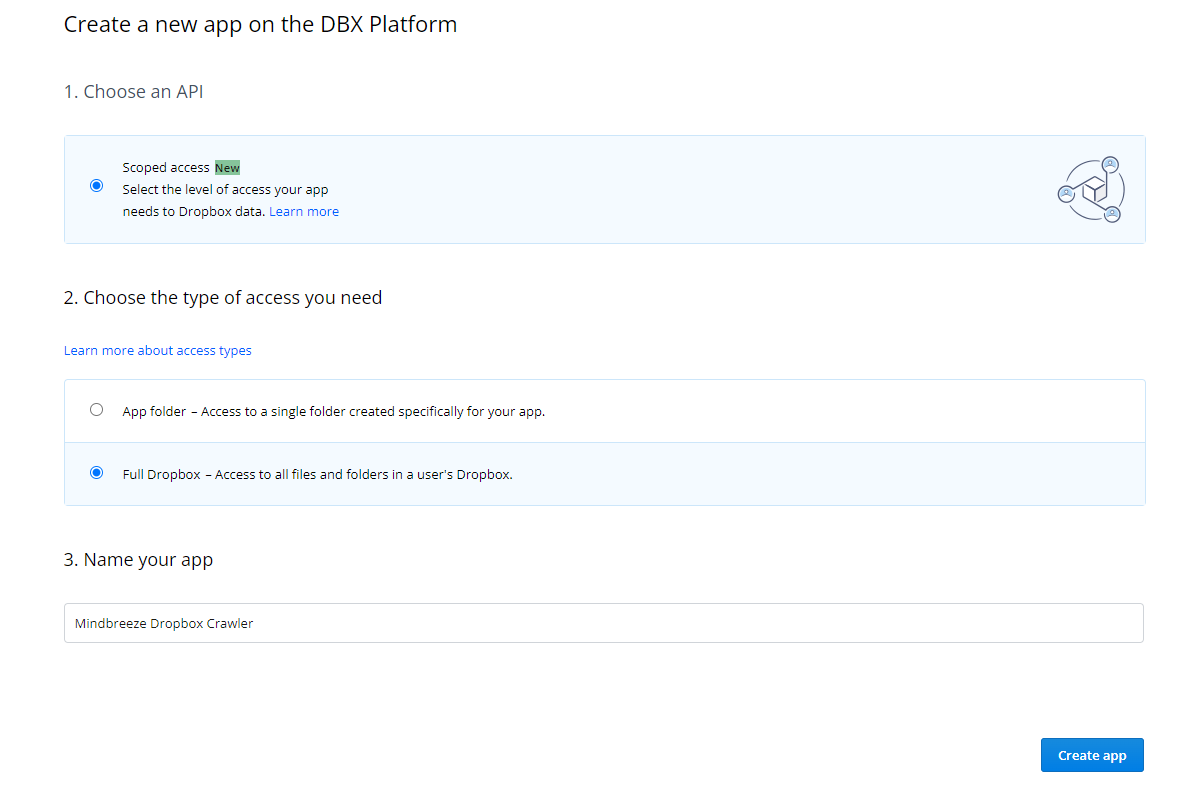
When selecting the API, select 'Scoped access' and for the required access type, select 'Full Dropbox'. You can then give the app a name. Finally, click the "Create app" button to create the app.
Now the permissions for the app need to be adjusted. Navigate to the app and then go to the tab "Permissions".
The Mindbreeze Dropbox Crawler requires the following permissions:
- account_info.read
- files.metadata.read
- files.content.read
- sharing.read
- team_data.member (team_data.governance.write, team_data.governance.read are granted indirectly)
- members.read
- groups.read
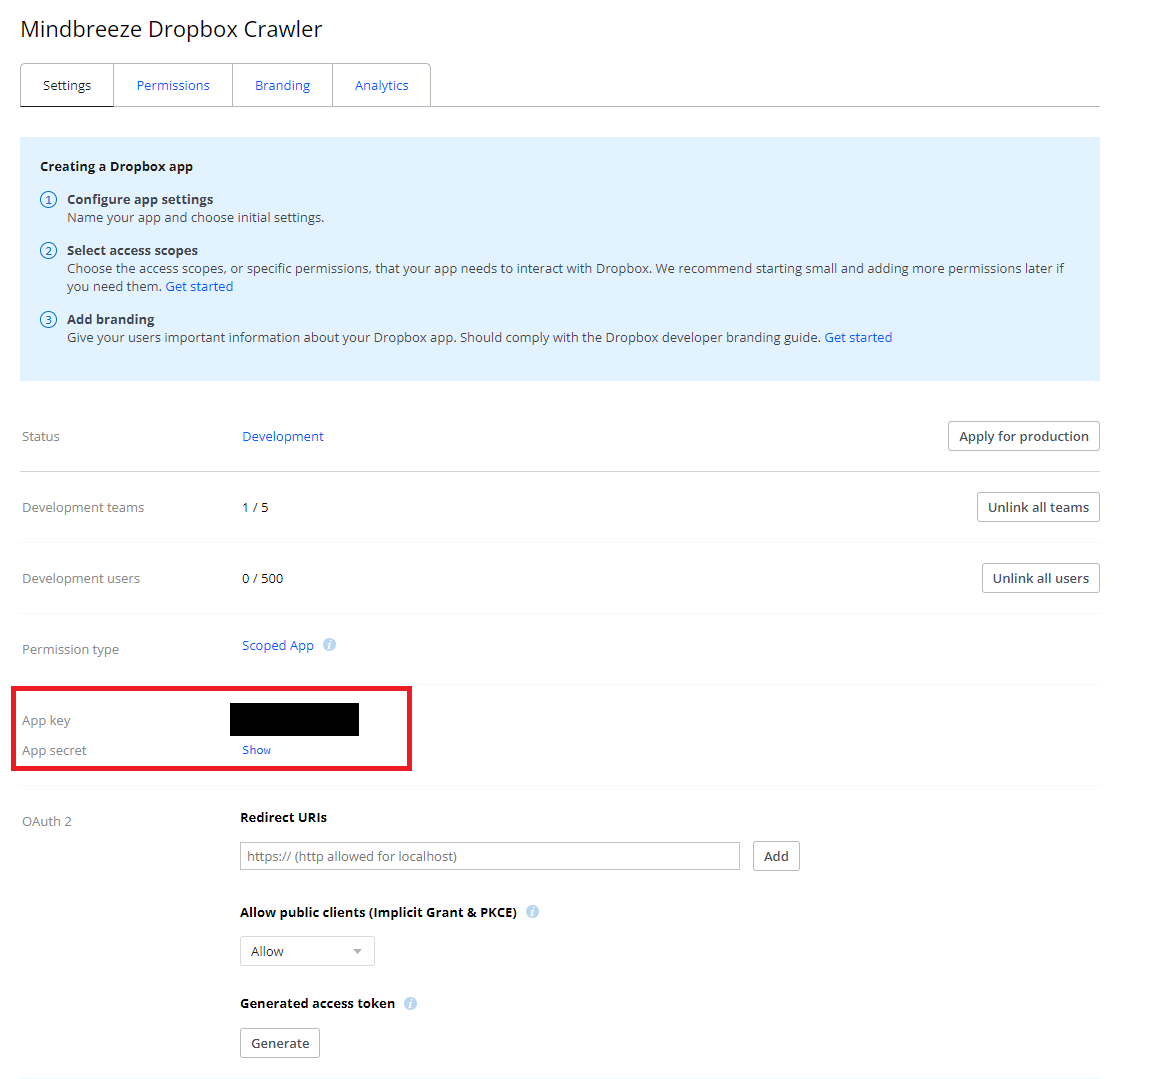
You can now find the App Key and App Secret in the Settings tab of the app. These are required for the setting App Credentials in the configuration.
Generating an Access Code
Attention: The access code generated in this section is single-use and is only valid for 5 minutes. Therefore, make sure that you perform this step at the end of your configuration so that the crawler/principal resolution service can start in time. Using this code, the crawler/principal resolution service retrieves a long lasting token, which is saved and used from then on.
Please also note that different services cannot use the same access code.
To generate the access code, open this URL with the browser:
<AppKey> in the URL must be replaced with the app key of your created app.
When you open the URL, you will see the following warning:
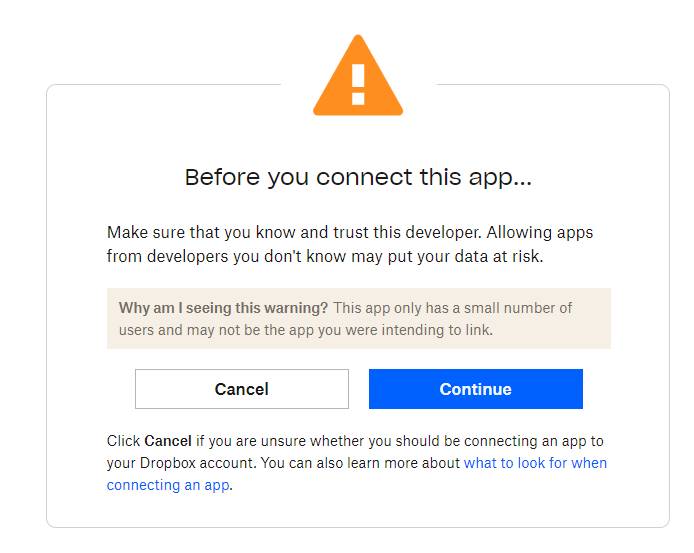
This is displayed because you have created your app yourself for this use case only and it therefore has few users. As long as you have entered your app key correctly, there are no concerns here.
You will then be shown the authorizations that the app requires again. These are the same as those configured above:
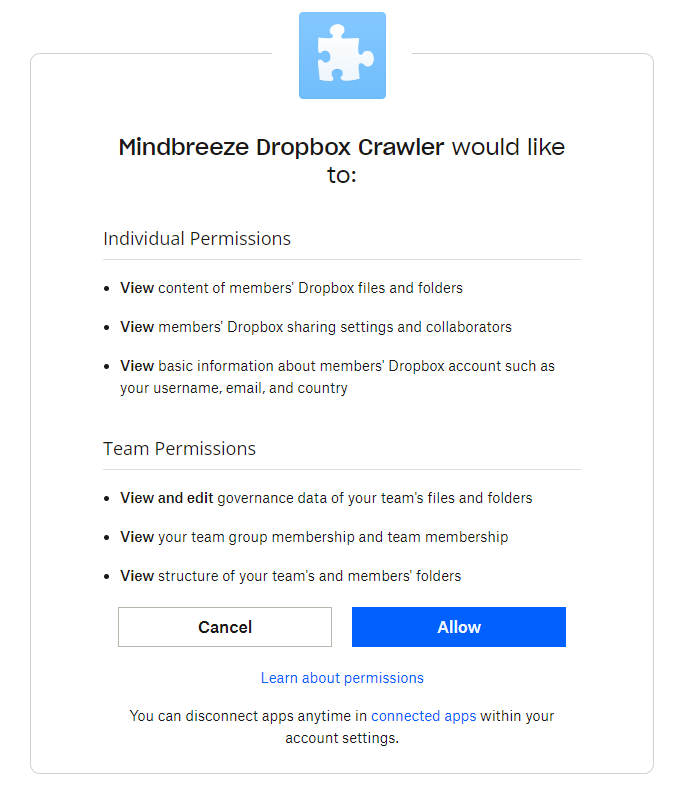
If you click on "Allow", the access code that you need for the setting Access Code will be generated.
Configuration of the Principal Resolution Service
Select "Advanced Settings" to make the following settings.
In the new or existing service, select the Dropbox Principal Resolution Service option in the Service setting. For more information about additional configuration options and how to create a cache and how to do the basic configuration of a cache for a Principal Resolution Service, see Installation & Configuration - Caching Principal Resolution Service.
Section „Connection Settings“
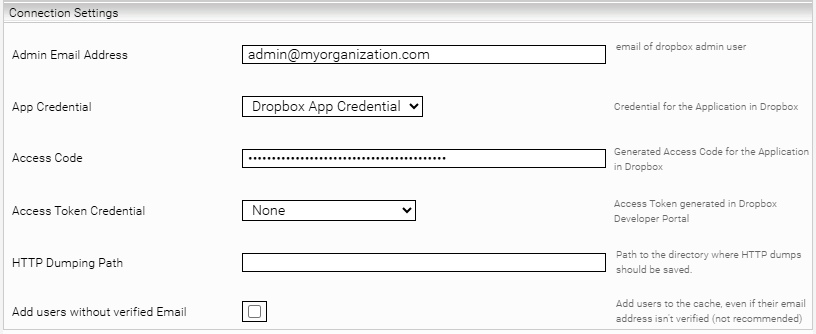
Enter the information about your Dropbox installation in the "Connection Settings" section. For "Admin Email Address" and " App Credential" you can simply make the same entries as in the crawler. How to obtain the “Access Code” is described in the chapter Generating an Access Code. For more information about the setting “Access Token Credential” see the chapter Section “Dropbox Settings”.
The advanced option "HTTP Dumping Path" is a debug option, where all HTTP requests and responses are stored on the specified path. This should not be configured in production operation.
With the setting “Add users without verified Email”, you can decide whether users without verified email addresses should be resolved by the Principal Resolution Service. It is not recommended to activate this setting.