White Paper
Installation and Configuration of Mindbreeze InSpire
Introduction
This document describes the installation and configuration of Mindbreeze InSpire in a Microsoft Windows environment.
Mindbreeze InSpire consists of:
- The Mindbreeze InSpire Node, which is used to create indexes which can be queried by the users.
- The Mindbreeze InSpire Management Node, which is used to configure and administer the Mindbreeze InSpire Nodes which are distributed over the network via a graphical user interface.
These components can be installed as required.
Chapter 9 describes the Mindbreeze InSpire query language.
Software Requirements
All information contained in this document implicitly assumes a Mindbreeze InSpire environment and Mindbreeze InSpire 2016 Spring Release.
Requirements:
- All information about our current software requirements you can find in our Software Product Information
The required setup packages are provided on the Mindbreeze InSpire ZIP/ ISO File in the prerequisites directory.
Advanced Configuration of Mindbreeze InSpire
After installing Mindbreeze InSpire, the user interface for configuring Mindbreeze InSpire will be displayed in a web browser.
It is recommended to select the option „Apply changes and restart on save“ before saving any changes in the configuration. The services will restart after saving configuration changes. Therefore, it is recommended that these changes should be performed only during maintenance times.
The “Overview“ tab
This screen gives an overview of all Services, Nodes, and Category Plugins configured on the server.
“Indices“ Tab 
Index Services can be managed using the “Indices“ tab. All configured index services are listed here. They can be edited and deleted from here. Additionally, new index services can be created.
Index service settings can be imported directly from or to an existing index. For detailed instructions visit chapter “Import/Export of Settings”.
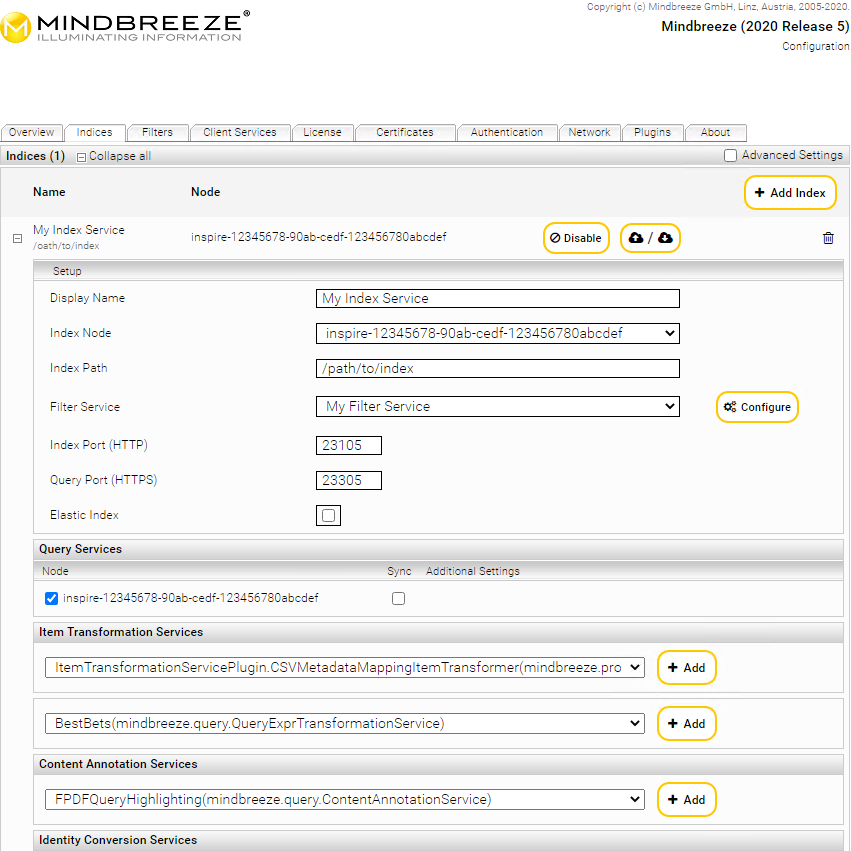
To create an Index Service on the “Indexes” tab, perform the following steps:
- Click the “+ Add Index” button located on the top right-hand side.
- In the following window, select an „Index Node“, a client service and a data source. Confirm your selection with „Apply“.
You can now also make the ‘Display name’ and other settings. These settings are explained in detail below. Save with „Save“ to save the changes.
Hint: By clicking on “Enable” or “Disable”, you can temporarily switch an index that has already been created on or off.
Index Service Settings
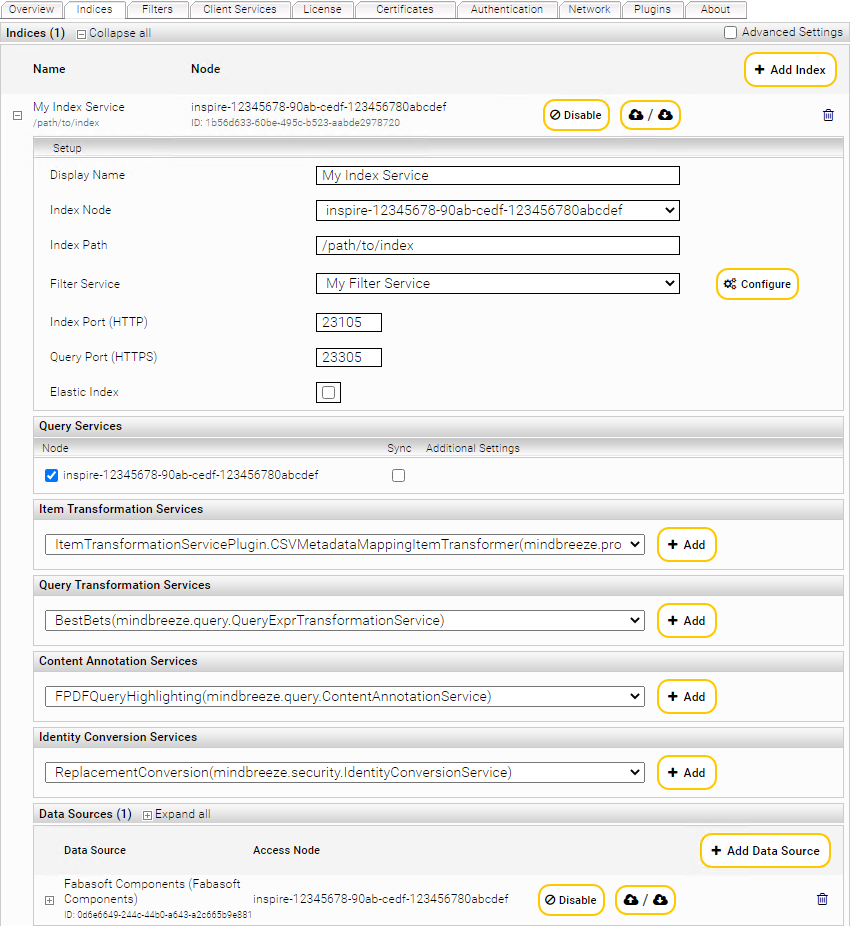
In the “Setup” box, the fields “Display Name”, “Index Node”, “Index Path” and “Filter Service” are available by default. The following values can be specified in those fields:
Setting | Description |
Display Name | In this field, a name for the Index Service can be specified. |
Index Node | In this field, the server the Index Service is running on is defined. |
Index Path | In this field, the path to the index directory can be specified. All index files will be stored in this directory. This path is located on the computer defined with "Index Node". |
Filter Service | A filter service that specifies the files to be indexed can be selected in this combo box. Click on the ‘Configure’ button to configure the associated filter service. You automatically switch to the ‘Filters’ tab. The filter service to be configured is opened there in edit mode. You can find out more about filters in the ‘Filters’ tab section. Hint: You can also edit all filter services from the ‘Filters’ tab. Hint: If required, further options can be displayed via the Advanced Settings checkbox. |
Query Services | In the ‘Query Services’ area, you can select from all existing query services those via which the index service is to be made available. |
Data Sources | A data source to be indexed can be specified in the ‘Data Sources’ area. More on this topic in the following subsection. |
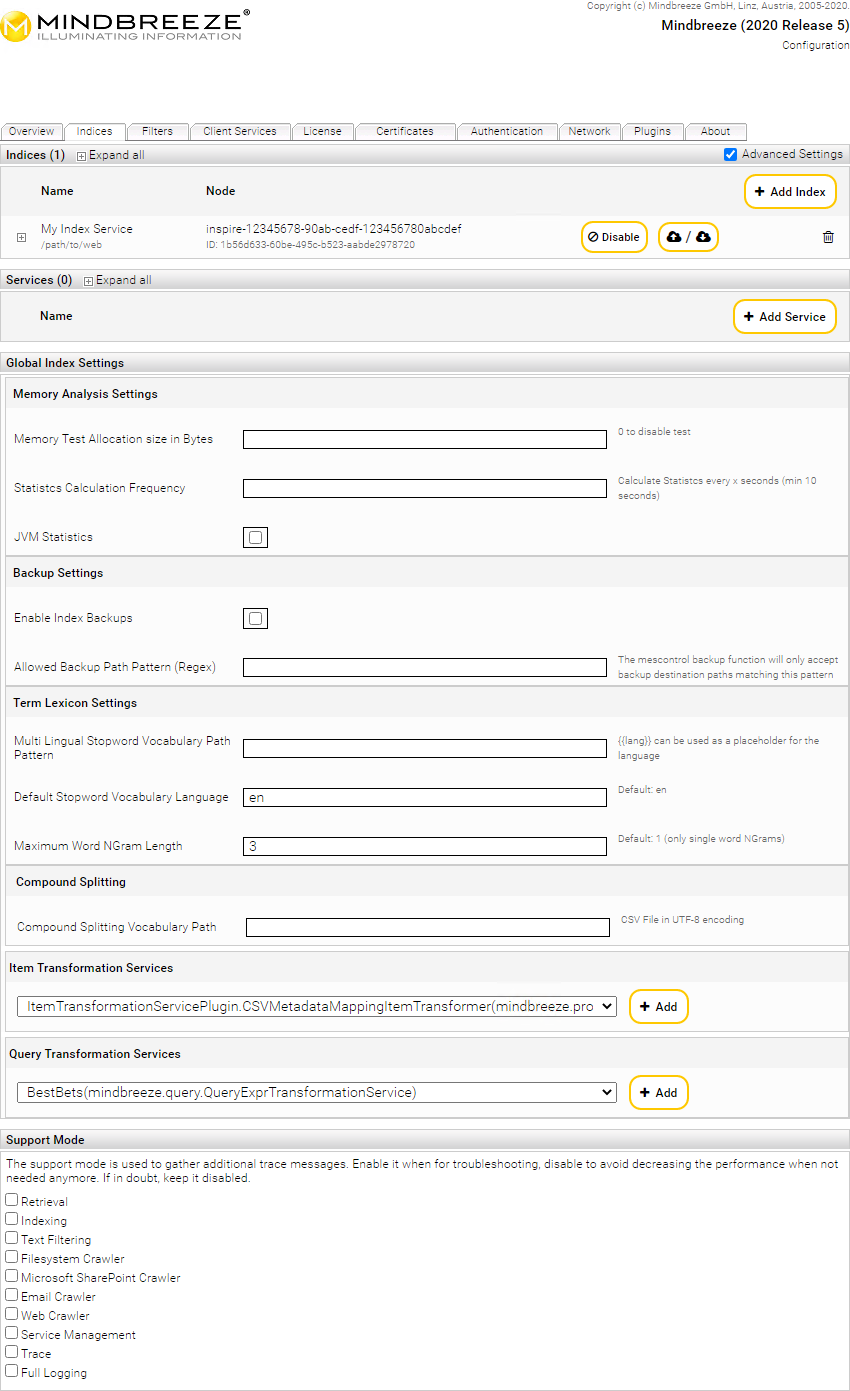
To obtain additional setting options for an index, click on the tab “Indices” again and activate the field “Advanced Settings” at the top right.
You will receive the following additional setting options:
Section: Setup | |||||||||||
Setting | Description | ||||||||||
Supported TLS Protocols | Allows customizing the set of TLS Protocols that are supported by the Query Service. The value of this field must be a comma separated list of JSSE Protocol names. | ||||||||||
External URL | If the Query Service is located behind a load balancer that is accessible with a different host name, it is necessary to enter the external URL to the load balancer including the base path (see Query Service URL Base Path for details). | ||||||||||
Query Service URL Base Path | Allows the query service target URL to use a different URL than the default root (“/”) base path. This is needed when using a query service behind a central non rewriting reverse proxy. | ||||||||||
Data Port (TCP/IP) | Specifies the TCP with which subsystems will communicate. | ||||||||||
Stop Character Class | This setting allows custom definition of word separators for this index. By default, an index uses the separator characters as defined by the Unicode standard. If you leave this field empty, the following characters will be used as separator characters: [:punct:] ¿ ¡ „ “ ‘ ” ’ « » ‹ › ‚ \pC
! ' # S % & ' ( ) * + , - . / : ; < = > ? @ [ / ] ^ _ { | } ~ If this field is not left blank, the stop characters defined here will be used in addition to the unicode separator characters for separating words. Please note that in Mindbreeze InSpire stop characters cannot be searched. | ||||||||||
Tokenizer Profile | Allows custom definition of the tokenizer using a profile name. Currently, two profiles are available:
| ||||||||||
Dump Requests /Responses | This option enables enhanced troubleshooting and logs requests and responses to the index path under the “mesindex-debug-dumps” directory. The setting "On Error" logs every time a request produces an error. If the default setting "Never" is chosen, no logging occurs, "Always" logs each request. Attention: Do not permanently activate “Always” in production mode. | ||||||||||
Maximum Sample Length | Defines the maximum number of characters that will be sample texted for metadata and contents. | ||||||||||
Maximum Hit Count | Specifies the maximum number of hits which will be processed for a single query. | ||||||||||
Approved Hits Reauthorize | Defines whether reauthorization of effective results should be performed by an external Data Source or by the internal Token Cache:
| ||||||||||
Aggregated Metadata Keys | This option configures the metadata that the user needs for aggregation. | ||||||||||
Unrestricted Public Access | When activated, queries to this index will not be access checked. Default setting: Deactivated | ||||||||||
Enforce ACL Evaluation | “Access Control Lists”, or “ACLs” for short, document which roles and groups have which rights to the respective document. When searching for documents, the user's roles and groups are compared with the ACLs of the documents and included or excluded in the search results. In combination with the setting “Unrestricted Public Access”, the following reasonable situations arise:
Hint: Simultaneously activating/deactivating the settings Unrestricted Public Access and Enforce ACL Evaluation is possible, but may result in unusual or problematic behaviour. This is therefore not recommended. Default setting: Enabled | ||||||||||
ACL Evaluation Cache | This option can be used to configure the ACL Evaluation Cache:
| ||||||||||
Suppress Identity Conversion | When enabled: directs the Query Service not to use any Identity Conversion Service including internal identity conversion. | ||||||||||
Suppress Internal Identity Conversion | Enabling this option directs the Query Service not to normalize the username according to platform standards. This option is useful if the normalization is not required. This use is specific to the Connector and Platform used. | ||||||||||
Use Authentication Cache | Is deactivated by default and enables the caching of external authorization results between the “Authentication Cache Flushing Interval”. | ||||||||||
Enable Security Token Authentication Cache (Deprecated) | enables the caching of security tokens. This Option ist deprecated and disabled by default. | ||||||||||
Authentication Cache Flushing Interval | The time that can be set here, sets the maximum lifetime of a cached access check result. | ||||||||||
SyncDelta Wait For Index Production Finished Attempts | can be used to configure the maximum amount of attempts (in 5 second intervals) to check whether the index has finished inversion, before the index synchronization is executed. If the amount is exceeded, the SyncDelta operation is aborted. | ||||||||||
Documents per Index Bucket | The maximum number of documents per bucket. If this setting is not configured, i.e., remains empty, the default value of 60000 is assumed. | ||||||||||
Query Threads per Index | Defines the maximum number of threads used to process a search query. If the value is 0, half of the CPU cores are used. Default value: 0 | ||||||||||
Term Boost Factor | Here, the relevance evaluation of terms can be controlled. | ||||||||||
NGram Boost Factor | Here, the relevance evaluation of NGrams can be controlled. | ||||||||||
Use Term Lexicon | Is activated by default and enables the term lexicon feature. If turned off, the term lexicon will be ignored during index creation and search.
| ||||||||||
Embedded Java VM Args (-Xms..) | This option enables to pass Java specific arguments such as garbage collection control information to the embedded JVM. | ||||||||||
RPC Request Timeout | The time that can be set here, sets the maximum duration of an internal RPC request. | ||||||||||
Section: Document Insertion | |
Setting | Description |
Include Modification Date in Document Replacement | Documents are replaced in case of a different modification date. |
Include Metadata CRC64 in Document Replacement | Documents are replaced in case of a different metadata checksum. |
Include Content CRC64 in Document Replacement | Documents are replaced in case of a different content checksum. |
Update Documents In-place | If the document is changed, an attempt is made to replace the document in the place of the old document, provided the changes are security-relevant or do not affect the inverted index. |
Disable Inversion of Replaced Documents | If this option is enabled, updated documents are not removed from the index unless the new version can be found. If more than "Maximum Number of Tracked Replaced DocIDs" are reached and the new version is not yet searchable, then the document is deleted until the new version is findable. With this option enabled, it is possible to sync while a document is continuously receiving updates and without having to activate the "Wait for Inversion Completed before Synchronization" option. See also Distributed Operation (G7) - Index Synchronization Settings. |
Maximum Number of Tracked Replaced DocIDs | Specifies the maximum number of versions of a document as long as a document is soft deleted, i.e. it is not inverted as deleted. Only effective if "Disable Inversion of Replaced Documents" is enabled. |
Maximum Number of Consecutive Replacements | If a document is replaced frequently within the time configured in Invert Replaced Document Max Age Seconds, it will still be inverted as a non-deleted document. How often it has to be replaced within this time, can be configured with Maximum Number of Consecutive Replacements. Only effective if "Disable Inversion of Replaced Documents" is activated. |
Invert Replaced Document Max Age Seconds | See Maximum Number of Consecutive Replacements |
Section: Indexed Objects Settings | |||||||||
Setting | Description | ||||||||
Indexed Objects Status Includes | Here you can specify which objects the index communicates to the crawler as the total number of indexed documents:
Attention: This setting should only be used for internal purposes by developers and consultants when modifying and testing the InSpire pipeline. The reason for this is that this is an inefficient way to achieve a full crawl run. Therefore, the use of this setting is only suitable for test environments. | ||||||||
Section: Inverter Settings | |
Setting | Description |
Reinversion Startup Delay Seconds | Delays the inversion so that all services, e.g. Item Transformation Service, have time to register at the index. |
Wait for Inversion Completed (Final Buckets) before Switching to Readonly | If this setting is enabled, the index will not be set to read-only until all buckets that are in the finalizing state (i.e., finalized buckets with only the inverter running), are completely finalized. |
Wait for Merging Complete On Set Bucket Readonly Timeout (Seconds) | If the option Wait for Inversion Completed before Synchronization is disabled, non-final buckets are set read-only during synchronization to ensure that they are in a stable state. After stopping the inverter, there is an additional wait until the merging of already inverted documents has been completed. By default, 20 minutes (1200 seconds) is waited for the merging to complete. If the timeout elapses, a warning is logged and the bucket is still set read-only. |
Detect and Ignore Non-Text if Content Size is Greater Than or Equal | Enable Non-Text Content detection for content size greater than the value. 0 will disable this feature. |
Detect and Ignore Non-Text Content Size Unit | Unit Type for „Detect and Ignore Non-Text if Content Size is Greater Than or Equal” Megabytes or Kilobytes. |
Detect and Ignore Non-Text Content Buffer Size | Buffer Size for the Non-Text Content detection. 0 will disable this feature. |
Detect and Ignore Non-Text Content Buffer Unit | Unit Type for „Detect and Ignore Non-Text Content Buffer Size” Megabytes or Kilobytes. |
Verify Document Info Merge Result before Use | If enabled, it will check if the merging of the document info has been done correctly. |
Wait for Event Servlet Update Status Inverval (Seconds) | Defines the maximum amount of time after which an update is sent on the Wait servlet. This can be overridden by the servlet using the parameter update_interval. See Configuration - Index Servlets - Wait. |
If enabled, the indexing status servlet reporting newly indexed documents is available. See Configuration – Index Servlets – Index Status (/Indexingstatus). | |
Regular expression restricting the properties which can be requested with the indexing status servlet. If left empty (default), only system metadata are authorized. For more information, see Configuration – Index Servlets – Index Status (/Indexingstatus). | |
Defines the path to a script to run as a transformer on new indexing status events.
Attention: Using an incompatible script can break the functionality of the index servlet “Index Status”. Please do not change this setting without consulting the Mindbreeze Support. For more information about the index servlet “Index Status”, see Configuration - Index-Servlets - Index Status (/indexingstatus). | |
Minimum Number of Successfullly Synced Consumers Required for a Message | If the index is configured as a Producer with several Consumers, this setting defines how many consumers need to receive a document before it is reported as “synced”. If there are fewer Consumers than the defined value, the documents will be reported if they are synced to all Consumers. Default setting: 1
For more information, see Configuration – Index Servlets – Index Status (/Indexingstatus). |
Section: Alternatives Query Spelling Settings | |
Setting | Description |
Alternatives Query Spelling Max Estimated Count | If there are fewer hits than entered in this option, alternative search terms are suggested. |
Force Alternatives Query Spelling Max Estimated Count | If this option is selected than „Alternative Query Spelling Max Estimated Count“-option cannot be overwritten by options in search request sent by client service. |
Section: Query Expansion Settings | |
Setting | Description |
Disable Query Expansion for Diacritic Term Variants | With this option, the extension of the search to diacritical variants of the search word for the query service can be prevented. |
Section: NonInverted Metadata Settings | |||||||||
Setting | Description | ||||||||
Strategy for NonInverted Metadata | Here you can define which strategy should be used for the NonInverted metadata.
| ||||||||
NonInverted Metadata Keys for Search (newline separated) | Here you can enter the metadata (one metadata per line) to be excluded from the search. | ||||||||
Section: Reference Settings | |
Setting | Description |
Inverted Reference Metadata Keys | Can be configured to resolve inverse references using the Mindbreeze Property Expression Language. If multiple metadata keys are to be configured, they must be separated by semicolons. |
Hash Reference Target Metadata Keys | Can be configured to resolve inverse references using the Mindbreeze Property Expression Language. The Metadata keys (separated by semicolons) to be referenced, are entered here. The metadata keys specified here must be aggregatable (e.g. via Aggregated Metadata Keys). Also configure the Inverted Hash Reference Metadata Keys. |
Inverted Hash Reference Metadata Keys | Can be configured to resolve inverse references using the Mindbreeze Property Expression Language. The Metadata keys (separated by semicolons) to be referenced, are entered here. For example: "Document 1" references the person "Max Mustermann" with metadata author_email: max.mustermann@example.com. Person "Max Mustermann" has metadata email: max.mustermann@example.com. For (inverted) string references to work, configure the following options:
Please note that the metadata keys specified here must be aggregatable (e.g. via Aggregated Metadata Keys). |
Enable Find All References For Source | Optimization for string references. Only effective if Inverted Hash Reference Metadata Keys is configured. |
Forced Reference Target Properties | Forward references (not string references) are resolved via metadata key mes:key by default. With this option, it is possible to overwrite the metadata key used to resolve the references, for each FQCategory. For example: Forced Reference Target Properties: Web:mindbreeze:page_id, then all references for documents with FQCategory: Web:mindbreeze will be resolved with the metadata page_id instead of mes:key. |
References Repair Bulk Update Size | The number of updates that will be performed within a transaction when repairreferences is called. Default: 100 See also Repair References. |
Section: Query Transformation Service Settings | |
Setting | Description |
Query Transformation Service Plugin Processing Timeout (ms) | This option can be used to set a time limit for transformations for query transformation services. By default, the limit is set to 200ms, which means that each transformation is waited for a maximum of this time during a search. If a transformation takes longer than the timeout, this transformation is skipped. The timeout applies to all query transformation plug-ins for each transformation. A value less than or equal to 0ms means that no limit is configured |
Section: Query Settings | |||||||
Setting | Description | ||||||
Use Additive Doc Boosting | Defines the boosting strategy for multiple boostings of one document. By default, “Additive Doc Boosting” is enabled, which considers all boostings on a document for calculating relevance. If the setting is disabled, only the highest boosting is used to calculate relevance. | ||||||
Default Restricted Categories for Did You Mean | "Did You Mean" suggestions are calculated only from the categories specified here. If empty, all documents from all categories are included. Separate the categories with line breaks or semicolons. For example: Web;Microsoft File | ||||||
Query Timeout Percentage for Did You Mean | Here you can set the "Did You Mean" timeout after which this should be aborted. The value is a percentage of the "Query Timeout" option in the client service. Example:
Valid values: ]0.0,1.0] | ||||||
Max Query Timeout ms for Did You Mean | Upper limit for the effective timeout for Did You Mean in milliseconds. Default value = 500 (0 = unlimited, only "Query Timeout Percentage for Did You Mean" is used). Example:
| ||||||
Disable Did You Mean Term Count Threshold | Did You Mean is only performed if the number of terms in the query (minus stop words, if configured) does not exceed the configured value. The following values have a special meaning:
| ||||||
Collect Documents Timeout Fraction for Key-Only Search | Defines the timeout percentage of the maximum query timeout for the “Collect Documents” phase. By default, a maximum of 20% (0.2) of the maximum query timeout is used. This setting only affects searches with the “Detail Limit”: DOCUMENT_HIT or KEY. Other searches, such as those with “Detail Limit”: CONTENT, are not affected by this setting. Default setting: empty (= 0.2 or 20%) | ||||||
Query performance settings.
The settings in this section are used to improve query performance:
Setting | Description | ||||||||
Enable Filter Deleted DocIDs | If this option is enabled, deleted documents are excluded earlier. | ||||||||
Enable Precomputed ACLs | Documents for which the querying user has no authorizations are excluded earlier with this option. This option cannot be used if ACL references are also used. Possible values:
| ||||||||
Number of ACL Precomputation Threads | This setting determines how many threads are used for this optimization. If the field is empty, the value of the “Query Threads per Index” setting is used. | ||||||||
Use ACL Document Filter if Authorized Ratio is Less Than | Precompute ACL optimization is only applied if less than this percentage (0.0–1.0) is authorized for the querying user via ACL in an index. | ||||||||
Reject Empty ACLs | Documents with empty ACLs are considered rejected during ACL precalculation. | ||||||||
Use Precomputed ACLs for DocInfo Access | When documents reference other documents, the metadata of the referenced documents can be accessed. By default, the ACLs of the referenced documents are not checked. However, if the option "Use precalculated ACLs for DocInfo access" is enabled, the ACLs of the referenced documents are checked in addition to the normal ACL checking. Please note that this option can only be enabled if "Enable Precomputed ACLs" is active | ||||||||
Content Position Sampling Optimization | This option enables an optimizes sample texting algorithm. |
Aggregation settings
Setting | Description |
Aggregated Metadata Keys Without Timeout (; separated) | Aggregation is not aborted for these metadata keys. |
Collected Aggregation Results Limit | The aggregation is not aborted after reaching the number configured here, but only that many results are returned. |
Index Synchronization
These settings are relevant if you use Mindbreeze InSpire in Distributed Operation (G7) mode.
Setting | Description | ||||||||
SyncDelta Outgoing Directory | Allows setting a custom temporary directory used for outgoing synchronization operations. | ||||||||
Maximum Number of Final Buckets To Copy | Allows overriding the default number of buckets copied within one synchronization operation. | ||||||||
Enable Task History Cleanup | If active, the last task status files are deleted when the index is started. The maximum number of deleted files can be changed with the "Maximum Number of Initial Cleaned-Up Task History Entries" option and is set to 500 000 by default. | ||||||||
Maximum Number of Persistent Task History Entries | Allows you to specify the maximum number of persistent task history files that are stored locally. These files will not be deleted by the Task History Cleanup. Default value: 10 000 | ||||||||
Maximum Number of Initial Cleaned-Up Task History Entries | Allows you to configure the maximum number of Task Status files that can be deleted during the Task History Cleanup. Default value: 500 000 | ||||||||
Maximum Number of Synchronization Threads | Allows limiting the number of threads used for a synchronization operation. | ||||||||
Wait for Inversion Completed before Synchronization | Synchronization, inversion, and merging cannot be performed simultaneously. This setting determines when each action should be performed, if synchronization is scheduled while inversion and merging are still in progress. Possible options:
Default setting: Inversion and Merging | ||||||||
Wait for Pausing of Inversion and Merging Timeout (Seconds) | Defines a maximum timeout for the inverter to successfully pause. If this timeout is exceeded, the pause attempt is cancelled. This setting is only effective, if the previous setting “Wait for Inversion Completed before Synchronization” is set to the option “Pausing of Inversion and Merging”. Setting the value to 0 disables the timeout. Timeouts should not occur, with the default setting of 60 seconds under normal circumstances. If timeouts occur, please consult the Mindbreeze Support. Default setting: 60 s Attention: Changing the default value can lead to performance degradation or denial of service. Do not change this value without the consultation of the Mindbreeze Support. | ||||||||
Resolve Index Conflicts on Synchronization | If turned on, try to resolve index synchronization conflicts implicitly. Default value: Activated | ||||||||
Update Non Final Timestamp Strategy | Defines the behavior for handling currently unused resources during synchronization. The following options are available:
Attention: Changing the default setting can lead to performance degradation and should not be changed under normal circumstances. |
Index Compactification
Index-performance may degrade over time if many documents are added and deleted. The compactification feature removes buckets that contain deleted documents from the index.
Remaining documents are moved to a new bucket.
Automatic Compactification
Setting | Description |
Permanent Delete Buckets | If the setting is disabled, buckets are moved to a backup folder instead of deleting. |
Enable Periodic Delete Buckets | Activates automatic compactification. |
Periodic Delete Buckets Schedule | This option defines the automatic compactification schedule using an extended cron expression.
|
Periodic Delete Buckets Max Duration | The compactification task is aborted after the specified number of minutes. The next run continues at this point. |
Periodic Delete Bucket if Deleted % | The automatic compactification task considers only those buckets for deletion, which reach the defined deleted document percentage. Only values greater than or equal to 60% are allowed. |
Periodic Clean Documents in Updates Bucket Service | If this setting is set to Deleted, previously deleted buckets will also be deleted from the doc info. This saves unnecessary resources and can improve the synchronisation time between Producer and Consumer. If this setting is set to Deleted and Obsolete Revisions, old revisions of documents saved by updates and changes to the document will also be deleted. |
Periodic Clean Documents in Updates Bucket Service Cron Expr | Sets the schedule (as an extended cron expression) for the automatic compacting of doc-info. For example, the value "0 0 2 * * *" means a run every day at 2:00 (documentation and examples of Cron expressions can be found here). The time refers to the local time. |
Periodic Clean Documents in Updates Bucket Service Max Start Window | Defines the time window (in minutes) in which the doc-info compacting run is triggered. The window starts from the time of the "Periodic Clean Updates Bucket Service Cron Expr". |
Periodic Clean Documents in Updates Bucket Service Max Duration | Defines the timeout of the task. After the timeout has expired, the task is cancelled. |
Manual Compactification
Additionally, a command line interface using the “mescontrol”-tool is available.
Prints the current state of the buckets including the deleted documents percentage. | |||||||||||
listtasks | Lists all running tasks. | ||||||||||
taskcancel <taskid> | Cancels the specified task. | ||||||||||
taskwait <taskid> | Waits until the specified task is finished. | ||||||||||
taskstatus <taskid> | Prints the status of the specified task. | ||||||||||
deletebuckets [--sync] [--min-percent-deleted-docs=<0..1>] [<bucketid_1>… <bucketed_n>] [--log-unreferenced-unfiltered-documents] [--cleanup-unreferenced-unfiltered-documents] | Deletes the specified buckets.
|
Network Settings
You can choose under Network Properties if you want to use the HTTP keep-alive for item transformations. This will reduce the number of open connections to static resources or reuse the connections. This feature is disabled by default.
Item Transformation Service Plugin Timeout: Item transformation requests are aborted after this timeout and the document is inverted without this transformation.
Entity Recognition Parameter
These settings enable the index service to extract metadata from document contents. For more information, see Configuration - Entity Recognition - Entity Recognition Parameter.
If Query Transformation plugins are installed the following section is added to the Index Service configuration panel in “Advanced Settings” mode.
In the drop-down list the available Query Transformation plugins can be selected. The selected plugins can be activated for the current Filter Service using the “Add” button besides.
The activated plugins are listed above. By clicking on the “expand” button (![]() ) of an active plugin, a “Plugin Properties” section will be visible. Here you can define properties for the current plugin instance in form of key-value pairs. With the corresponding “delete” button you can remove (
) of an active plugin, a “Plugin Properties” section will be visible. Here you can define properties for the current plugin instance in form of key-value pairs. With the corresponding “delete” button you can remove (![]() ) these custom properties.
) these custom properties.
By clicking on the delete button besides the active plugin name, the plugin will be removed from the list with all defined instance properties and will not be active for the current Index service.
Global configuration of query and item transformation plugins
Under "Global Index Settings", you can configure the preinstalled query and item transformation plugins globally for all indices. These plugins are also automatically applied to any newly added index. The global configuration is only applied to indices for which no plugins are directly configured or default plugins removed.
Repair References
Using "repairreferences" it is possible to correct references that refer to incorrect uniformitemids. If corrections are made, the DocumentInfo is automatically re-inverted.
The repair is performed using the following steps:
- Scan all documents in the index to ensure that DocIDs are unique
- Repair of document entries in the reference index
- Repair of references in all documents
Usage:
The repair is started with the mescontrol command line tool "repairreferences". It is necessary that the option "Disable Unrestricted Privileged Servlets" is deactivated.
mescontrol http://<INDEXHOST>:<INDEXPORT> repairreferences [--bulk-update-size=0] [--skip-uniformitemid-check] [--dry-run] [<docid> ... <docid>]
Optional parameters:
- --bulk-update-size: The number of updates performed within a transaction. Overrides the References Repair Bulk Update Size index option. Default value: 100
- --skip-uniformitemid-check: Step 1 is skipped
- --dry-run: At the end of step 3 documents are not updated
- docid ... docid: List of documents to be repaired
Enabling Index Backups
Index Backups can be enabled in the “Global Index Settings” section beneath the service configuration sections on the „Indices“ tab.
In the field „Allowed Backup Path Pattern (Regex)“ a regular expression is used to restrict the pattern of allowed backup directory paths.
Note: When separating paths, backslashes must be escaped: \\
To start a backup, the command line tool mescontrol can be used:
mescontrol http://<INDEXHOST>:<INDEXPORT> backup <BACKUPZIELPFAD>
To stop a currently running backup, the following command line can be used:
mescontrol http://<INDEXHOST>:<INDEXPORT> stopbackup
Enabling Support Mode
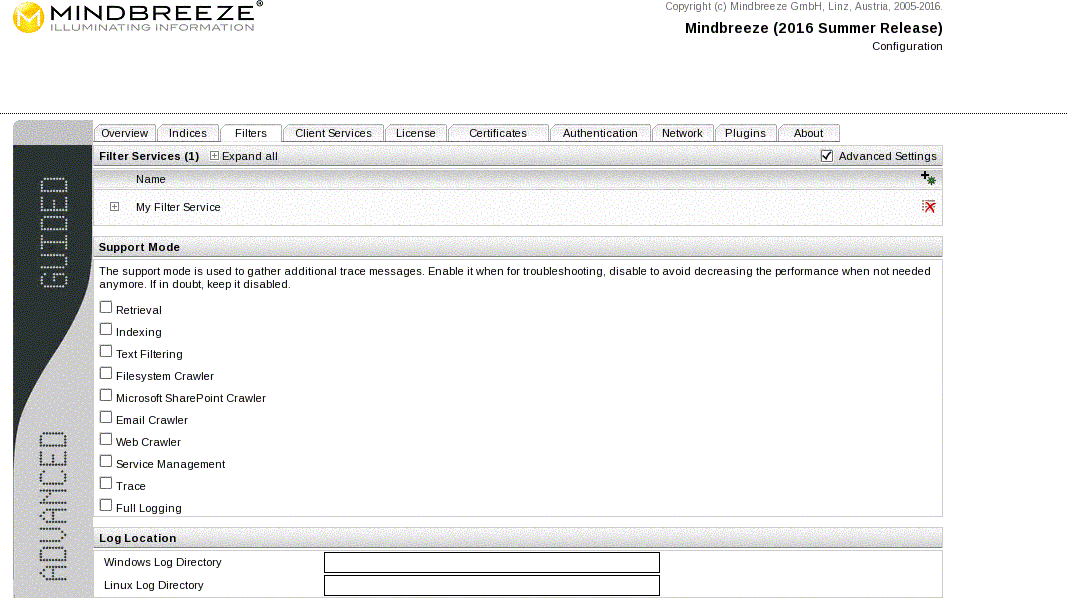
Activating “Advanced Settings” checkbox also shows the “Support Mode” section beneath the service configuration sections on the “Indices”, “Filter”, as well as “Client Services” tabs. Support mode traces detail information about the individual services into log files defaulting to the Mindbreeze service user’s TEMP directory on Windows and to /var/opt/mindbreeze/log directory on Linux platforms. Custom log directories can be configured in the “Log Location” section below.
Note: Do not keep support mode activated in “normal” operation to avoid decreasing the performance when not needed anymore. If in doubt, keep it disabled.
To persist changes click on the “Save” button on the top right corner.
Sub Query Expression
Sub Query Expression enables reference evaluation inside of metadata. This allows, for example, searching all the files inside a folder, or vice versa, the folder in which a file is located. This can be applied for all Metadata Keys, which point to another document. The reverse direction can also be enabled by adding the metadata keys to the field Inverted Reference Metadata Keys. In addition to forward and reverse references, string and reverse string references (via property expression lookup and rev_lookup) can be used.
Tokenizer Configuration
The options in „Tokenizer Configuration“are used to change the behavior of substring matches for search results
Setting | Description | ||||||
NGrams for Non-Whitespace Separated Tokens Zone Pattern | This option is used to define a Regular Expression (RegEx) for all the Metadata Names for which non-whitespace separated NGRams are to be created. An empty field will disable the feature.
Example: (search term list is incomplete) | ||||||
When enabled, search queries with separators and special characters provide more precise search results. This makes it easier to find documents with e.g. file numbers, invoice numbers or business references. Documents containing the search term - but without the separators and special characters - will then no longer be displayed. Example: Search for ISBN 978-0201100884
Note: For this setting to take effect, the setting Non Whitespace Stop Characters inverted must also be enabled. Please note that already existing indices must be re-inverted if you enable Non Whitespace Stop Characters inverted; see below for details. | |||||||
Non Whitespace Stop Characters inverted | Must be enabled if Match non Whitespace Suffix Stop Characters is enabled. If Match non Whitespace Suffix Stop Characters is not enabled, then this setting has no effect on the search. Note: Please note that a re-inversion is required for changes to this setting to take effect. If you have an existing index with Mindbreeze InSpire 22.3 Release or older and choose to update to version Mindbreeze InSpire 23.1 Release or newer, this index must also be re-inverted for the feature to take effect. | ||||||
Minimum Length of Prefix NGram | Sets the minimum length of prefix NGrams (or infix NGrams in the title) that are used for the search. | ||||||
Maximum Length of Prefix NGram | Sets the maximum length of prefix NGrams (or infix NGrams in the title) that are used for the search. | ||||||
Minimum Characters in a Word | Sets the minimum length of words. Longer words are not distinguished by the search. | ||||||
Maximum Characters in a Word | Sets the maximum length of words. Longer words are not distinguished by the search. | ||||||
Maximum Count of Non-Whitespace Tokens | This option is used to limit a number of non-whitespace separated tokens. |
Transaction System Settings
The options in this group can be used for index transactions subsystem fine-tuning.
Setting | Description |
Disable OOM-Killer On Checkpoint | This option option allows to temporarily disable built-in Linux OOM-Killer functionality at transaction checkpoint steps to avoid the index process being killed in case of out of memory conditions. |
Maximum Cache Size in MB | This option is used to change the cache size default value. |
Maximum Number of Groupcommit Participants | can be used to limit the number of group commit participants, that is number of cores / 4 by default. The option has effect only when “Enable Core Based Groupcommit Strategy” option is enabled. |
Memory Analysis Settings
Setting | Description |
Memory Test Allocation size in Bytes | This option can be used to test how long an allocation of a certain memory size takes on your JVM. This option field can be used to specify the memory size (in bytes) to be allocated for the test. The result is located in the log directory of the index within the log file memory-usage.csv. |
Statistcs Calculation Frequency | Here you can specify the time interval at which the results of the "Memory Test Allocation size in Bytes" and "Enable JVM Statistics" options are to be calculated. (in seconds) |
Enable JVM Statistics | If this option is enabled, the JVM statistics are written to the log file memory-usage.csv in the log directory of the index. |
Enable Core Dumps | If this option is enabled, core dumps are written to a file in case the index crashes. The file is located in the log directory of the index. |
Optional Terms
Using the “Optional Terms”, finding documents can be simplified by providing results in which not all search terms necessarily have to occur. To make this transparent for the user, a note is displayed with the search result. This feature is active by default, but can be parameterised or completely deactivated.
It is important to note here that some options in the Global Index, Local Index and Client Service/UI of the Relevance section in the MMC configuration areas have the same name or functionality, but some options override/dominate the others.
In principle, the following mightiness applies (first is least dominant, last is most dominant):
Global Index < Local Index < Client Service/UI of the Relevance section in the MMC
Example:
Global Index: Optional Terms = activated
Local Index: Optional Terms = activated
MMC: Optional Terms = deactivated
In total: Optional Terms = deactivated
Further Example:
Global Index: Optional Terms = deactivated
Local Index: Optional Terms = deactivated
Client Service: Optional Terms = activated
In total: Optional Terms = activated
Area: Global Query Settings | |
Setting | Description |
Optional Terms Ratio | If this option is activated, the ratio of the terms can also be specified or how many terms can be omitted.
Example: Default: 0.33 Note: If 0 is entered, the optional terms are deactivated. |
Term Boost Position Reduction Max | Maximum value by which the boosting of a term can be reduced.
Example: Default: 0.2 |
Term Boost Position Reduction Step | Step size by which each following value is reduced.
Example with 0.1 and "Term Boost Position Reduction Max"=0.2 and search input of "My name is John" results in the following term boosting: Default: 0.05 |
Disable Term Boost Position Reduction | If this option is checked, “Term Boost Position Reduction Max” and “Term Boost Position Reduction Step” are deactivated. |
Default Restricted Categories for Did You Mean | "Did You Mean" suggestions are calculated only from the categories specified here. If empty, all documents from all categories are included. Separate the categories with line breaks or semicolons. For example: Web;Microsoft File |
Area: Term Boost Relative to Position in Query | |
Setting | Description |
Enable Unparsed Term Series to Terms Transformer | If activated, this option enables legacy terms to be transformed into terms. This allows you to enter only a series of terms in the search line as before and the search still uses the Optional Terms. This is a requirement for the "Optional Terms" feature and is enabled by default. If you have older query transformation plugins installed and experience problems with the search, we recommend updating the plugins. If this is not possible, you can disable this setting. This should make older query transformation plugins work again. |
Optional Terms Ratio | See “Optional Terms Ratio” in Global Query Settings. Examples: Note: This option is empty by default, and if it remains empty, the Client Services Settings are applied and if they are also empty, the global Indices Settings are applied (if set). |
Term Boost Position Reduction Max | See “Term Boost Position Reduction Max” in Global Query Settings. |
Term Boost Position Reduction Step | See “Term Boost Position Reduction Step” in Global Query Settings. |
Disable Term Boost Position Reduction | See “Disable Term Boost Position Reduction” in Global Query Settings. |
Area: Query Settings | |
Setting | Description |
Show Missing Terms in Results | If this option is activated, the missing terms or the terms to be added are also displayed in the search result by means of a note. |
Optional Terms Ratio | See “Optional Terms Ratio” in Term Boost Relative to Position in Query. Note: If this option is deactivated (set to 0), the options "Terms Position Boost Maximum Reduction" and "Terms Position Boost Step Size Reduction" in MMC Relevance (here) are also deactivated. |
Compound Splitting
With the help of compound splitting, individual words composed of several words can be recognized and separated accordingly, so that partial words are also sufficient for the search query to find more complex words.
Example:
In order to also find documents that e.g. also contain "recognition", "forbestechcouncil" etc. in the results, the following can be entered in the search input:
AI cognition techcouncil
Notes:
- The prerequisite for the compound splitting is the activation of the "Enable Language Detection" option, which activates the automatic language detection of the documents. Currently, the languages DE and EN are supported for the Compound Splitting functionality. More supportable languages will follow soon.
- The Compound Splitting functionality applies only to newly added documents. To apply the functionality to already existing documents, a full re-inversion of the index is necessary. A description of how to do this can be found here.
- The Compound Splitting function is enabled by default and the following options are available for the respective local indices as well as Global. For a more detailed description, please refer to the "Compound Splitting Strategy" option below.
Area: Compound Splitting | |||||||||||||||
Setting | Description | ||||||||||||||
Compound Splitting Strategy | With this option you can switch off the compound splitting function or determine a strategy. You can choose between 6 options:
| ||||||||||||||
Path to Custom Compound Splitting Models Directory | Here you can specify the directory path (within your local machine) of custom models. Naming convention should be followed, see Appendix G for details. | ||||||||||||||
Disable Compound Splitting for Languages matching | Here you can specify which languages should not be considered for Compound Splitting. | ||||||||||||||
Enable Compound Splitting for Languages matching | Here you can specify which languages should be considered for Compound Splitting. | ||||||||||||||
[Deprecated] Compound Splitting Vocabulary Path | Deprecated –> Should not be used anymore. Here a .csv file (within your local machine) of custom models can be determined. | ||||||||||||||
Area: Query Settings | |
Setting | Description |
Disable Subword Highlighting | If active, the highlighting (in the sample text / preview) of terms that were found via compound splitting is deactivated. Activating this setting can help to improve search performance. |
Note: For Windows users, you need to install additionally: MESExtensionsSetup.exe
Named Entity Recognition (NER)
Named Entity Recognition can be used to identify and classify named entities in both the content and metadata of a document based on AI-based language detection and subsequent sentence segmentation.
Currently, the following named entities are supported, which are already pre-trained and can be adapted and extended in the further course (e.g. by tools).
- Persons (entity:person)
- Locations (entity:location)
- Organizations (entity:organization)
- Numeric values (entity:number)
Example:
To find all documents by people that occur near the words "head", "academy" and "mindbreeze", the following can be entered in the search input.
entity:person:ALL NEAR head NEAR academy NEAR mindbreeze
Notes:
- The prerequisite for NER is the activation of the "Enable Language Detection" option, which activates the automatic language detection of the documents. Currently, the languages DE and EN are supported for the NER functionality. In the future, more languages will be supported.
- The composite decomposition functionality applies only to newly added documents. To apply the functionality to already existing documents, a full re-inversion of the index is necessary. A description of how to do this can be found here.
- The NER functionality is disabled by default and the following options are available for the respective local indices as well as Global. For a more detailed description, please refer to the "Compound Splitting Strategy" option below.
A description of how to customize Insight Apps (e.g. for different entity colours) ca be found here and here.
Enable Language Detection | Here you can determine whether the automatic language detection should be activated or not. Default setting: Activated Note: This option is required for the Compound Splitting and NER features. If no language is detected for a document, those two features cannot be applied to that document. The automatic language detection is built into the index, in contrast to the LanguageDetector ItemTransformer plugin, so that the plugin is not needed anymore.
| ||||||||||||||
Language Detection Min Text Bytes | This option allows you to specify the minimum amount of text in a document above which automatic language detection should be performed. If the specified amount of text (in bytes) is less than the amount of text in the document (in bytes), the automatic language detection will not be performed for that document. | ||||||||||||||
Language Detection Max Text Bytes | The specified amount of text (in bytes) corresponds to the maximum amount of text that is considered for automatic language detection, starting from the beginning of the document. The amount of text in the document that exceeds these limits is not relevant for language recognition. | ||||||||||||||
Model based NER Extraction | With this option you can switch off the NER function or determine a strategy. You can choose between six strategies:
| ||||||||||||||
Path to Custom NER Resources Directory | Here you can specify the directory path (within your local machine) of custom models and catalogs. It is necessary to follow the directory structure and naming convention detailed in Appendix G. | ||||||||||||||
Min Words Per Sentence | Specifies the minimum number of words per sentence required for NER evaluation. If a sentence consists of fewer words than specified in this option, then the entire sentence discarded from NER processing. Default value: 5 | ||||||||||||||
Max Words Per Sentence | Defines the maximum number of words per sentence for which NER evaluation is performed. If a sentence consists of more words than specified for this option, then the entire sentence Is discarded from NER processing. Default value: 30 | ||||||||||||||
Minimum Probability For NER Tags | This parameter influences the number of false positives and tweaks the NER results overall. An individual probability value (floating point number between 0 and 1) is calculated for each calculated tag. If the probability for the calculated tag is smaller than the value specified in this parameter, the tag is discarded and not processed. Therefore, small probability values will display more tags and large probability values will display fewer tags. Default value: 0.5 | ||||||||||||||
Restricted Zones Pattern | A regex pattern for document zones (= metadata) to be processed for NER. For example, if this pattern is set to “title|content”, only text in the zones “content” and “title” will be processed for NER. Text in other zones will be ignored. When left empty, all ER zones will be processed for NER. Note: This option can also be used to restrict the processing of metadata from the Sentence Transformer. If the restriction is only to be applied to Sentence Transformers, the “Static Sentence Transformer Restricted Zones Pattern” option can be used instead.. You can find more information about this in Whitepaper – Natural Language Question Answering (NLQA) – Configuration: Sentence Transformation. | ||||||||||||||
Enable NER Highlighting | When enabled, NER-tagged words are highlighted in the search. The Highlighting is only visible if the Client Service parameters “Mark All Entity Types”, or “Mark Entity Types” are configured. See . | ||||||||||||||
Maximum Transformed JSON Rules Cache | Maximum number of transformed JSON rules stored in the cache, default value is 20. Transformed JSON rules that are sent when inserting a document with the metadata “mes:itemtransformationrulesjson”. | ||||||||||||||
NER Entity Catalog Filters Strategy | If this setting is enabled, an additional catalog-based filtering is added to the semantic pipeline to help remove false positives. This setting causes words with NER Tags to be removed, unless these words exist in the respective entity catalog. For example, if the word “ABCD” is marked as an NER Tag of type ‘Person’, but no entry “ABCD” is present in the Person-catalogs, then the entity tag will be removed from this word.
| ||||||||||||||
When this setting is enabled, additional catalog-based filtering is added to the semantic pipeline to remove false positives, similar to the NER Enitity Catalog Filters Strategy option. This setting causes words with NER tags to be removed if those words are present in the corresponding stop word catalog. Another difference from the NER Enitity Catalog Filters Strategy option is that the stop word catalogs are not entity-dependent, but instead depend on the language of the document. | |||||||||||||||
NER Entity Catalog Filter Minimum Matched Words Ratio | This parameter influences the effect of the catalog filters, especially for multi-word entities. This parameter specifies the minimum required ratio (between 0 and 1) of characters that need to match with existing words in the Catalog Filter and total recognized words so that an entity is not discarded. This is particularly relevant for multi-word entities.
For example, a string like “Dr. Albert Einstein” could be detected as a multi-word entity. The word “Dr.” does not exist as a person name in the predefined Mindbreeze Catalog, so the resulting ratio of matching words is less than 1. If this setting is set to 1, then the string “Dr. Albert Einstein” will not be tagged as a person entity. Lowering the value of this parameter makes the filter more tolerant, but carries the risk of producing more false positives. | ||||||||||||||
NER Stop Word Catalog Filter Maximum Matched Words Ratio | Similar to the “NER Entity Catalog Filter Minimum Matched Words Ratio” option, this parameter influences the effect of catalog filters on multiword entities. If the ratio of the number of characters of the recognized stop words of a multiword entity is greater than the value defined here, the entity marker is removed. | ||||||||||||||
Enable Inversion of Text Region Entity Annotations | If this box is checked, custom entity annotations added by the end user can also be reinverted and searched. The custom entity annotations can be highlighted in the same way as the extracted entities using NER (see “Enable NER Highlighting”). hey can also be searched like other NER tags, for example using a search-query like: Note: See Hierarchical CSV Enricher for how to add custom entity annotations. | ||||||||||||||
Included Text Region Entity Annotation Label Patterns for Inversion | Regex pattern of user-defined entity annotation names to be considered during reinversion, separated by a new line. Leave this setting empty to include all custom entity annotations. | ||||||||||||||
Note: For Windows users, you need to additionally install: MESExtensionsSetup.exe .
Named Entity Recognition (Client Service)
Area: Named entity recognition | |
Enable NER in Sample Text | When active, entity recognition highlighting is enabled for the sample text. |
Enable NER in HTML Preview | When active, entity recognition highlighting is enabled for the HTML Preview, this affects all document types other than PDF. |
Enable NER in PDF Preview | When active, entity recognition highlighting is enabled for the PDF Preview. |
Mark All Entity Types | When enabled, all words that have a tagged entity will be highlighted, regardless of their entity type. When disabled, only entity names specified in Mark Entity Types will be marked. |
Mark Entity Types | In this setting, you can specify which Entity types are to be highlighted in the sample text and preview. (newline separated). The prebuilt NER model currently supports the following entities: “person”, ”location” and “organization”. If Mark All Entity types is not checked, only entity types in this text field will be highlighted. If Mark All Entity Types is not checked and Mark Entity Types is left empty, then no highlighting is performed. |
Sentence Transformation
This section describes all the Sentence Transformation configuration options. These settings relate to „Natural Language Question Answering“ (in short: NLQA). Please read the Whitepaper – Natural Language Question Answering (NLQA) first.
Maximum Transformed JSON Rules Cache | The maximum size of transformed JSON Rules saved in the cache. Transformed JSON Rules are sent on Document Insertion on the metadatum "mes:itemtransformationrulesjson". Default value: 20 | ||||||||||||||||||
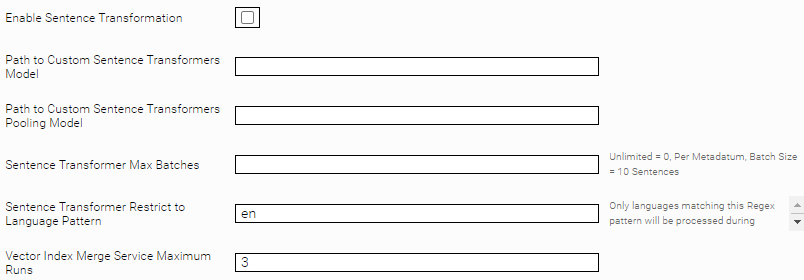
Enable this option to enable sentence transformation (is required to enable NLQA). To fully enable NLQA, additional settings must be made, see Whitepaper – Natural Language Question Answering (NLQA) - Configuration | |||||||||||||||||||
Sentence Transformers Use GPU | If active, the Sentence Transformers use the GPU. If no GPU is available, the CPU is used. | ||||||||||||||||||
Sentence Transformation GPU Device ID | The device ID of the GPU to be used. Should only be configured if Sentence Transformers Use GPU is activated and more than one GPU is installed. Default value: 0 | ||||||||||||||||||
Sentence Transformers Model ID Setting | Sentence transformer model used for NLQA.
| ||||||||||||||||||
Path to Custom Sentence Transformers Model | Defines the path to a custom Sentence Transformer model. Is only effective if either "Custom" or "Default" is selected in "Sentence Transformers Model ID Setting". If you would like to use a custom model for your data science project, please contact support@mindbreeze.com. | ||||||||||||||||||
Embed Texts as Documents Task Prefix | Prefix added to the query to signal to the sentence transformer model that the text is to be embedded as a document (e.g. “search_document:”). Refer to the documentation of the model for more information. Default value: empty (suitable for the default model) | ||||||||||||||||||
Embed Texts as Questions Task Prefix | Prefix added to the query to signal to the sentence transformer model that the text is to be embedded as a question (e.g. “search_query:”). Refer to the documentation of the model for more information. Default value: empty (suitable for the default model) | ||||||||||||||||||
Path to Custom Sentence Transformers Pooling Model | By default, a Sentence Transformers Pooling model is not used. If you would like to use this for your data science project, please contact support@mindbreeze.com. | ||||||||||||||||||
Cross Encoder Model ID Setting | Cross encoder model used for reranking answers for NLQA. This is only active if answer reranking is active (see Whitepaper Natural Language Question Answering (NLQA) - I am not satisfied with the quality of the answers. What can I do?)
| ||||||||||||||||||
Path to Custom Cross Encoder Model | Defines the path to a custom Cross Encoder model. Is only effective if "Custom" is selected in "Cross Encoder Model ID Setting", and if answer reranking is active. If you would like to use a custom model for your data science project, please contact support@mindbreeze.com. | ||||||||||||||||||
Sentence Transformer Max Batches | Can be configured to reduce the indexing time for documents processed by the Sentence Transformer. Default value: blank (No restriction on the number of sentences to be processed). | ||||||||||||||||||
Sentence Transformer Batch Size | To process text, the sentence transformer creates batches (= a number of record segments). This setting defines the maximum size of the batches. If performance problems occur, adjusting this setting can help with improving the performance. Default value: 10 | ||||||||||||||||||
Skip Embeddings for Property Values if Language was Unreliably Detected | This setting affects the calculation of sentence embeddings and the search results found by the Similarity Search, if the detection of the language is rated as unreliable by the Language Detector.
Default setting: Disabled | ||||||||||||||||||
Skip Embeddings for Property Value if Language is Undetectable | This setting affects the calculation of sentence embeddings and the search results found by the Similarity Search, if the Language Detector did not detect any language. This can be the case for very short texts or metadata.
Default setting: Disabled | ||||||||||||||||||
Sentence Transformer Restrict to Language Pattern | Regex Pattern to restrict documents based on the recognized document language for processing by the Sentence Transformer. If this option is left empty, all documents will be processed regardless of the recognized document language. Default value: be|bg|br|bs|ca|cs|cy|da|de|el|en|es|et|eo|eu|fi|fo|fr|fy|ga|gd|gl|gv|he|hr|hu|is|it|ka|kl|kw|la|lb|lt|lv|mk|mt|nl|no|pl|pt|ro|ru|sk|sl|sq|sr|sv|tr|uk|wen (all European languages) Attention: The restriction of the Sentence Transformer is only possible with language codes in accordance with ISO 639-1. | ||||||||||||||||||
Static Sentence Transformer Restricted Zones Pattern | A regex pattern for document zones that are to be processed by the Sentence Transformer. If this pattern is set to “title|content”, for example, only text in the “content” and “title” zones is processed. Text in other zones is ignored. If this option is left blank, it is restricted to “title|content” (default value). Example:
Note: If Restricted Zones Pattern is configured, this restriction is evaluated first. Then the restriction of Static Sentence Transformer Restricted Zones Pattern is evaluated. | ||||||||||||||||||
Dynamic Sentence Transformer Excluded Zones Pattern | Metadata that is explicitly marked with “EMBEDDINGS_COMPUTED” is processed by the Sentence Transformer. A regex pattern can also be configured here for document zones that are to be excluded from the Sentence Transformer if “EMBEDDINGS_COMPUTED” is set for the zone. Default value: empty (no zone restriction) For more information on how to set “embeddings-computed” in a sitemap, see Configuration – Web Connector – Mindbreeze Extension of the Sitemaps.org Protocol | ||||||||||||||||||
This setting can limit the number of merge runs for vector index files. Vector index files contain embeddings and merging these files can affect the performance. The changing of this setting is only necessary in special use cases. Attention: Configuring this setting can affect the performance. Therefore, please do not change this setting without consulting the Mindbreeze Support. | |||||||||||||||||||
Vector Index File Format Revision | This setting specifies the format used for storing the vectors. Attention: This setting can affect the query performance. The default setting should be appropriate for most usages. Please do not change this setting without consulting the Mindbreeze Support. Changing this setting is only effective after a full reinversion of the index.
Default value: Latest | ||||||||||||||||||
Area: Sentence Segmentation Layout Processing | |
Enable Process Layout Information for Sentence Segmentation | If enabled, layout information (annotations) of the document is considered during sentence segmentation. The segmented sentences form the basis for calculating the vectors of the Sentence Transformer, which enables "Natural Language Question Answering" (NLQA). Default setting: Disabled. |
Minimum Regions Length for Sentence Segmentation | The minimum length for a region to be considered during sentence segmentation. This helps to highlight relevant information in a better way. Default value: 20 |
HTML Tags for Sentence Segmentation | HTML annotations (= HTML Tags) that are considered during sentence segmentation. Default value: p |
Text Regions for Sentence Segmentation | Regions annotations that are considered during sentence segmentation. Default value: |
Process Layout if any Expr Matches | Multiple Mindbreeze Property Expressions can be configured here, separated by newline. Attention: Only property expressions that are available at the time of inversion can be used. Layout information is only considered for documents where at least one property expression emits something. For other documents, sentence segmentation is done without considering any layout information. If empty, layout information is considered for all documents. Default value: empty. |
Section: Sentences Transformation Text Segmentation | |||||||||||||
Text Segmenter Profile | The text segmentation can be controlled via profiles. The segmented text sections form the basis for calculating the vectors of the Sentence Transformer, which enables "Natural Language Question Answering" (NLQA).
| ||||||||||||
Min Sentence Element Size | Minimum number of elements for a text segment to be counted as a sentence. Note: An "element" is usually a word. | ||||||||||||
Max Sentence Element Size | Maximum number of elements before a text segment is counted as more than one sentence. | ||||||||||||
Element Split Threshold | If the current text segment including the current sentence is longer than Max Element Size, this option is used to configure at which point the current sentence is split and it is also ensured that the second part of the sentence is not too small. In the latter case, the entire sentence is still included to ensure that the context is preserved. | ||||||||||||
Max Sentence Size | Maximum number of sentences that a text segment may contain. | ||||||||||||
Max Element Size | Maximum number of elements that a text segment may contain. | ||||||||||||
Overlap Max Sentence Size | Maximum number of sentences that are overlapped when calculating the text segments | ||||||||||||
Overlap Max Element Size | Maximum number of elements that are overlapped when calculating the text segments | ||||||||||||
Large Text Segment Max Size | Maximum number of segments to be used for large text segments. | ||||||||||||
Large Text Segment Overlap Size | Number of overlap segments to be used for large segments. | ||||||||||||
Large Text Segment Min Size | Minimum number of segments to be used for large segments. | ||||||||||||
Minimum Score | Only answers with at least the score configured here will be delivered during the search. Valid values for this option: 0.0 - 1.0 Default setting: 0.5 | ||||||||||||||
Text Region | Defines the size of the answers. This setting can be overridden if explicitly specified in the query expression. Example: ~[region:large]“How many connectors does Mindbreeze InSpire offer?”. The following options are available:
Default setting: Use Global Settings. | ||||||||||||||
This setting affects the number of results the Similarity Search can find. It is configured by defining the maximum number of best vectors that are queried first in a Similarity Search before being processed further. The definition of the maximum number of retrieved vectors can have the following effect:
Default setting: empty (the default value “1000” from the global settings is used) Note: This setting overrides the global configuration value. Attention: The default setting is sufficient for most use cases, since it enables the Similarity Search to find a lot of results in a short time. Please only change this setting in agreement with the Mindbreeze Support. | |||||||||||||||
Optimize Query For Similarity Search | This setting controls whether similarity searches are optimized.
This affects searches which involve both a similarity search and other constraints. If optimized, the index will first restrict the set of candidates according to the non-similarity constraints, before the similarity search. This can significantly improve the performance, but negatively affect the relevance score of the results. For all the values below, if a stricter value is set in the api.v2.search request (see api.v2.search Interface Description – Sentence Transformation Settings), that value takes precedence. See also Whitepaper Natural Language Question Answering (NLQA) - I am not satisfied with the inversion time and/or search performance. What can I do?.
Default value: Use Global Settings | ||||||||||||||
Transform Terms to Similarity | If active, terms_expr are automatically converted to similarity_expr. Thus, a normal unparsed_expr search (e.g. a search with the standard Insight App) will automatically perform a similarity search. Please note that "Enable Unparsed Term Series to Terms Transformer" must also be enabled (default: enabled).
Default setting: Optional. | ||||||||||||||
Optimize Transformed Query | If enabled, the transformed queries from the setting “Transform Terms to Similarity” are also optimized according to the setting “Optimize Query For Similarity Search”. Default setting: Disabled | ||||||||||||||
Remove Trailing Question Mark | If active, the question mark at the end of the query is removed, if present. Only effective if Transform Terms to Similarity is activated (Enabled or Option). Default value: Enabled Note: With the standard Sentence Transformer model, this option (if active) leads to better results on average. | ||||||||||||||
Similarity Include Ignored Terms | When enabled, ignored terms from QueryExprTransformation Services (e.g., stop words) are still included in the similarity search. These terms are still ignored in the full-text search. Only effective if Transform Terms to Similarity is enabled (Enabled or Optional). Default setting: Enabled | ||||||||||||||
Similarity Search Strategy | The search strategy for the Similarity Search. Changing the default setting can lead to performance degradation and should not be changed under normal circumstances.
| ||||||||||||||
Enable Reranking | Defines whether answers are reranked using a cross encoder model. This requires that the setting “Cross Encoder Model ID Setting“ is configured.
| ||||||||||||||
Max Answers to be used for Reranking | Defines how many answers are collected before the reranking stage. A higher value may improve the quality of the answers, but will degrade performances. Default value: 100 | ||||||||||||||
Answer Batch Size to be used for Reranking | During the reranking phase, answers are grouped in batches and sent separately to the Cross Encoder Model. This setting defines the size of the batches. If performance problems occur, adjusting this setting can help with improving the performance. Default value: 10 | ||||||||||||||
Disable Computing Start Pages From Answer Text Positions | For AI Answers, the first page of the text source is generated along with the answer. This is useful for checking the generated text against the source, but requires additional computation. In case of performance issues, this setting can be disabled. | ||||||||||||||
Text Region | Only active if Use Global Settings is selected in the local index settings. See description of Text Region in the table “Similarity Search Settings (Indices)”. |
Maximum Retrieved Vectors | The maximum number of best vectors that are queried first in a Similarity Search before being processed further. Default value: 100 |
Optimize Query For Similarity Search | See description in the table “Similarity Search Settings (Indices)”. Default value: Default |
Answer Count | The maximum number of answers that will be returned with a single request, if not explicitly specified in the Insight App. For more information about specifying the answer count in the Insight App, see Development of Insight Apps - Answers. |
Maximum Request Answer Count | Defines the maximum number of answers that can be requested in one search request. If the answer count is specified in the Insight App, it cannot exceed this limit. Default setting: 100 For more information about specifying the answer count in the Insight App, see Development of Insight Apps - Answers. |
Minimum Score | Only answers with at least the score configured here will be delivered during the search. Valid values for this option: 0.0 - 1.0 Default value: 0.5 Note: This setting overrides the index setting “Minimum Score”. If Minimum Score is not configured in the Client Services settings, the Minimum Score from the Indices settings is used. |
Max Retrieved Vectors | The maximum number of best vectors that are queried first in a Similarity Search and then processed further. If this setting is empty, the value of the Global Similarity Search Settings is used. Default value: empty |
Enable Reranking | If checked, search requests by default request answers to be reranked. Default value: unchecked |
Storage Settings
Section: Storage Settings | |
Block Storage Requests on Sync | There is a short time window (during sync) in which no filter/index requests can be processed. The requests are then answered with http status code 503. If this setting is enabled, these requests are blocked until they can be processed. |
Stop Word Catalogs Settings
Stop word catalogs can be used to skip stop words in some usecases, such as highlighting.
Section: Stop Word Catalogs Settings | |||||||||||||||
Stop Word Catalogs Strategy | With this setting you can determine the Stop Word Catalogs to be loaded or disable stop words entirely. You can choose between the following options:
| ||||||||||||||
Path to Custom Stop Words Catalogs Directory | Here you can specify the directory path (within your local machine) of custom models and catalogs. It is necessary to follow the directory structure and naming convention detailed in Appendix G . | ||||||||||||||
Exclude Stop Words from Highlighting | When this option is enabled, Stop Words are excluded from Highlighting. | ||||||||||||||
Exclude Stop Words from Term Lexicons | If this option is enabled, stop words will not be included in the term lexica. Please note that a full re-inversion is required after changing this option. If this option is enabled and the underlying stop word catalogue is changed, a full re-inversion is also required. | ||||||||||||||
Text Cleaning
The “Text Cleaning” Feature enables the removal characters belonging to special Unicode categories from the Sample Text and HTML preview. This setting is disabled by default.
Data Sources
To create data sources for a particular index, click one of the icons at the top right of the “Data Sources” section. These icons represent the different data sources integrated into the Mindbreeze InSpire software.
Custom data source
A custom data source makes it possible to use the Mindbreeze InSpire Client to search data sources integrated by a third party.
These connectors can be installed from the Mindbreeze Management Center (also see Configuration – Plugin Installation).
Look for detailed installation instructions in the documentation provided with the data source.
To create a custom data source proceed as follows:
- Click the
 symbol. A configuration form for custom data sources will be displayed.
 - In the “Source name” field, assign an appropriate name for this data source.
- In the “Category” field, choose the registered data category corresponding to the data source being set up.
Click the ”Save“ button in the top-right corner to save your settings.
You will find further information on how to register a new custom data source with Mindbreeze InSpire and how to configure its indexing in the documentation of the Mindbreeze connector delivered by the third party.
Crawler Scheduling
It is possible to apply one or more user defined time spans for the crawlers to run at. To set up this feature, go to the “Index” tab of your Mindbreeze InSpire Management Web Interface and enable the advanced mode by clicking on the check box at the top right corner of the page. After clicking on this check box some more user controls should appear on the screen, including one called “Crawler Schedule”. This section provides an overview over the already configured time spans that define when the current crawler should run.
To add a new entry, simply click the “Add” button and enter the desired time span. Here you can enter the time interval when the crawler should run. Please use a 24 h time format for your input. After entering your time span you can either click “Apply” to save your changes or “Cancel” to discard them.
To change an already existing time span, select it in the list and then click the “Edit” button. To remove one of the entries, simply select it in the list and then click the “Remove” button.
Click the “Save” button at the top right of the screen to save your changes and make them take effect.
Filter- and Index performance optimization
Under "Advanced Settings" in the "Performance Settings" section, the option "Concurrent Filter and Index Dispatch Threads" allows you to define the number of threads that download documents in parallel and send them to the filter and index service. With a higher value (e.g. 20) you can optimize the performance, but this also increases the load on the filter and index service.
Default value: 10.
Extension Point Properties and Environment Variables
For every data source, "Extension Point Properties" and "Extension Point Environment Variables" can be defined. These settings are not relevant for you and are for internal use only.
Customizing the category descriptor
The category descriptor specifies the display options and the filter information of a data source and is an XML document stored in the plugin (typically categoryDescriptor.xml; the name is referenced via plugins.xml).
The root element is the “category” element:
<?xml version="1.0" encoding="UTF-8"?>
<category id="Category" supportsPublic="false" keep-docinfo-metadata="false">
<name>Category</name>
</category>
Attributes in the “category” element are:
supportsPublic | Specifies whether the data source may be configured in a public index. Default setting: false |
keep-docinfo-metadata | Defines whether metadata with aggregatable or regexmatchable attributes will be retained or overwritten by an updated descriptor. Default setting: false |
Adding custom metadata columns
A metadata definition could look like this:
<metadata>
<metadatum aggregatable="true" id="current_state" visible="true">
<name xml:lang="en">Ticket State</name>
<name xml:lang="de">Ticket Status</name>
</metadatum>
</metadata>
The following attributes can be defined in the metadatum element and are used to control the metadata in the index:
Attribute | Description |
aggregatable | If this attribute is set to true, the column will be available as a filter (should only be defined for properties for which the values allow a grouping of the results – the aggregatable option doesn’t make sense for unique values, which can only occur once in the search result. |
regexmatchable | Specifies whether the search for these metadata can be performed with a regular expression. |
visible | Specifies whether the column is displayed in the default result presentation. |
Replacing the hit icons
The small icon in the data source list of the search client is defined in the file “categoryIcon.png” in the ZIP archive of the data source plugin. You can replace the icon with a 16x16 icon of your choice.
You can also define an icon with the icon tag directly in categoryDescriptor.xml. This requires a unique ID, size attributes (height and width) and the picture itself (value), encoded as Base64 value.
<context>
<Icon alt="Ticket" height="16" width="16"
id="tag:mindbreeze.com,2007/contextitems/contexticon;ticket"
mimetype="image/png"
type="tag:mindbreeze.com,2007/contextitems/contexticon"
value="
iVBORw0KGgoAAAANSUhEUgAAABAAAAAQCAYAAAAf8/9hAAAABmJLR0QA/wD/AP+gvaeTAAAACXBIWXMAAAsTA AALEwEAmpwYAAAAB3RJTUUH3wIXECgw/xAFagAAAS1JREFUOMvFkz1uwkAUhL/nNV4Zesw9wgUILYq4gymCgCiRIG3gCkAOEnMFTgMNFT8W65cCpOAIAqmY8knzaTQ7C/eWvA8Gpd1uN3HOPQFyo0+NMYm1tkcrjmuzJNH/apYk2orjmu+c88tRxHq91tVqJSJ/hBBhu9kQRZGWo0icc74PoFmGqspkPMZae9G/3W55brdJ01Q0ywA4AIAgCPgYDi+agyAAYL/fIyLo8e4fKlEKhQKf0+nZBM45ur1eDoTqCeCo17e36/WrctpTDtDtdAjD8KzROUej0eCxXs/dc4DhaJSjh2FIsVi8nkA8D0Dn87kU/B9mpVLhoVr99ZICoOJ5AuAbY/bLxQJAms3mzQteLhYYY5wM+v1SmqbT45S5ecqe9xVY+3L3z8g3o1Sele9r3SQAAAAASUVORK5CYII= " />
</context>
Adding user-defined hit actions
You can add user-defined actions based on specific metadata, for instance, in order to open a ticket search result in a custom ticket web application.
<context>
<Menu>
<Action name="Open" pattern="http://intranet.myorganization.com/ticketing/show.html?ticketid={{mes:key}}">
<name xml:lang="en">Open Ticket</name>
<name xml:lang="de">Ticket Öffnen</name>
</Action>
</Menu>
</context>
For the changes to take effect, you can upload the ZIP archive plugin with the modified categoryDescriptor.xml via the Mindbreeze configuration interface.
Note: We recommend renaming modified plugins with a separate name to better detect changes in product updates.
Limitations
The usage of the same category descriptor in two custom plugins simultaneously is not supported. In that case the deployment order during a snapshot is not defined.
app.telmetry configuration for Crawl Runs
The crawl run information can be stored in a separate LogPool.
To do this, the Fabasoft app.telemetry log definitions for Mindbreeze Services must be downloaded from the Mindbreeze configuration interface. Select the "Overview" tab and click on the link "Fabasoft app.telemetry log definitions and Dashboards".
Then create a new log pool with the following settings:
Field | Entry |
Application | Mindbreeze |
Application ID | [* don’t care] |
Application Tier | Crawler Service Run |
Tier ID | [* don’t care] |
In the tab "Log Definition Columns" the xml file: apptelemetrylogdefinitions_crawlerservicerun.xml must be uploaded from the log definition archive.
“Filters“ tab
On the “Filters“ tab, all Filter Services can be managed. In the “Filter Services” box, the available Filter Services are shown. Using the “Add new filter“ button (the plus icon, located toward the top right-hand side) additional Filter Services can be defined.
To create a new Filter Service, perform the following steps:
- Click “+ Add Filter” located at the top right-hand side.
- Edit the properties of the Filter Service according to your needs. Select “Advanced settings” to display all settings and to show all file extensions that the Filter Service will filter. Available Filters are displayed as well as the filters provided by Mindbreeze InSpire
Section „Setup“
Setting | Description | ||||
Display Name | A name for the Filter Service can be specified in this field. | ||||
Embedded Java VM Maximum Heap Size (Advanced Settings) | If Java filters need more memory increase | ||||
Dump Requests/Responses (Advanced Settings) | To analyze problems with Filters activate “Dump Requests/Responses” and select a directory to store the dumps with the option “Dump Directory”. | ||||
Maximal Input Size (MB) (Advanced Settings) | If you want to filter Documents that are bigger than 50 MB increase | ||||
Maximum Threads per Filter Request (Advanced Settings) | To accelerate filtering of ZIPs and PST-Files increase | ||||
Maximum Filter Recursion Depth (Advanced Settings) | Configure a custom ”Filter Recursion Depth” to control the number of extracted objects from nested containers like ZIPs . | ||||
Filter Pass Through Extensions Regular Expression (Advanced Settings) | Specify a Regular Expression for “Filter Pass Through Extensions Regular Expression” to specify extensions which are sent directly to the Index instead of filtering without contents. | ||||
Index Empty Content Regardless of Extension (Advanced Settings) | If “Index Empty Content Regardless of Extension” is enabled, documents with empty content are always indexed regardless of extension and availability of matching Content Filter. | ||||
Probe Filters Matching Extension Regex (Advanced Settings) | To try all matching Plugins in case of errors in their relative order for a set of extensions, specify the extension as regular expression in the “Probe Filters Matching Extension Regex” field. | ||||
Metadata Merge Strategy (Advanced Settings) | The following options are available:
| ||||
Section „Filter Service Nodes“ Here, the servers on which the Filter Service will be run can be selected.. | |||||
Section „Filter Plugins“
Edit the listed file extensions in the “Filter Plugins” section according to the desired configuration.
Documents are handled differently by the Filter Service depending on their file extension. Here you can specify exactly whether and which filter plugin should handle a particular file extension.
Section „Base Configuration“ (Advanced Settings)
Setting | Description |
Destination Pattern | This option defines a regular expression that applied to destinations in an Index Request header, e.g. |
Destination Replacement | This option is a replacement text with optional back references for the groups captured with the destination pattern, e.g. |
Allow Select the Content Filter Plugin by ID in Request | Must be activated if the /filterAndIndex API should allow the selection of a content filter plugin via ID (filter_plugin_id). |
Section “Filter Generated Metadata” (Advanced Settings)
Setting | Description |
Generate CRC64 of Metadata | If this setting is activated, the metadatacrc is additionally used to check whether an item should be replaced in the index. Select “Generate CRC64 of Metadata“ to generate a CRC64 of the filtered metadata. If the CRC differs, the document will be replaced in the index if needed. Additional Regular Expression rules can be defined to include or exclude Metadata fields sent by the crawler. In the following settings a "Regular Expression" can be specified to include or exclude metadata in the CRC. The default configuration specifies that all crawler metadata is used to calculate the metadata CRC. |
Include Metadata in Metadata CRC (case sensitive) | A regular expression is used to define which metadata should be included in the CRC. This is case-sensitive. |
Include Metadata in Metadata CRC (ignore case) | A regular expression is used to define which metadata should be included in the CRC. The spelling is ignored here. |
Exclude Metadata in Metadata CRC (case sensitive) | A regular expression is used to define which metadata should be excluded from the CRC. This is case-sensitive. |
Exclude Metadata in Metadata CRC (ignore case) | A regular expression is used to define which metadata should be excluded from the CRC. The spelling is ignored here. |
Section “Located Content Download Settings” (Advanced Settings)
Setting | Description |
Enable File URI | Activates or deactivates URIs in the format file://example.com/path_to_file |
Enable SMB URI | Activates or deactivates URIs in the format smb://example.com/path_to_file |
Consume Bearer access_token from Query String | Can be activated if the “Located Content” URL requires authentication using a bearer token. The filter service accepts URLs that contain the query parameter access_token. The transmitted token is read from the query string by the filter service and then forwarded in the HTTP header Authorization as a bearer token when the actual content is retrieved by the filter. Example: Incoming URL: https://example.com/path-to-file?access_token=eyJh... Outgoing URL: https://example.com/path-to-file Header for the outgoing HTTP request: Authentication: Bearer eyJh… |
Verify SSL Certificate | If self-signed certificates are used for testing purposes, the security check of the certificates can be disabled here. For production installations, however, it is strongly recommended to re-enable certificate verification. |
Allow URI Pattern | The regex rule to be used to define the permitted URIs. If this setting is left blank, all URIs will be accepted. Important: The regex rule must be defined if “Consume Bearer access_token from Query String” is enabled. |
Disallow URI Pattern | The regex rule to be used to define the prohibited URIs. |
Section “Global Filter Settings” (Advanced Settings)
Setting | Description |
Ignore Heartbeat Error | Select “Ignore Heartbeat Error” to prevent Filter Service restart if it fails to send hearbeat to Node. This may happen in occasions when the system is very busy. |
Section “Global Filter Plugin Properties”
Extracting additional PDF Meta Keys
The PDF-Filter extracts the following Meta Keys from PDF documents if they are available:
- document:title
- document:Author
- document:Subject
- document:Keywords
- document:Creator
- document:Producer
- document:CreationDate
- document:LastModified
- document:Trapped
- document:PageCount
To extract additional Meta Keys add the plugin „FilterPlugin.PDFPreviewFPDFFilter“ to the „Global Filter Plugin Properties“ and configure the property „PDF Meta Keys“. Multiple values are separated via semicolon („;“):
Saving HTML meta tags as metadata
The HTML filter plugins Jericho and JerichoWithThumbnails extract the HTML meta tags as metadata values. If these HTML meta tags occur multiple times (with the same name and value), it is possible to save them only once as a metadata value.
Add the plugin “FilterPlugin.JerichoWithThumbnails” or “FilterPlugin.Jericho” (if no HTML thumbnail generation is used) to the filter under “Global Filter Plugin Properties” and enable the property “Store only distinct HTML meta tag values as metadata”.
Enable the property “Store only distinct HTML meta tag values as metadata”.
If a regular expression is defined here as "Parsable HTML meta tag pattern," only meta tags with matching "name" or "http-equiv" attributes are stored as metadata.
If Post Filter Transformation plugins are installed (f. ex. ReferenceMetadataBuilder), the following section is additionally shown in the Filter Service configuration:
In the drop-down list the available Post Filter Transformation plugins can be selected. The selected plugins can be activated for the current Filter Service using the “Add” button besides.
The activated plugins are listed above. By clicking on the “expand” button (![]() ) of an active plugin, a “Plugin Properties” section will be visible. Here you can define properties for the current plugin instance in form of key-value pairs. With the corresponding “delete” button you can remove (
) of an active plugin, a “Plugin Properties” section will be visible. Here you can define properties for the current plugin instance in form of key-value pairs. With the corresponding “delete” button you can remove (![]() ) these custom properties.
) these custom properties.
By clicking on the delete button besides the active plugin name, the plugin will be removed from the list with all defined instance properties and will not be active for the current Filter service.
- To save the modifications, click “Save“. Modifications in the configuration are propagated to the appropriate server nodes.
- Switch to the “Overview“ tab-to get an overview of the mapping of services and server nodes.
Similar to the ”Indexes“ tab, the ”Filters“ tab offers the ability to enable the support mode.
"Client Services" Tab
The ”Client Services“ tab is used to manage all client services. A client service provides the server-side support for the Mindbreeze InSpire Web Client. The field “Web Client Services” shows all existing web client services.
You can add more by clicking on “+ Add Client Service” on the far right of the header area of the list.
In order to create a new web client service, proceed as follows:
Click „+ Add Client Service“ located at the top right-hand side.
Modify the settings of the new client service.
In the “Setup” field you can manage the settings “Display Name”, “Node”, “Port (HTTPS)”, “Requires Authentication” and URL of Help-Website. The following values can be defined using those fields:
Section: Setup | |
Display Name | This field can be used to assign an appropriate name to the client service. |
Node | This field defines the node on which the client service will run. |
Port (HTTPS) | This field determines under which TCP port the service will be made accessible. This port is used in the address of the Web Client e.g. “https://myserver.myorganization.com:23350/“. |
Bind Address (HTTPS) | Here you configure on which IP address the service is accessible. By default (value not set) the IP address 0.0.0.0 (all IP addresses) is used. If, for example, the service should only be accessible on localhost, the "Bind Address (HTTPS)" option must be set to the value 127.0.0.1. |
Data Port (TCP/IP) | Determines a TCP port for communication with subservices. |
Query Metrics Port(TCP/IP) | If a port is specified for Query Metrics, recording of Query statistics is enabled. The Port is used to control the Query Metrics recording. |
Requires Authentication | This field defines if the client service offers its resources to the public or only to local users. Should the data be made publicly available, the corresponding data sources must also be configured appropriately (“Advanced Settings”, “Unrestricted Public Access”). |
Suppress Termination Cause | If active not information is displayed on search timeouts. |
Display Tabs for Data Sources | If this option is enabled, the Web Client will show tabs for each activated data source. |
Enable Tab Editing | Tabs can be edited if this setting is enabled. |
Load More Results Using | With Infinite Scrolling more results are loaded automatically when scrolling. Pages activates the paging feature. The number of visible pages is configured with: Maximum Number of Displayed Pages. |
| Pages
|
URL of Help-Website | Here the URL of a Help Website can be entered. This site is then available as link in the Client Service. |
Fabasoft app.telemetry Web API URL | Here the URL of an app.telemetry Web API can be entered, to enable end-to-end software telemetry. |
Dump Requests | To analyse errors and problems, activate this option. |
Dump Directory | Is the directory for storing the "dumps". |
One Phase Search and Enrich | If this option is activated, the search and contextualisation of the results are performed in one query instead of the usual two. Activate this option if only a few query engines are used by the client service. |
Disable External Contextualization | The Contextualization is a standard interface for the transformation of hits by plugins. The hits are thus “contextualized” or displayed correctly in the client. If this option is activated, no external contextualization is performed during the search. This option can be overridden by the search request. Default setting: Deactivated. |
Logout Redirect URL | Is the URL where the client gets redirected to after logging out |
User ID is E-Mail Address | If the displayed user name is a valid e-mail address, this can be used to specify that the e-mail address is automatically filled in the feedback dialogue. |
Disable Autocompletion of Query | Deactivates the auto-completion of the search term |
Mandatory Data Source Search In Constraints Resolution | Causes the “Search In Constraints” to be calculated for all data sources. Can be set in the category descriptor for each data source. |
Query Expansion for Diacritic Term Variants | Ist diese Option aktiviert, wird die Suche auf diakritischen Varianten des Suchwortes ausgeweitet. |
Use SSL (HTTPS) | If this option is enabled, the Client Service can be reached via https:// in the browser, while deselecting the option allows connecting using http://. The port setting of the Client Service is respected nonetheless. |
Supported TLS Protocols | This option allows you to configure the TLS protocols supported by the client service. Here you can specify a comma-separated list of JSSE protocol names. |
SSL Certificate | This field allows to select the SSL-Certificate that is used by the Client Service. By default the certificate that is contained in the license (“Use SSL-Certificate supplied with your license”) If SSL-Certificates were installed in the “Certificates” Tab, these certificates can be selected. Only available if "Use SSL (HTTPS)" is enabled. |
Use SAML Authentication | Defines SAML for authentication for the Client Service. |
External URL | If the client service is used behind a proxy, the URL to reach the client service is entered here. |
URL Base Path | Here a different URL base path instead of the default root (“/”) can be entered. This is useful if the client service is running behind a reverse proxy, which can’t rewrite URL paths. |
Override Browser Language | If “Use Browser Language” is selected, the browser language setting of a user is used for the localization of the Client Service. Otherwise, the language selected in this field will take priority over the browser language. |
Enable Explicit Time Zone | By default, the browser's time zone is used for date values in search results. If you want to use a different time zone instead, activate this option and set the desired time zone in the "Explicit Time Zone" option. |
Fallback to English for Languages without Built-In Translations | When enabled, languages that do not have built-in translations are parsed as en-US instead. When disabled, all languages in the ISO 639 standard are accepted and passed to the client service. Hint: This setting is only relevant if you use custom i18n translations for this client service. You can find a list of languages with built-in translations in Mindbreeze Inspire Product Information. |
Explicit Time Zone | Time zone in which the date values are displayed in search results. The supported time zones are listed here. |
Servlet Affinity | This option is only needed if the Client Service works behind a load balancer and SAML authentication is used. The specified value is then set as an "AFFINITY" cookie for each request. |
Maximum Number of User Query Terms | Limits the number of words the user can use in the query. |
Maximum Custom Metadata Count | If the data source supports grouped metadata, this value is used to set the maximum count of grouped metadata displayed in detail view. Additionally, this value limits the displayed length of list-metadata. |
Content Fetch Timeout | Downloads are aborted after this time span is elapsed. |
Query Timeout | Queries are aborted after this time span is elapsed. The searches against individual indexes are executed in parallel. If an index does not return any results within the timeout, then only the results of the other indexes are displayed. Within this timeout, all necessary processes are performed, such as query transformation, search in the index, authorization of hits, etc… |
Refinement Resolution Timeout | Refinement resolution is aborted after this time span is elapsed. |
Search In Resolution Timeout | Specifies the time after which the loading from the "Sources" list is aborted. |
HTTP Connect Timeout | This field defines the maximum wait time when opening a http connection. |
AJAX Request Timeout | AJAX requests are aborted after this time span is elapsed. |
Preview Length | This field defines the length of the preview. |
Maximum Request Size | Maximum request size in kB. |
Maximum Search Request Size | Maximum query size for search queries in kB. |
User Profile Storage Path | This field defines a directory where user profiles are stored. User profiles are saved automatically while the user interacts with the Client. Each Client Service saves its own set of user profiles if no path is configured. If you want multiple Client Services to use the same user profiles, enter the same path for all Client Services. |
Embedded Java VM Args (-Xmx..) | This field defines the options that are assigned to the Client Service on startup. Please use this option only after consulting the Mindbreeze Support. |
Flush in Memory Metrics after (queries) | Query statistics are written to disk after the given number of queries. |
Flush in Memory Metrics after (seconds) | Flush the Query statistics to disk after the given seconds. |
Maximum Metrics Filesize | Query statistic files are limited to the given size. |
Metrics Base Directory | Base Directory to store the Query statistics. |
[Deprecated] Enable Healthcheck | This option is deprecated and should no longer be used. Please use the following Healthcheck Settings option instead. Activates the Healthcheck service, which can be used to test the functionality of the client service. |
Section: Filter Settings | |
Maximum Number of Displayed Values | The maximum count of displayed values can be entered here. |
Always Request All Aggregation Values | (For diagnostic purposes only) If this option is selected, all values are requested from the index instead of just the "Maximum Number of Displayed Values". This can reduce the performance of the search. This has no effect on the number of filter values displayed in the client. (Default value: not active) |
Number of Displayed Values | The number of displayed values can be entered here. |
Collapsible | Filter values are collapsible if selected. |
Open by Default | Filter values are open by default. |
Flat Date Filter Values (Month Year) | If this option is selected, for date values the filter values are displayed as a flat list (instead of hierarchically grouped by year) (default: not active). |
Request facets as properties | If this option is enabled, all filterable properties are also queried for each document. This can be used to correct the number of documents in the filters if multiple indexes contain duplicates. This option can drastically reduce the search performance. |
Chat Service | The insight service, which will be used for generating answers (for the AI Chat) can be selected here. |
Enable Feedback Button | If this option is enabled, a Feedback button is displayed, when you hover of a message in the AI Chat. The feedback will be sent to the app.telemetry Form Log Pool. |
app.telemetry Form ID | The ID of the app.telemetry Form Log Pool for feedback messages. By default, the form log pool "ChatUI" with the form ID "ChatUIForm" is available for this purpose. Additional log pools can be created in the app.telemetry configuration. This setting is only relevant if "Enable Feedback Button" is enabled. |
Section: PDF Diff (Advanced Settings) | |
PDF Diff Service | The service, which will be used for comparing PDF files, can be selected here. |
- „Additional Client Service Nodes“: Mindbreeze nodes on which the Client Service is also started.
- In the section "Data Sources" the sorting of the data sources is defined. “Group by Category" groups the data sources by data source type (category) and then sorts them alphabetically. If you want to change the order of the data source types, enter the desired order, separated by a comma, in the field "Order of Categories". To make a customised sort by data source name, use the "Manual Order of Data Sources" field. If "Group by Category" is activated, the data sources are sorted to the front in the group. If you do not specify all data source types or names used, the remaining data sources will be displayed according to the default sorting. If a value contains a comma, you can use a JSON array instead of the comma-separated list.
- In the part “Filters” filters that are displayed in the Client Service can be chosen. Filters that can be selected depend on the selected Query Services and the defined “Aggregation Metadata Keys”.
- In the “Query Engines” field you can choose the data sources which will be made available over the client service.
- „Federated Query Engines“: Enter URLs of query services that are not managed by this Manager Node here. For authentication a special multi master configuration is necessary, see the whitepaper "SAML-based Authentication (eng)" for details.
- „Federated Client Services“: URLs of Client Services which should be included for all users.
- „Display federated results immediately, ignoring global relevancy ranking “: if activated all requested results from a source are displayed. This may include less relevant results on the first page.
- "Federated Client Services Use Legacy Messageframe Channel": If this option is activated, the communication to the federated Client Services runs via the deprecated Messageframe Channel. This option can be used if you want to include Client Services that run on an InSpire appliance version 20.2 or older.
- „Use Legacy Messageframe Channel“: To also use the Legacy Messageframe Channel for Client Services that were federated directly at the Search Client via the settings, set the option "Use Legacy Messageframe Channel" to “Enable”. The following values can be selected:
- "Auto": Mindbreeze InSpire decides itself whether to use the Legacy Messageframe Channel (recommended)
- "Enable": explicitly enables the Legacy Messageframe Channel
- "Disable": explicitly disables the Legacy Messageframe Channel
- „Metrics Query Engines“: If user requests are to be used for auto-completion, the URLs of query engines with recorded metrics must be entered here.
- „Federated Sources“: Activate “Enable Fabasoft Mindbreeze Cloud Sources” to federate several Fabasoft Mindbreeze Cloud services. To add own services, reference additional service lists.
- „API V2 Concurrent Request Limits”: Set the maximum number of concurrent requests for each API service. If the limit is reached, the API calls return the status message „Maximum number of concurrent requests exceeded, please try again later!“ until the number of concurrent requests is below the limit. 0 means no limit. Default: 0
- „API V2 Named Concurrent Request Limits“: Here you can configure the maximum number of simultaneously processed requests per request name. The request name can be set with the request header “x-mes-api-request-name.” If the “Request Name Pattern” regex matches the request name, the number of requests processed simultaneously will be set to the value in the “Maximum Concurrent Request Count” field. 0 also means no limit here.
- In the section "Query Persistence Settings" you can enable searches to be saved for the user. Activate the functionality with "Enable" and configure a database connection to save the searches using the fields "JDBC URL", "User", "Password" and "Database Table Prefix". The "Database Table Prefix" can be used to store different client services in the same database. The "User" and "Password" parameters can also be configured as username/password credential. To do this, you have to create an endpoint entry for the JDBC URL.
- If the option “Count Filtered Values” in section “Query Settings” is enabled filter counts are also displayed for not selected values.
- If the option “Enable Character NGRAMs” in section “Query Settings” is enabled, Character NGRAMs can be activated or deactivated. Default: true.
- The setting „Maximum Request Result Count” in section “Query Settings” defines the maximum number of results that can be requested in one search request. If the result count is specified in the Insight App, it cannot exceed the maximum. Default setting: 100
- If the option „Ignore Global Uniform Properties” is enabled, metadata defined in the Uniform Property Descriptor can be overwritten by the Category Descriptor.
Memory Analysis Settings (Advanced Settings)

Area: Memory Analysis Settings | |
Memory Test Allocation size in Bytes | This option can be used to test how long an allocation of a certain memory size takes on your JVM. The result is located in the log directory of the client service within the log file memory-usage.csv. |
Statistcs Calculation Frequency | Here you can specify the time interval at which the results of the "Memory Test Allocation size in Bytes" and "Enable JVM Statistics" options are to be calculated. (in seconds) |
Enable JVM Statistics | If this option is enabled, the JVM statistics are written to the log file memory-usage.csv in the log directory of the client service. |
Configuring permitted forwarding URL for user login
If a user logs in to the client service or if the Insight App Editor is used, HTTP forwarding is performed by the browser (via the address /mashup-login) depending on the configured login type. For security reasons, no forwarding to arbitrary URLs is allowed. These settings can be used to configure which URLs are permitted.
By default, "Allow login redirect URLs to" is set to "Client Service External URL." This means that only URLs that correspond to the "External URL" of the client services are allowed. For example, if the client service external URL is https://search.myorganization.com, then the URL https://search.myorganization.com/login is permitted, but the URL https://crm.myorganization.com/login is not.
Note: If the external URL is not set in the client service, then only the URL model is checked, either HTTP or HTTPS, depending on the "Use SSL" setting in the client service.
Relative URLs are always permitted. If the URL is not permitted, the browser gets an "HTTP 403 Forbidden" error message.
The default settings are usually sufficient for simple applications. In special cases, such as load balancers with differing client service "External URLs" or reverse proxies that terminate SSL, the default settings are not suitable and cause HTTP 403 errors. For these special applications, the setting "Allow login redirect URLs to" must be set to "Custom Pattern", and a regular expression (Java) must be specified for "Custom Pattern". The regular expression is matched directly against the forwarding URL. If there is a match, the URL is permitted, otherwise an HTTP 403 error is output. An example of a regular expression would be https://search.myorganization.com.* which allows the URL https://search.myorganization.com/login, but not https://crm.myorganization.com/login.
Note: If the regular expression is missing or incorrect, then no forwarding URL is permitted.
Settings for impersonating search queries
The impersonation of search queries is used, for example, in the "InSpire AI Chat and Insight Services for Retrieval Augmented Generation" in the "Retrieval" step.
Setting | Description |
Token Lifetime (seconds) | Duration (in seconds) for which the impersonation token is valid (Default: 60 seconds). |
Zone ID | User-defined ID that defines the client services that issue and accept impersonation tokens for each other. Default value: not set. |
Impersonation Zone ID
For security reasons, an impersonation token issued by a client service is by default only accepted by the same client service or by synchronized client services (multi-node scenario). A possible use case is, for example, an InSpire AI Chat that is operated behind a load balancer and performs a failover to another client service.
If required, this behavior can be influenced in the section "Impersonation Settings" with the setting "Zone ID". The Zone ID can be configured to an arbitrary value, which is then used to validate the impersonation token. A possible use case is, for example, to configure the same Zone ID on another client service (on the same or on another node) so that the "InSpire AI Chat" retrieval search process is possible on a different client service than the one that is used by the user to access the service.
Security Notes:
Ensure that all Client Services where you set a Zone ID have a correctly configured authentication. A valid impersonation token enables a search query to be sent without further end user authentication. The overall system is only as secure as the least secure client service of the client services involved.
Settings for non-interactive Impersonation
Setting | Description |
Enable Non-Interactive Impersonation | Is this option activated, non-interactive impersonation is possible. |
Token Lifetime (hours) | The duration (in hours) for which the non-interactive impersonation token is valid. Default setting: 24 hours |
Max Challenge Timestamp Age (seconds) | The maximum age (in seconds) of challenge timestamps. Default setting: 60 seconds |
Allow remote requests | Is this option activated, non-interactive impersonation tokens can also be used outside of the same node. |
Configuring settings for validating requests
The client service supports the validation of the HTTP host header of requests. This can improve security. The setting "Validate HTTP Request Host Header Pattern" can be used to specify a regular expression that matches the host. The request is only processed if there is a match. Otherwise, an error is noted in the log and the request is rejected with the status HTTP 403.
Configuring settings for the delivery of images
By default, non-static images, such as thumbnails or icons, are delivered as data URLs. If, for instance, a custom client causes problems with data URLs, the setting “Enable Get Image Resources In Separate Requests” can be used to switch the delivery to HTTP(S) URLs. This setting may be removed in the next version of Mindbreeze. Therefore, the custom client must be adapted and data URLs have to be used in order to work even after the next update. Security notice: If this setting is active, the host name in the URL will not be validated.
Configuring settings for Query Service
In a producer-consumer scenario, search queries on the consumer node are directed to the index in the consumer node by default. If, for example, the consumer index cannot be reached due to maintenance, the consumer cannot be used for a search. The Client Service setting "Enable Fallback to Query Services on other Nodes" can be activated to send the search query directly to the Producer Index in such situations. This improves the availability of the search in producer-consumer scenarios.
The setting "Use Credentials from Endpoint Mapping Fallback" is intended for internal use and does not need to be changed.
Similarity Search Settings
The settings for this section are described in the chapter Sentence Transformation.
Named Entity Recognition
The settings for this section are described in the chapter Named Entity Recognition (Client Service).
Enable Saved Searches 
- In the Section “Query Persistence Settings” you can set up server-side searches. If enabled is checked, the user can store queries in a database and access them via the Client-Service. Enable this functionality by checking „Enable” and setting up your database connection. The „Database Table Prefix” can be used to use different Client-Services in the same database.
Settings:
Setting | Description |
Enable | To save the searches on the server enable this checkbox. |
JDBC URL | URL to database. |
Max Number Of Database Connections | Maximum number of database connections. Default value: 10, minimum value: 2. |
User | Username of the database. |
Password | Password for the user of the database. |
Database Table Prefix | Set a table prefix if is needed. |
The “User” and “Password” parameters can also be configured as username/password credentials. To do this, an endpoint entry must be created for the JDBC URL.
Optional Authentication
With the “optional authentication” setting the Mindbreeze InSpire Client Service allows anonymous search in the documents that have no access restrictions. The user can log in for accessing the contents that are restricted and can optionally return to anonymous search by logging off.
For configuring optional authentication, on the Mindbreeze InSpire configuration interface navigate to the “Client Services” tab and set the “Requires Authentication” option to “Optional”.
The optional authentication setting requires that the Client Service has the “Authentication Generates Trusted Peer Credentials” is checked and a “Trusted Peer Credential Certificate” is selected for the Client Service.
If the trusted peer certificate is not available the client service does not allow anonymous access and login is mandatory.
If optional authentication is successfully set the user can switch between authenticated and anonymous modes by clicking on the “Login” respective “Logout” links on the Client Service user interface:
Show/hide user name
If a user is logged in and a user name is available, it can be shown or hidden using the “Display Username” setting.
When this setting is enabled, the full user name is output. If the setting is not enabled, "Login" or "Logout" appears, depending on the login status.
CORS header
If you use federated search, or use a Insight App running on a different server, these settings may be relevant to you. In such scenarios, Web browsers usually prohibit communication with other servers, except for non-authenticated public servers, since no critical data is transferred there.
The option "Allowed Origins" controls which "Origins" are allowed. Origins are absolute URLs from which requests are allowed.
If you want to use a client service with authentication from other origins with different private domains, you must explicitly list the URLs of these origins in the “Allowed Origins” option. For example, http://search.myorganization.com,https://search.mycorporation.com
Alternatively, you can use the “Allowed Origins Pattern” option to control which origins are allowed using regular expressions. You can specify multiple lines here. For example, the value
https://.*\.myorganization\.com
https://.*\.mycorporation\.com
allows access from, for example
https://search.myorganization.com
https://myapp.myorganization.com
https://find.mycorporation.com
but not from
https://search.example.com
Note: as soon as you use the “Allowed Origins Pattern” option, the “Allowed Origins” option has no effect.
Default values
For non-authenticated ClientServices ("Requires Authentication": "No"), the value ".*" is assumed for "Allowed Origins Pattern" by default if "Allowed Origins (Pattern)" is not explicitly configured.
For (optional) authenticated ClientServices ("Requires Authentication": "Optional" or "Yes"), all hosts with any port that are within your top private domain are allowed by default if "Allowed Origins (Pattern)" is not explicitly configured. The "top private domain" is the domain that is one level below the public suffix (as defined in the Mozilla Foundation's Public Suffix List (PSL)). For example, such a domain would be "mindbreeze.com", from which the pattern "(.*\.)?\Qmindbreeze.com\E(:[0-9]+)? " is generated. The domain name is extracted from the "External URL". If this is not configured, it is extracted from the configured "Hostname" from the nodes configuration. If this is also not possible, the domain name is extracted from the system FQDN.
CORS with SAML
If your SAML IDP is not within the domain of your Mindbreeze InSpire appliance, configurations must be made under certain conditions. Mostly, this is of interest for SAML IDPs in the cloud. Please ensure that Mindbreeze InSpire trusts your IDP. To do this, first activate the Advanced Settings.
Setting | Description |
Trusted Cloud SAML Login Domains | By default, Microsoft Entra ID (previously called “Azure Active Directory”) and Okta are trusted. If you are using a different SAML IDP, please contact us. We are very interested in what IDPs our customers are using to improve support for those IDPs. |
Trust SAML Hostnames from Authenticators | By default, the IDPs from the "Available SAML Authenticators" settings from the "Authentication" tab are trusted. However, this is not always sufficient as the login URL may be different (e.g. due to redirects). If this is the case, the domain of the login URL can be entered manually in "Trusted Cloud SAML Login Domains". |
Attention: When redirecting through the SAML IDP back to the log-in screen in the client service, a 403 error may appear. The reason for this is that the "Origin” HTTP header has the value "null". To prevent this, set in the setting "Allowed Origins Pattern" the value "null".
Preview Settings
Whether to automatically scroll to the most relevant match result when previewing PDF files. Default: false.
Healthcheck
The health check of the Client Service is configured in the “Healthcheck Settings“ section.
The address <Adresse des Client Services>/ping indicates whether the client service is operational. This allows the service to be monitored in order to inform the operation or to enable/disable it on a load balancer, for example.
By default, the "Workload Check" checks the load of the Web server and the number of parallel requests (see also API V2 Concurrent Request Limits). The "Disabled" setting disables this check.
In addition, you can add your own checks in "JSON Healthcheck Files Directory". This allows search queries to be executed and their results can be checked and processed with Javascript.
Responses
Workload Check | JSON Healthcheck Files Directory | HTTP Status Code | HTTP Body |
OK | Not configured | 200 | OK |
OK | Configured | Acc. to configuration | Acc. to configuration |
NOK | - | 500 | NOK |
Voting
In order to offer the possibility to give feedback on a result (positive or negative feedback), the option "Enable Voting" can be set in the client service.
If this option is active, all results in the client are equipped two additional buttons.
You can analyze the feedback in app.telemetry (Application -> Query Service Query Log -> View Telemetry Data).
Cookie Settings
The Client Service automatically sets a session cookie (JSESSIONID) by default. If desired, this can be prevented by activating the setting "Disable Session Cookie" (If, for example, the Client Service is operated publicly and cookies are not permitted for legal reasons). Hints: This setting can impair performance. This setting must not be used in conjunction with the authorization form SAML.
The "Same Site Cookie Behavior" setting determines whether cookies are used across domains. If you use the federated search and the servers are on different domains (e.g. search.myorganization.de federated to search.mycorporation.com) and you use cookies to log in to the browser (for example, with the authorization form SAML), then "Same Site Cookie Behavior" must be set to the value "Auto" (default value). This ensures that the cookies required for authorization can be transferred. Note: the "Auto" value determines that when "Use SSL" is active, effectively cookies with Same Site Cookie Behavior "None" are set. If "Use SSL" is not active (e.g. when using a load balancer), no Same Site Cookie Behavior is set.
If you are not using federated search with cookie-based authorization, you can set the “Same Site Cookie Behavior” setting to "Strict" for increased security. This will prevent cookies from being passed on. The other possible values of this setting are for internal use and should not be used.
Content Security Policy Settings
It is possible to configure a Content-Security-Policy Header (CSP Header) in the Client Service.
This is sent for every request from an Insight app unless it is a URL that contains the pattern: “https://<<your-domain.com>>/api/...”.
Basic Configuration
The minimum configuration consists of selecting the setting: “Enable CSP” and entering a valid “External URL”.
The following CSP header is generated using these two options:
Content-Security-Policy: frame-ancestor 'self' <<externalurl>>; object-src 'none';
This header can prevent potential clickjacking attacks and security scanners used will no longer list this potential vulnerability.
Advanced Configuration
In the advanced configuration, custom policy directives can be defined that overwrite the basic configuration.
To do this, the “Enable CSP” checkbox must also be selected and one or more “Custom Policy Directive” must be created.
This enables an extension of the basic configuration, whereby no automatic directives are created in the extended configuration (frame-ancestor & object-src).
It is possible to create a part of a new directive without a value, such as is the case with the following header:
Content-Security-Policy: 'unsafe-inline'; frame-ancestors 'self'; ...
Setting | Description |
Enable CSP | Enables the creation of a simple CSP header. (The external URL must be set) |
Custom Directive Name | The name of the user-defined policy to be created (overwrites basic configuration) |
Custom Directive Value | The values of the user-defined policy to be created. (overwrites basic configuration) |
HTTP Header Security Settings
Under “HTTP Header Security Settings“ the behavior of certain HTTP Security Headers can be configured.
Setting | Description |
HSTS | Controls the Strict-Transport-Security header. Activates the header automatically when “Use SSL (HTTPS)” is enabled. Default setting: Auto |
HSTS Include Sub-Domains | In addition to Strict-Transport-Security, also sets includeSubDomains. Default setting: Disabled. |
Anti-Clickjacking | Controls the X-Frame-Options header.
Default setting: Disabled |
Block Content Type Sniffing | Controls the X-Content-Type-Options Header. Default setting: Enabled |
Operating custom Insight Apps using the Client Service
To operate your own Insight Apps using the Client Service please use the section “Web Application Contexts Settings”.
Details about the configuration can be found in Development of Insight Apps.
Using port 80 as the client service port on G7 appliances
To run a client service on port 80, the following steps are required on G7 appliances:
In the section “Setup”, disable the setting “Use SSL (HTTPS)”:
Then, set the “Port (HTTP)” to 23350. Port 80 is automatically forwarded to this port.
For security reasons, access to port 80 is restricted. To allow access for specific IP addresses or subnets, edit the file: “/var/data/iptables.sh”.
In the line “iptables -t nat -A PREROUTING -m addrtype --dst-type LOCAL -s 127.0.0.1 -p tcp -m tcp --dport 80 -j DOCKER,” enter the allowed addresses instead of 127.0.0.1 or remove “-s 127.0.0.1” to enable access from anywhere. Then restart the appliance to apply the firewall rules.
During an update, the file “/var/data/iptables.sh” is overwritten and a backup in the format "/var/data/iptables.sh.bak.YYYYY-MM-DD" is automatically created. If necessary, restore your customized rules after the update.
“License” tab
The “License“ tab is used to manage the Mindbreeze InSpire license.
To reinstall or upgrade a license, perform the following steps:
- In the field next to "License": select your desired license file. You can use the "Choose File" button for this purpose.
- Then click on "Upload" and save by clicking on "Save".
After saving the license file, the name of the company licensed for the current installation of Mindbreeze InSpire and the license expiration date is displayed in the “Current License Information” box.
The “Licensed Products” section displays your licensed products and their restrictions.
The restrictions include:
- Maximum User Count: Displays the maximum number of users for which the current license is issued.
- Maximum Document Count: Displays the maximum number of indexable documents for which the current license is issued.
“Certificates“ tab
General information about Trusted Peers authentication
Mindbreeze InSpire offers the possibility for third-party applications to issue queries to the Query Service without providing complete user credentials. Such applications are called ”trusted peers“ and must authenticate themselves using a SSL certificate. In order to ensure the confidentiality of the data stored in the index, it is required that such certificates are signed by a Certificate Authority (CA) which has been registered within Mindbreeze InSpire.
In order to define the trusted CA, use the ”Certificates“ tab to upload the “.CER” file containing the certificate of the CA in PEM format. If you don’t upload any CA certificate, the functionality of trusted peers will not be available. The option “Trusted Peer” enables if an available certificate is used for this purpose. The box “Current Trusted CA Information” shows the currently registered certificates.
Authentication with client-certificates
All CA-certificates („Available CAs“) can also be used for authentication via client-certificates. This type of authentication can be used from the Windows Client. Every user has to present a certificate signed by a specified CA. The CA has to be defined in the index settings by selecting a certificate for the preference “Authentication Certificate” in “Advanced Settings”.
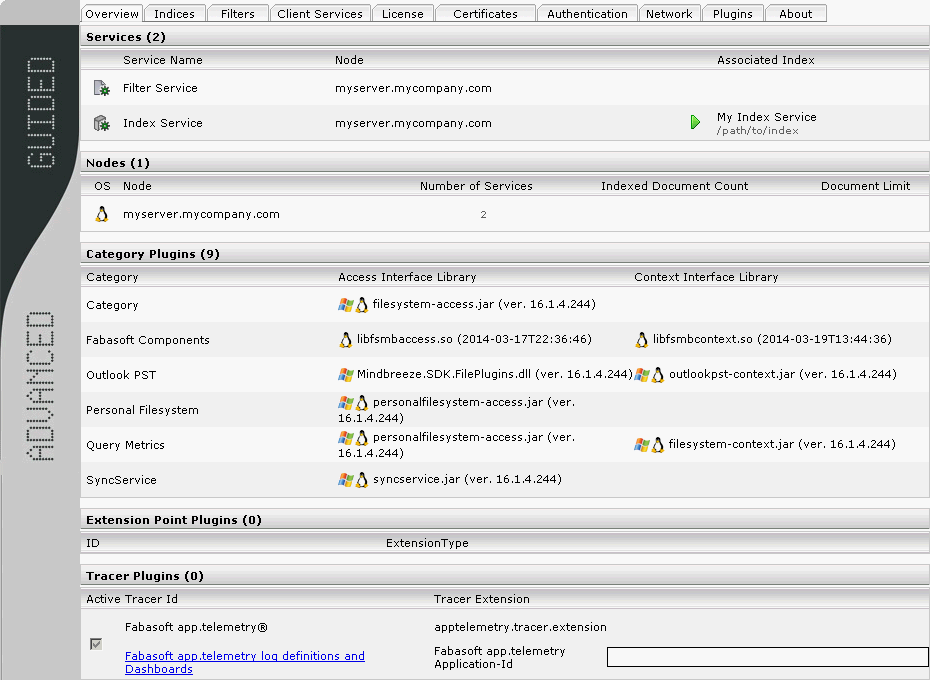
In order to operate the Web Client Service with a different SSL certificate than the supplied one, for example to use load-balancing, upload certificates in PKCS #12 format.
Prerequisites for certificates in PKCS #12 format
SSL/TLS certificates are available in various formats. For Mindbreeze InSpire, a specific format is necessary:
- Unencrypted PKCS #12 archive format (includes in most cases .p12 or .pfx file extension) with the following contents:
Attention: Uploading a certificate in a different format will result in the failing of the installation.
Upload and activation of SSL certificates
In the following chapters, the upload of an SSL certificate is explained as well as enabling the SSL certificate for the Client Service and the Mindbreeze Management Center. Be aware, that enabling the SSL certificate for the Client Service and the Mindbreeze Management Center has to be done separately. This is because the use of the SSL certificate differentiates. For the Mindbreeze InSpire Management Center, the SSL certificate is used for the administration interface. For the Mindbreeze Client Services, a per service configured SSL server certificate is used to correspond with the external server URL accessible to the end user.
Tutorial Video “Install SSL certificate”
Information on how to upload and activate an SSL certificate for the client service and for the Mindbreeze Management Center is available in the following video: https://www.youtube.com/watch?v=oThC_VNcc5s
The following chapters provide the information mentioned in the video and additional information.
Upload
To upload an SSL certificate, go to “Configuration” and then to the tab “Certificates”. Here you can switch the type of the certificate between “Auto”, “CA” and “SSL”. Switch the type to “SSL” and then select the SSL certificate with “Choose File”. Finally, click “Upload” to upload the chosen SSL certificate.
All the uploaded certificates are listed below in the section “Available SSL Certificates”. These certificates are available to be chosen for each Web Client Service.
Enabling SSL certificates for the Client Service
Go to „Configuration“ and then to „Client Services“. Activate “Advanced Settings” and open your Web Client Service. In the first section “Setup”, go to the setting “Use SSL (HTTPS)”. If this setting is not active, please activate it. Then, go to the setting “SSL Certificate”. The default setting “Use SSL Certificate supplied with your license” uses the certificate supplied with your license. Open the drop-down-menu and select the SSL certificate you want to use. Finally, make sure that “Apply changes and restart on save” is activated in the top right corner and click “Save”.
Attention: The Client Service only accepts SSL certificates in PKCS #12 format with empty import password. The SSL certificate file must contain a private key and the corresponding server certificate.
Enabling SSL certificates for the Mindbreeze Management Center
Go to „Setup“ and then to „SSL Certificate“. Click „Choose File“ to select the SSL certificate you want to use. Then upload the certificate with „Upload File“. After the upload is done, refresh the Mindbreeze Management Center to enable the SSL certificate.
Attention: The Management Center only accepts SSL certificates in the PKCS #12 format. If the certificate has an import password, it can be specified in the field “Password”. The SSL certificate file must contain a private key and the corresponding server certificate.
Upload and activation of SSL certificates for multiple Mindbreeze InSpire appliances
In the case of multiple Mindbreeze InSpire appliances that are interconnected with each other, the handling of the SSL certificate must be done in a different way. Such a case can be present, for example, in a Producer-Consumer infrastructure.
For the SSL certificate to work properly, one of the following two points must be provided:
- The SSL certificate is valid for all domains involved.
- The SSL certificate is a wildcard certificate.
If one of the two points is provided, the SSL certificate must be installed on the Master appliance. After that, the Task Manager will synchronize the certificate to the connected appliances when carrying out the task “Synchronize config and data”. The configured tasks of the Task Master can be found in the Management Center, in the main menu item “Setup” under “Tasks”.
Verification of a successful SSL certificate activation
After the activation of a SSL certificate for the Client Service and/or Management Center, it can happen that the old certificate is still displayed in the browser. This is because browsers often include the certificate into the cache and the new certificate won’t be displayed immediately, although the background services were restarted.
To resolve this issue, please try the URLs of the Client Service or Management Center in a different browser or restart the current browser. After a couple of minutes, the new certificate should be visible.
“Network“ Tab
The “Network“ tab enables common network configurations for all services.
Proxy Settings
These proxy settings are used by all Mindbreeze Enterprise Search services in order to access web resources through a proxy server. Host address and port of proxy server and a valid username and password is to be provided if necessary.
LDAP Settings
This information is important for the connection with the LDAP servers necessary for authorisations:
Setting | Description |
Domain Name | Fully qualified domain name. |
LDAP Server | These LDAP Servers will be preferred for LDAP queries. Additionally the LDAP servers in DNS Server Records (_ldap._tcp.gc._msdcs and _ldap._tcp) of Active Directory will be used if the configured LDAP Server is not reachable or delivers no results. |
Disable LDAP Server Discovery | Only configured LDAP Servers will be used for queries. No LDAP server discovery will be performed. |
Excluded Domain | Domains to be excluded from LDAP queries. |
Connection Encryption | For the connection to the LDAP server, the SSL protocol (LDAPS) on port 636 or the TLS protocol (StartTLS) on port 389 can be selected. If Unencrypted is selected, no encryption is performed. |
Enable Connection Pool Manager | Connections to LDAP server are reused to improve performance. |
Maximum Connections | Maximum number of connections to LDAP server which are established at service startup. These connections can be used in parallel. A LDAP query will be block only if all these connections are in use. |
Maximum Shared Connections | Maximum number of threads that can share the same underlaying physical connection. |
The LDAP queries are logged in the "Network Requests" log pool of AppTelemetry. Scheme "ldap" and port "389" can be used as filters. All queries that are present in the cache have the status "Persisted Cache".
“About“ Tab
The “About“ tab shows common information about the current installation of Mindbreeze InSpire, such as the version number and the copyright.
Recovering Mindbreeze Configuration from a backup
When a configuration change is saved, backups of the Mindbreeze configuration files (mesconfig.xml and pluginsite.xml) are automatically created. The backup files can be found in the same folder as the original configuration files:
%userprofile%\AppData\Roaming\Mindbreeze\Enterprise Search\Server\,
The %userprofile% folder is the profile folder of the Mindbreeze Manager Service user. If the service is started with the system user, the configuration files are located in
C:\Windows\System32\config\systemprofile\ AppData\Roaming\Mindbreeze\Enterprise Search\Server\
The backups have the following naming schema: mesconfig.xml.backup_<timestamp> und pluginsite.xml.backup_<timestamp>.
For recovering the last state of the Mindbreeze configuration the following steps are necessary:
- Stop the Mindbreeze Manager and Node services
- Replace the files mesconfig.xml and pluginsite.xml with the corresponding backups: mesconfig.xml.backup_<timestamp>
- Start the Mindbreeze Manager and Node services.
Import/Export of Settings
Settings of various services can be imported and exported using this component:
Format
The following format is used for the import and export of settings:
<settings>
<attributes>
<attribute name="name" value="value"></attribute>
</attributes>
<properties>
<property name="name" value="value"></property>
</properties>
</settings>
Export
The export window (on the left) reads all available options from the service. These options can then be uses for importing into another service.
Import
The import window (in the middle) displays the updated configuration. Notice: The services have to be of the same type for this to work.
Changes
The changes window (on the right) displays a visual diff of the changes.
Remove exisiting settings
If this option is active the configuration of the target service is overwritten.
The following options are never overwritten:
- Service Name
- Index Path
- Index Port (HTTP)
- Data Port (TCP/IP)
- Query Port (HTTPS)
- Filter Service
- Caching Principal Resolution Service
- Authorization Service
If you only wanyt to extend or update the configuration you can disable this option.
Download XML as file
With “Download XML as file”, settings (including properties and attributes) are downloaded in XML format
Download Properties as YAML
With “Download Properties as YAML”, settings (only properties) are downloaded in YAML format.
Download Properties as JSON
With “Download Properties as JSON”, settings (only properties) are downloaded in JSON format.
Parameterization
Introduction
Through configuration parameters and so-called “Development Snapshots”, changes to
- the Mindbreeze Service configuration (add/remove and customize connectors, indices, filters, client services, ...)
- the semantics pipeline
- the Query Transformation Pipeline
- InSpire Insight Apps
- Any resource files like boosts, relevance parameters
can be exported as a development snapshot and then automatically transferred to production. Any settings (e.g. the data source URL to be indexed) can be overwritten locally as parameters on the respective environment. This ensures that the production data sources are indexed productively and the developer data sources in the development system. Credentials, certificates are not stored and are preserved.
Enable/Disable Parameterization
This feature is available only for G7 appliances.
From the ‘Indices’ tab, check the advanced settings, you can enable or disable the parameterization feature from the following table.
Note: To disable parametrization, click on the ‘Disable Parameterized Configuration’ button. If there are any active parameterized configuration options, the button is disabled. To disable parameterization in that case, you have to remove all parameters first.
Add a Parameter
Once parametrization is enabled, you can parameterize a configuration option from the following ‘Add/Update Parameter’ (…) button.

You can select one of the existing parameters in your node environment or add a new parameter from the following table.
Note: The parameter’s name must not include any white spaces or special characters.
To apply changes, you have to choose a parameter from the table list.
Note: Choosing or selecting a parameter is done by clicking on the table row. If selected, it is yellow highlighted.
After clicking apply, the value of the configuration option ‘Crawling Root [1]’ will be the value of the parameter chosen from the previous table. In addition, the configuration option’s value is now read-only.
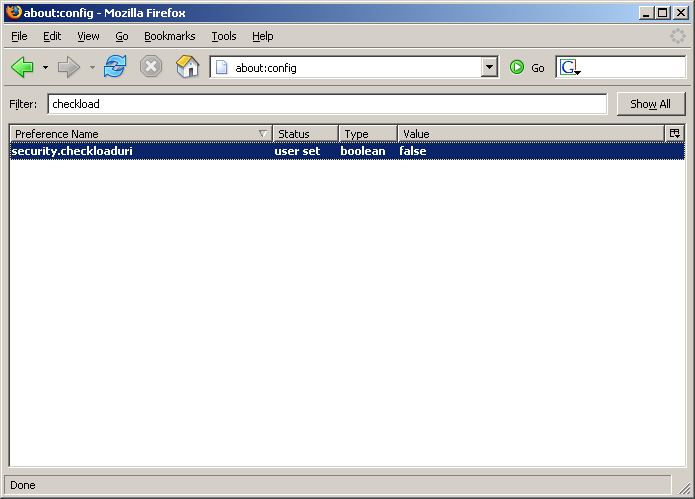
Update a Parameter
To edit the parameterized configuration option (e.g. change the parameter value or choose another parameter), click on the following ‘Add/Update parameter’ button.

The dialog is opened, where the referenced parameter for this configuration option is automatically chosen (highlighted) from the available list.
Change the value of the parameter (e.g. ‘https://another_site.com/events’) and click apply:
The configuration option’s value will also change accordingly.
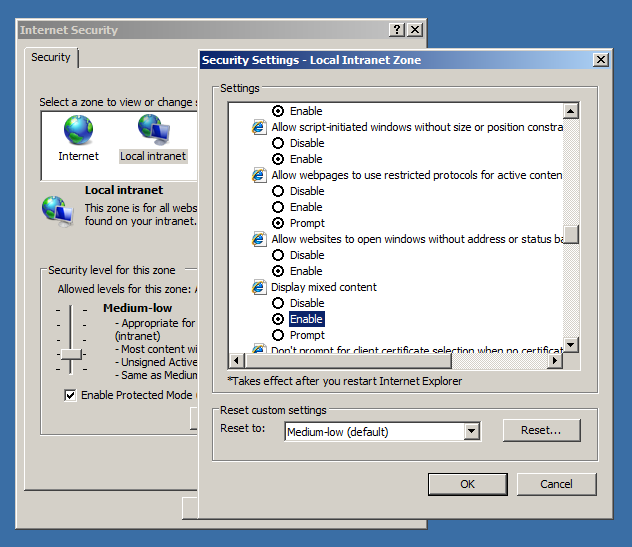
Note: Another possible change is to select another parameter (e.g. ‘param2’). In this case, the configuration ‘Crawling Root [1]’ will now refer to the newly chosen parameter.
And the value of ‘Crawling Root [1]’ will accordingly refer to the value of ‘param2’.

Remove a Parameter
To remove a parameter from the configuration option ‘Crawling Root [1]’, you can click on the following ‘Remove parameter’ (x) button.

Note: The value of the configuration option ‘Crawling Root [1]’ is now read/write and it takes the value of the last referenced parameter.
Now clicking on the above ‘Add/Update Parameter’ button will re-open the dialog to parameterize this configuration option from the beginning.
Mindbreeze InSpire Query language 
The Mindbreeze InSpire Query language is used to specify queries.
Querying single terms
To search for a word or the first letters of a word no wildcard characters (%, *, etc...) are required.
Example: | act |
Entering “act” initiates a search for objects that start with the term “act” or contain the word “act”. During a search capitalization is ignored, i.e. a search for the term “act” returns the same results as a search for “Act” or “ACT”, since the query language does not distinguish between upper and lower case letters.
Search for multiple terms in one document
In addition to querying single terms, you can query for multiple terms within one document. A search for multiple terms covers documents containing the terms themselves as well as documents containing words starting with these terms. To be part of the search result, all terms entered have to be contained in a document.
Alternative 1 | Car test |
Alternative 2 | Car Test |
Alternative 3 | CAR TEST |
These three alternatives return the same search result: documents containing words beginning with ”car“ and “test” or containing “car” and “test” as independent terms. The query language does not distinguish between upper and lower case letters.
Search for phrases/definite search
A search for phrases searches for definite words or phrases. This kind of search is initiated via quotation marks (“) at the beginning and at the end of a phrase.
Example: | "Knowledge is a matter of seconds" |
The exact phrase is searched for. Searching for phrases does not make sense if the exact spelling of the words or the phrase is unknown.
Restriction to file extensions
Mindbreeze InSpire is able to restrict the search to files with particular file extensions.
Example: | mind (extension:doc OR extension:xls OR extension:msg) |
This query searches all files with the file extensions “.doc” (Microsoft Word), ”.xls” (Microsoft Excel) and ”.msg” (Microsoft Outlook) for the word “mind” or words starting with "mind" in upper case or lower case letters.
Logic operations
AND
Phrases, words and word beginnings in a search query are implicitly combined with the logical operator AND. The search delivers documents containing all phrases, words and word beginnings listed in the search query. The keyword AND can also be included explicitly in a (for example nested) search query.
Example: | "Mindbreeze" AND "Search" |
OR
The logical operator OR delivers all documents containing at least one of the search criteria: at least one of the phrases, words or word beginnings entered. The search result also contains documents, containing only one entered term or one word beginning with an entered term or containing one of the entered phrases. The key word OR has to be explicitly defined within a search query and can also be used in a nested query.
Example: | |
Alternative 1 | ("Mindbreeze" OR "Search") AND "Software" |
Alternative 2 | ("Mindbreeze" OR "Search") "Software" |
These two queries deliver all documents containing the word “Mindbreeze” and/or the word ”Search” together with the word “Software“. They deliver documents containing the combinations ”Mindbreeze” and ”Software“, “Search” and ”Software” or ”Mindbreeze”, ”Search” and ”Software”.
Key words
NEAR 
A search with the NEAR operator delivers documents, in which one word is found near another word.
Mindbreeze NEAR Search |
NOT
A search with the NOT operator returns results within a source set where the word does not occur. NOT cannot be specified without any other word that yields results.
Example: | Mindbreeze NOT slow |
Metadata search
A metadata search is primarily used to refine a search result via additional restrictions. Mindbreeze InSpire provides some default metadata. In addition, manufacturer dependent metadata (defined by Mindbreeze partners) can be used.
Syntax of a metadata search: <metadatum>:<value>
Example: | title:Integration |
A search for a file extension can be defined via the metadatum ”extension”.
Example: | extension:doc mind |
In this example both alternatives produce the same search result: Microsoft Word files containing the word “mind” or words starting with “mind”.
The following table shows the metadata available for the data sources provided by Mindbreeze InSpire by default:
Short name | Metadatum | Description | Available for |
Name | title | Search within name | Any |
Extension | extension | Search within extension | Any |
Directory | directory | Search within folder name | File system, Outlook, Exchange |
Subject | subject | Search within subject | Outlook, Exchange |
From | from | Search within sender | Outlook, Exchange |
To | to | Search within receiver | Outlook, Exchange |
(not displayed) | content | Search within document content | Any |
The Microsoft Exchange Connector defines the metadata terms from and to.
Example: | from:bauernf |
This search query delivers all objects sent by an address with the term ”bauernf”.
Interval Search
A Query containing the „TO“ operator returns search terms between the left and the rigth side of the operator. This is particularly useful when combined with numerical strings. Mindbreeze recognizes numerical values in various formats, for example:
text | canonical representation |
100 | 100,00 |
100.0 | 100,00 |
100,0 | 100,00 |
1.000,00 | 1000,00 |
1.000 | 1,00 |
1,000.00 | 1000,00 |
-100 | -100,00 |
Interval Search Syntax: <from> TO <to>
Example: | 105 TO 110 |
Extended Metadata Interval Search 
Extended metadata interval search syntax:
label:[from> TO <to>]
label:[<from>]
label:[TO <to>]
Example: | size:[1MB TO 1,4MB] mes:date:[2012-03-20 TO 2012-03-25] |
Combination of language elements 
It is possible to combine the described language elements of the Mindbreeze InSpire query language.
Example: | title:Integration from:bauernf extension:doc |
This example delivers Microsoft Word documents sent by an address with the term ”bauernf“ in it and with a title containing the word “Integration" or a word beginning with ”Integration”.
Useful search results even if not all search terms match
Using the Optional Terms, finding documents can be simplified by providing results in which not all search terms necessarily have to occur. To make this transparent for the user, a note is displayed with the search result. This feature is active by default, but can be parameterised or completely deactivated (see section Optional Terms).
Example Query: | Artificial Intelligence Human Interaction Article |
By default, documents are found in which at least two thirds (67%) of the search terms occur. Since the search query in this example contains 5 search terms, one term can be missing in the result. The screenshot below shows an example where a document is found for this search query that does not contain the term "Article".
Operation and Maintenance
Changing the Index Service-Mode
A Mindbreeze InSpire Index Service supports the following modes:
- Mode: running (
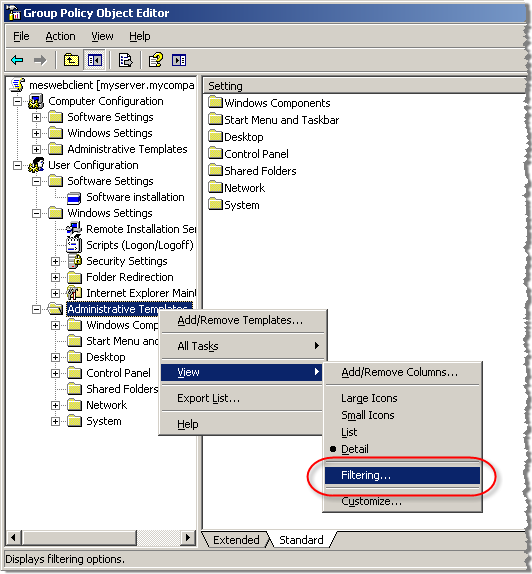 )
)
This is the default mode of a Mindbreeze InSpire Index Service. This mode represents normal operation - Mode: readonly (
 )
)
This mode is used to provide index consistency during backup of the index files for Mindbreeze InSpire
Hint: To allow resumption of the indexing process or start indexing of new documents (delta-indexing), the state must be changed back to “Mode: running”. - Mode: offline (
 )
)
This mode cannot be set explicitly by the user. An Index Service is in this mode when it has been stopped completely.
Manually changing the Index Service-Mode
In addition to automatic state changes, the mode can also be changed via the Mindbreeze InSpire configuration user interface. In the “Services” field click the icon in the “Associated Index” column to change the mode. Clicking it again changes the mode back to the original state.
Hint: If the Index Service is not running, there will also be an indication why. The mode of the index service cannot be changed when in this state via the user interface, you must start the Index Service manually.
Changing the Index Service-Mode using a Script
- To change the index service mode to “readonly”, please run the following from the Command Prompt:
mescontrol http://indexserver.yourcompany.com:23100 readonly
- To change the index service mode to “running”, please run the following from the Command Prompt:
mescontrol http://indexserver.yourcompany.com:23100 readwrite
Backing up the index data
Mindbreeze InSpire uses a file-based index. These index files can be backed up completely in a consistent state.
To save index data, perform the following steps:
- Change the mode of the index service to “Mode: readonly “(
 ).
). - Check the consistency of the index with:
mescontrol http://index.yourcompany.com:23100 checkconsistency - Verify the exit code (ERRORLEVEL) of mescontrol
- Navigate to the directory where the index is stored, and backup the files within this directory, only when no errors occurred up to now
- Change the mode of the index service to “Mode: running” (
 ).
).
Restoring index data
To restore a previously saved index, perform the following steps:
- Stop the Index Service.
- Delete any existing files in the index directory (if not required any more) or change the path to the index files of the Index Service in the configuration to a new.
Hint: If you define another directory, make sure that the service user has write access to the defined path. - Copy the restored index files into the directory.
- Restart the Index Service.
Index Status Information
Index Statistics
Every Index service provides detailed status information about status of the indexing process and the number of documents indexed by using the “/statistics” URL path:
An example endpoint of an index service on host “indexserver.myorganization.com” listening on 23100 would result in the following URL: http://indexserver.myorganization.com:23100/statistics
Indexed Documents
In addition to getting statistics on the indexing status one can use the “/documents” URL Path to browse indexed documents either by document key (depending on the connector in use) or by document id (docid). Please note that the docid is an internal sequence number and varies between indexing runs.
An example endpoint of an index service on host “indexserver.myorganization.com” listening on 23100 would result in the following URL: http://indexserver.myorganization.com:23100/documents
Retrieving Index Status Information
For health checking purposes one can use the raw index status handler available via /index_mode on the index service’s bind port. For instance on an Index Service running on indexserver.myorganization.com that is listening on port 23100 it would be: http://indexserver.myorganization.com:23100/index_mode
If the Index Service receives a request on this end point, the index responds with status information in form of an XML document that has the following schema:
<status mode=”<status-information>” />
<status-information> indicates the mode of the index which can be:
- normal (read write)
- readonly
- offline (closed)
Receiving an HTTP status code other than 200 also indicates that the index is not fully operational.
Backup of log files
The log files are archived regularly. This is done using a cron job, which is run every Sunday at 2:30 by default.
All log files from the paths /data/logs and /var/opt/mindbreeze/log are archived and stored in /data/backups/log-backups.
Binary files are not backed up but removed during backup.
Only the first 50GB of files larger than that are backed up.
Query Service Reconfiguration
The following query service options can temporarily be changed without index restart, and these changes will not persistent in the index configuration:
- “Query Threads per Index”
- “Number of ACL Precomputation Threads“
This reconfiguration is possible only with disabled “Disable Unrestricted Privileged Servlets” option.
To change the number of query threads, please run the following from the Command Prompt:
mescontrol http://localhost:23100 reconfigure --query-threads=<n>
To change the number of ACL precomputation threads, please run the following from the Command Prompt:
mescontrol http://localhost:23100 reconfigure --precompute-acl-threads=<n>
Appendix A
Service Restart Behavior after Configuration Changes
Index/ | Index/ | Connector | Filter | Filter Plugins | Caching Principal Resolution Service | Client Service | Client Service | |
Connector | ||||||||
Adding a new index and a connector | R | R | ||||||
Adding a connector to an existing index | R | R | R | R | ||||
Changing a connector's configuration | R | |||||||
Index/Query | ||||||||
Changing index path | ||||||||
Changing an index's configuration | R | R | ||||||
Adding a query plugins to an existing index | R | R | ||||||
Changing a query plugin's configuration | R | |||||||
Filter | ||||||||
Adding a filter plugin to an existing filter | R | R | ||||||
Changing a filter's configuration | R | R | ||||||
Changing a filter plugin's configuration | R | |||||||
Client Service | ||||||||
Changing a client service's configuration | R | R | ||||||
Adding a client service plugin | R | R | ||||||
Changing a client service's plugin | R | |||||||
Generic | ||||||||
Changing the log level | ||||||||
Changing the log directory | R | R | R | R | R | R | R | R |
Changing the proxy settings | R | R | R | R | R | R | R | R |
Changing the LDAP settings | R | R | R | R | R | R | R | R |
Changing the credentials and endpoints | R | R | R | R | R | |||
Changing the authentication settings ** | R | R | R | R | R | R | ||
Changing the certificates ** | R | R | R | R | R | R | ||
** = Only services which are affected directly by the change. For example, changing the kerberos keytab will cause the restart of the service which uses this keytab. | ||||||||
Appendix B
Manual Configuration of Kerberos-based Authentication
The following steps are needed for manual configuration:
- Set the HTTP/<host_fqdn> service principal name for the service user, using the setspn tool or add manually using adsiedit.msc. Here the <host_fqdn> is the fully qualified domain name of the Mindbreeze InSpire Node:
e.g setspn –a HTTP/myserver.mydomain.com DOMAIN\serviceuser.
Make sure that the SPN is not already set for a different user or host object from the current Windows Active Directory, e.g. using setspn -x (available on Windows Server 2008 servers) or try third party tools like dumpspn.
- Set the trusted for delegation flag for the service user in the "Users and Computers" management console plugin (dsa.msc).
Appendix C
This appendix lists useful administration details for Mindbreeze InSpire components.
Web browser configuration
The security restrictions of web-browsers limit the use of file resources (e.g. file://myserver.myorganization.com/share/letter.doc) and they are not accessible in most browsers without modification of security settings. Kerberos support for authentication is also not configured by default but Mindbreeze InSpire uses Kerberos Single Sign On for secure network wide search. This section shows how to manually configure the required browser settings based on Mozilla Firefox and Microsoft Internet Explorer.
Mozilla Firefox – Manually setting the settings
To manually configure Mozilla Firefox, type about:config in the address bar. This will show a list of configuration options.
The following configuration entries have to be set.
Config Value | Description | Example values |
network.negotiate-auth.delegation-uris | This value should contain two entries of the fully qualified hostname of the Mindbreeze Web Client Service. One for the http protocol, the other for https: Note: Multiple entries can be specified using a comma (,) as a seperator. | … http://myserver.myorganization.com, https://myserver.myorganization.com |
network.negotiate-auth.trusted-uris | This value should contain the same entries as the network.negotiate-auth.delegation-uris value. Hinweis: Multiple entries can be specified using a comma (,) as a seperator. | http://myserver.myorganization.com, https://myserver.myorganization.com |
After restarting the Firefox browser, the changes should have been applied. Authentication with the Mindbreeze InSpire Web Client Service should now work as expected.
In addition to Kerberos authentication, another important configuration option is to be able to open file URLs. Mozilla Firefox up to version 1.4, and Mozilla Suite up to version 1.7.x provide only one global value to configure the settings of file URLs. This configuration is called ”security.checkloaduri“ and should be set to ”false“.
Warning: Globally setting this value might open a security risk when visiting malicious internet sites.
Newer versions of Mozilla Firefox (starting with version 1.5) and the Mozilla SeaMonkey Suite starting with version 1.0 are able to set the security settings for a set of web sites which are described by a policy.
To create a policy you have to manually edit the user.js configuration file that resides in your local Mozilla proflie folder. (e.g.: C:\Docments and Settings\User\Application Data\Mozilla\Firefox\Profiles\xxxxx.xxx\user.js).
Note: Please refer to the %USERPROFILE%\Application_Data\Mozilla\Firefox\profiles.ini configuration file, to find your active Firefox profile directory.
The following snippet shows the configuration of a new policy called “messecurity settings” for the Mindbreeze InSpire Web Client Service Node running on myserver.myorganization.com, on port 23350
user_pref("capability.policy.policynames", "messecuritysettings");
user_pref("capability.policy.messecuritysettings.sites", "https://myserver.myorganization.com:23350");
user_pref("capability.policy. messecuritysettings.checkloaduri.enabled", "allAccess");
Note: Several Web Client Services can be added to the policy by separating them with spaces.
Google Chrome and Microsoft Edge
Setting the configuration manually
Microsoft Internet Explorer uses security zones to implement its security model. By default, a web site is located in the “Internet” zone. To grant the necessary rights to the Mindbreeze InSpire Web Client, add the URL of the Mindbreeze InSpire Web Client Services to the “Local intranet” zone.
Double-click the globe symbol toward the right of the status bar. Then in the “Internet Security” tab which is displayed, select “Local Intranet” and “Sites”. Add the Mindbreeze InSpire Client Service URL to the local intranet sites using the following the dialogs.
Add both the http as well as the https URL of the Mindbreeze Enterprise Search Web Client Services to the list of local intranet sites.
Example: Your Mindbreeze InSpire Web Client Service is available from myserver.myorganization.com add the following two entries to the list:
http://myserver.myorganization.com
https://myserver.myorganization.com
Also make sure that the option "Display Mixed Content" is enabled for your local intranet. You can check this setting with "Custom level".
Additionally, you should disable the “Do not save encrypted pages” option in the “Advanced” Tab.
To apply the changes, reload the Web Client page after the Web Client address has been added to the Intranet Zone.
Configuration of Microsoft Internet Explorer via Group Policies
Follow the steps below to automatically set the configuration described above for a specific organizational unit in your Active Directory domain. The following section guides you through the steps needed to create a group policy which adds the Mindbreeze InSpire Web Client Service to the Trusted Sites and the Mindbreeze certificate to the Root Certificate Authorities.
First, log on as a member of the “Domain Admins” group.
Then open the “Active Directory Users and Computers Management” console. Right-click the domain or Organizational Unit where you want your Internet Explorer to be configured and click “Properties”.
Then select the Group Policy Tab and click the “New” button. Type a name for the new Group Policy Object. (e.g. MES IE Config). Then click the “Edit” button.
In the following section an administrative template which will configure the Internet Explorer settings mentioned above will be added.
After opening the Group Policy Object Editor, right-click “Administrative Templates” and select “Filtering…”.
In the following dialog uncheck “Only show policy settings that can be fully managed”.
Import the administrative template.
First right-click “Administrative Templates” and select “Add/Remove Templates…”.
In the following dialog add the file called “MindbreezeEnterpriseSearchWebclient.adm” located on the Mindbreeze InSpire installation ZIP / ISO.
After adding the administrative template, please enable all settings.
To add the Mindbreeze Webclient to the “Trusted Sites” navigate through User Configuration>> Windows Settings >> Internet Explorer Maintenance >> Security. Next, right-click Security Zones and Content Ratings in the right window pane and click Properties.
Select “Import the current security zones and privacy settings”. If prompted, click “Continue”. Then click “Modify Settings”.
The zone “Internet” is selected by default. Switch to the zone “Local Intranet”. Then click on “Sites”. In some cases, a dialogue will open where you can define which sites belong to the Local Intranet zone. Click on “Advanced”. You can now add the Web Client address. Enter one address for the HTTP protocol and one for the HTTPS protocol (e.g. http://myserver.myorganization.com and https://myserver.myorganization.com).
To add the certificate for Mindbreeze InSpire into the list of the Trusted Root Certification Authorities, navigate down to Computer Configuration > Windows Settings > Security Settings > Public Key Policies > Trusted Root Certification Authorities. Right-click on this option and select “Import”.
In the “Certificate Import Wizard”, browse to the location of the Mindbreeze Certificate called camindbreeze.pem that is located in the installation directory of the Mindbreeze InSpire Node (e.g. /var/opt/lindbreeze/lib/store.). Confirm all open dialogs and wizards.
Now Mindbreeze MES Server Authority should be shown in the list of Trusted Root Certification Authorities. Close all open dialogs and windows of the snap-in.
Restart the client computers for changes to take effect. After that the Mindbreeze InSpire Web Client should work without restrictions.
Appendix D
Available Fabasoft app.telemetry log pools for monitoring Mindbreeze InSpire services
InSpire provides the following log pools in the „Mindbreeze InSpire Warnings and Errors“ area for monitoring errors and warnings from services:
An administrator can be notified of errors or warnings using Fabasoft app.telemetry. InSpire provides the following counter checks for this purpose:
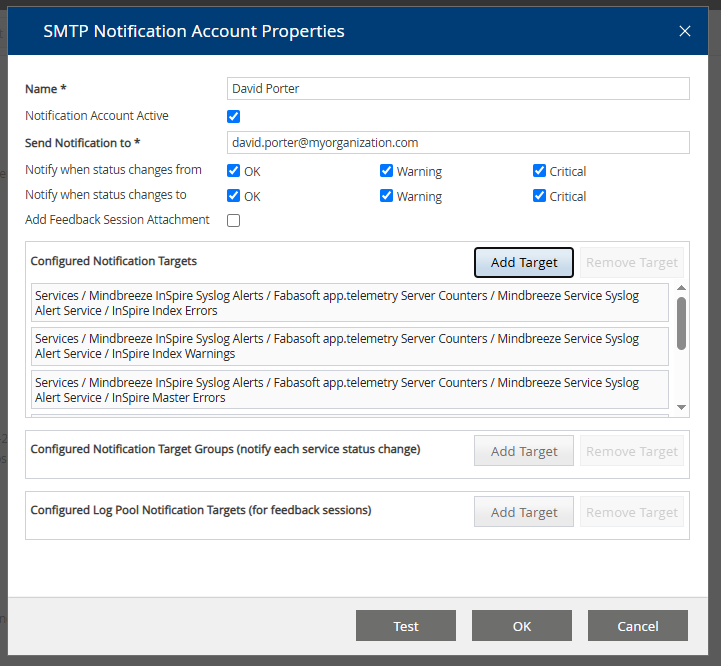
Notifications can be set up for the individual service checks in app.telemetry.
Configuration of notifications
Click on „Configuration“ and then open „Notifications“ by clicking on the plus symbol. You will now see a sub-item called „Local Mail“. Create a new notification account with a right click or by clicking on „New Notification Account“.
In the window that now appears, enter your name and under „Send Notification to“ the email address that should receive notifications. Under „Notify when status changes from“ and „Notify when status changes to“, you can specify the status changes for which you would like to receive an e-mail notification.
Furthermore, you can now specify which logs you would like to monitor. While individual logs can be selected separately under „Configured Notification Targets“, „Configured Notification Target Groups (notify each service status change)“ allows you to select log pool groups.
If you want to monitor separate logs, click on „Add Target“ under „Configured Notification Targets“. In the window that now appears, you can now open „Mindbreeze InSpire Syslog Alerts“, then open, for example, „Fabasoft.app.telemetry Server Counters / Mindbreeze Service Syslog Alert Service“ and select the respective logs.
The selected, separate logs are displayed as follows:
If you want to monitor an entire log pool group, click on „Add Target“ under „Configured Notification Target Groups (notify each service status change)“. In the window that now appears, you can now select „Mindbreeze InSpire Syslog Alerts“, for example.
The selected log pool group is displayed as follows:
Finally, confirm your settings and selection with „OK“ to activate the notification account.
By activating the notification account, you will now receive email notifications about errors or warnings, which could look like this, for example:
If errors or warnings have been corrected, you will receive an email notification that could look like this, for example:
Install Fabasoft app.telemetry Log Pools manually for Mindbreeze Services
Log pools do not need to be installed manually in Mindbreeze InSpire, as the Mindbreeze InSpire setup manages all log pools itself. Manual installation of log pools is only required in Fabasoft Mindbreeze Enterprise.
Downloading the Log Definitions
The Fabasoft app.telemetry log definitions for the Mindbreeze services can be downloaded from the Mindbreeze configuration console by clicking on the Link “Fabasoft app.telemetry log definitions and Dashboards” on the “Overview” tab of the Configuration UI.
After downloading and extracting the archive apptelemetryconfig.zip, the Fabasoft app.telemetry log definitions are located in a folder named “Logdefinitions”. Here you can find the following files:
- apptelemetrylogdefinitions_clientservice.xml: log definition file for Mindbreeze Client Services;
- apptelemetrylogdefinitions_client.xml: log definition file for the Mindbreeze JavaScript Clients;
- apptelemetrylogdefinitions_contentfilterservice.xml: log definition file for Mindbreeze Content Filter Services;
- apptelemetrylogdefinitions_crawlerservice.xml: log definition file for the Mindbreeze Crawler Services;
- apptelemetrylogdefinitions_filterservice.xml: log definition file for Mindbreeze Filter Services;
- apptelemetrylogdefinitions_indexservice.xml: log definition file for Mindbreeze Index Services;
- apptelemetrylogdefinitions_jobsyncservice.xml: log definition file for the Mindbreeze JobSync Services (used for Mindbreeze InSite installations);
- apptelemetrylogdefinitions_networkrequests.xml: log definition file for a network requests log pool for Mindbreeze Web Crawlers;
- apptelemetrylogdefinitions_queryservice.xml: log definition file for Mindbreeze Query Services;
- apptelemetrylogdefinitions_sdkcsandbox.xml: log definition file for the Mindbreeze SDKCsandbox services;
- apptelemetrylogdefinitions_tenantqueryservice.xml: additional log definition for multitenant Query services.
Creating Log Pools for the Mindbreeze Services in Fabasoft app.telemetry
Defining Log Pools for the Mindbreeze services can be accomplished following the steps described here:
In the “Log Pool Properties” tab of the log pool configurations the following “Application Filter” parameters should be set correctly for the Mindbreeze log pools:
- Application: Mindbreeze
- Application Tier:
- “Client” for Mindbreze Client log pool
- “Client Service” for Mindbreeze Client Service Log pools
- “Client Service Query Log” for Mindbreeze Client Service Query Log - Log pools
- “Content Filter Service” for Content Fitler Service log pools
- “Index Service” for Index Service log pools
- “Query Service” for Query Service log pools
- “Sandbox” for SDKCsandbox Service log pools.
Appendix E
Extended cron expressions
With an extended cron expression you can define when or in which intervals a task should be executed. This has the advantage that the task is executed automatically instead of having to execute it manually each time.
Format and syntax
Basically, an extended cron expression consists of 6 fields:
1. field | 2. field | 3. field | 4. field | 5. field | 6. field | |
Field name | Seconds | Minutes | Hours | Day of month | Month | Day of week |
Valid values | 0-59 | 0-59 | 0-23 | 1-31 | 1-12 oder | 0-6 oder |
The fields are each separated by a space and look like this (X is a placeholder for a field):
X X X X X X
Examples
Extended cron expression | Meaning |
0 0 12 * * * | Daily at 12:00 am |
0 15 10 * * * | Daily at 10:15 am |
20 15 10 * * * | Daily at 10:15:20 am |
0 15 10 * * 0 | Every Sunday at 10:15 am |
0 15 10 * * SUN | Every Sunday at 10:15 am |
0 15 10 2 4 * | Every 2nd April at 10:15 am |
0 15 10 * 4 * | Every day in April at 10:15 am |
0 15 10 7 * * | On every 7th day of the month at 10:15 am |
Appendix F
List of supported time zones
Africa/Abidjan, Africa/Accra, Africa/Addis_Ababa, Africa/Algiers, Africa/Asmara, Africa/Asmera, Africa/Bamako, Africa/Bangui, Africa/Banjul, Africa/Bissau, Africa/Blantyre, Africa/Brazzaville, Africa/Bujumbura, Africa/Cairo, Africa/Casablanca, Africa/Ceuta, Africa/Conakry, Africa/Dakar, Africa/Dar_es_Salaam, Africa/Djibouti, Africa/Douala, Africa/El_Aaiun, Africa/Freetown, Africa/Gaborone, Africa/Harare, Africa/Johannesburg, Africa/Juba, Africa/Kampala, Africa/Khartoum, Africa/Kigali, Africa/Kinshasa, Africa/Lagos, Africa/Libreville, Africa/Lome, Africa/Luanda, Africa/Lubumbashi, Africa/Lusaka, Africa/Malabo, Africa/Maputo, Africa/Maseru, Africa/Mbabane, Africa/Mogadishu, Africa/Monrovia, Africa/Nairobi, Africa/Ndjamena, Africa/Niamey, Africa/Nouakchott, Africa/Ouagadougou, Africa/Porto-Novo, Africa/Sao_Tome, Africa/Timbuktu, Africa/Tripoli, Africa/Tunis, Africa/Windhoek, America/Adak, America/Anchorage, America/Anguilla, America/Antigua, America/Araguaina, America/Argentina/Buenos_Aires, America/Argentina/Catamarca, America/Argentina/ComodRivadavia, America/Argentina/Cordoba, America/Argentina/Jujuy, America/Argentina/La_Rioja, America/Argentina/Mendoza, America/Argentina/Rio_Gallegos, America/Argentina/Salta, America/Argentina/San_Juan, America/Argentina/San_Luis, America/Argentina/Tucuman, America/Argentina/Ushuaia, America/Aruba, America/Asuncion, America/Atikokan, America/Atka, America/Bahia, America/Bahia_Banderas, America/Barbados, America/Belem, America/Belize, America/Blanc-Sablon, America/Boa_Vista, America/Bogota, America/Boise, America/Buenos_Aires, America/Cambridge_Bay, America/Campo_Grande, America/Cancun, America/Caracas, America/Catamarca, America/Cayenne, America/Cayman, America/Chicago, America/Chihuahua, America/Coral_Harbour, America/Cordoba, America/Costa_Rica, America/Creston, America/Cuiaba, America/Curacao, America/Danmarkshavn, America/Dawson, America/Dawson_Creek, America/Denver, America/Detroit, America/Dominica, America/Edmonton, America/Eirunepe, America/El_Salvador, America/Ensenada, America/Fort_Nelson, America/Fort_Wayne, America/Fortaleza, America/Glace_Bay, America/Godthab, America/Goose_Bay, America/Grand_Turk, America/Grenada, America/Guadeloupe, America/Guatemala, America/Guayaquil, America/Guyana, America/Halifax, America/Havana, America/Hermosillo, America/Indiana/Indianapolis, America/Indiana/Knox, America/Indiana/Marengo, America/Indiana/Petersburg, America/Indiana/Tell_City, America/Indiana/Vevay, America/Indiana/Vincennes, America/Indiana/Winamac, America/Indianapolis, America/Inuvik, America/Iqaluit, America/Jamaica, America/Jujuy, America/Juneau, America/Kentucky/Louisville, America/Kentucky/Monticello, America/Knox_IN, America/Kralendijk, America/La_Paz, America/Lima, America/Los_Angeles, America/Louisville, America/Lower_Princes, America/Maceio, America/Managua, America/Manaus, America/Marigot, America/Martinique, America/Matamoros, America/Mazatlan, America/Mendoza, America/Menominee, America/Merida, America/Metlakatla, America/Mexico_City, America/Miquelon, America/Moncton, America/Monterrey, America/Montevideo, America/Montreal, America/Montserrat, America/Nassau, America/New_York, America/Nipigon, America/Nome, America/Noronha, America/North_Dakota/Beulah, America/North_Dakota/Center, America/North_Dakota/New_Salem, America/Ojinaga, America/Panama, America/Pangnirtung, America/Paramaribo, America/Phoenix, America/Port-au-Prince, America/Port_of_Spain, America/Porto_Acre, America/Porto_Velho, America/Puerto_Rico, America/Rainy_River, America/Rankin_Inlet, America/Recife, America/Regina, America/Resolute, America/Rio_Branco, America/Rosario, America/Santa_Isabel, America/Santarem, America/Santiago, America/Santo_Domingo, America/Sao_Paulo, America/Scoresbysund, America/Shiprock, America/Sitka, America/St_Barthelemy, America/St_Johns, America/St_Kitts, America/St_Lucia, America/St_Thomas, America/St_Vincent, America/Swift_Current, America/Tegucigalpa, America/Thule, America/Thunder_Bay, America/Tijuana, America/Toronto, America/Tortola, America/Vancouver, America/Virgin, America/Whitehorse, America/Winnipeg, America/Yakutat, America/Yellowknife, Antarctica/Casey, Antarctica/Davis, Antarctica/DumontDUrville, Antarctica/Macquarie, Antarctica/Mawson, Antarctica/McMurdo, Antarctica/Palmer, Antarctica/Rothera, Antarctica/South_Pole, Antarctica/Syowa, Antarctica/Troll, Antarctica/Vostok, Arctic/Longyearbyen, Asia/Aden, Asia/Almaty, Asia/Amman, Asia/Anadyr, Asia/Aqtau, Asia/Aqtobe, Asia/Ashgabat, Asia/Ashkhabad, Asia/Baghdad, Asia/Bahrain, Asia/Baku, Asia/Bangkok, Asia/Barnaul, Asia/Beirut, Asia/Bishkek, Asia/Brunei, Asia/Calcutta, Asia/Chita, Asia/Choibalsan, Asia/Chongqing, Asia/Chungking, Asia/Colombo, Asia/Dacca, Asia/Damascus, Asia/Dhaka, Asia/Dili, Asia/Dubai, Asia/Dushanbe, Asia/Gaza, Asia/Harbin, Asia/Hebron, Asia/Ho_Chi_Minh, Asia/Hong_Kong, Asia/Hovd, Asia/Irkutsk, Asia/Istanbul, Asia/Jakarta, Asia/Jayapura, Asia/Jerusalem, Asia/Kabul, Asia/Kamchatka, Asia/Karachi, Asia/Kashgar, Asia/Kathmandu, Asia/Katmandu, Asia/Khandyga, Asia/Kolkata, Asia/Krasnoyarsk, Asia/Kuala_Lumpur, Asia/Kuching, Asia/Kuwait, Asia/Macao, Asia/Macau, Asia/Magadan, Asia/Makassar, Asia/Manila, Asia/Muscat, Asia/Nicosia, Asia/Novokuznetsk, Asia/Novosibirsk, Asia/Omsk, Asia/Oral, Asia/Phnom_Penh, Asia/Pontianak, Asia/Pyongyang, Asia/Qatar, Asia/Qyzylorda, Asia/Rangoon, Asia/Riyadh, Asia/Saigon, Asia/Sakhalin, Asia/Samarkand, Asia/Seoul, Asia/Shanghai, Asia/Singapore, Asia/Srednekolymsk, Asia/Taipei, Asia/Tashkent, Asia/Tbilisi, Asia/Tehran, Asia/Tel_Aviv, Asia/Thimbu, Asia/Thimphu, Asia/Tokyo, Asia/Tomsk, Asia/Ujung_Pandang, Asia/Ulaanbaatar, Asia/Ulan_Bator, Asia/Urumqi, Asia/Ust-Nera, Asia/Vientiane, Asia/Vladivostok, Asia/Yakutsk, Asia/Yekaterinburg, Asia/Yerevan, Atlantic/Azores, Atlantic/Bermuda, Atlantic/Canary, Atlantic/Cape_Verde, Atlantic/Faeroe, Atlantic/Faroe, Atlantic/Jan_Mayen, Atlantic/Madeira, Atlantic/Reykjavik, Atlantic/South_Georgia, Atlantic/St_Helena, Atlantic/Stanley, Australia/ACT, Australia/Adelaide, Australia/Brisbane, Australia/Broken_Hill, Australia/Canberra, Australia/Currie, Australia/Darwin, Australia/Eucla, Australia/Hobart, Australia/LHI, Australia/Lindeman, Australia/Lord_Howe, Australia/Melbourne, Australia/NSW, Australia/North, Australia/Perth, Australia/Queensland, Australia/South, Australia/Sydney, Australia/Tasmania, Australia/Victoria, Australia/West, Australia/Yancowinna, Brazil/Acre, Brazil/DeNoronha, Brazil/East, Brazil/West, CET, CST6CDT, Canada/Atlantic, Canada/Central, Canada/East-Saskatchewan, Canada/Eastern, Canada/Mountain, Canada/Newfoundland, Canada/Pacific, Canada/Saskatchewan, Canada/Yukon, Chile/Continental, Chile/EasterIsland, Cuba, EET, EST5EDT, Egypt, Eire, Etc/GMT, Etc/GMT+0, Etc/GMT+1, Etc/GMT+10, Etc/GMT+11, Etc/GMT+12, Etc/GMT+2, Etc/GMT+3, Etc/GMT+4, Etc/GMT+5, Etc/GMT+6, Etc/GMT+7, Etc/GMT+8, Etc/GMT+9, Etc/GMT-0, Etc/GMT-1, Etc/GMT-10, Etc/GMT-11, Etc/GMT-12, Etc/GMT-13, Etc/GMT-14, Etc/GMT-2, Etc/GMT-3, Etc/GMT-4, Etc/GMT-5, Etc/GMT-6, Etc/GMT-7, Etc/GMT-8, Etc/GMT-9, Etc/GMT0, Etc/Greenwich, Etc/UCT, Etc/UTC, Etc/Universal, Etc/Zulu, Europe/Amsterdam, Europe/Andorra, Europe/Astrakhan, Europe/Athens, Europe/Belfast, Europe/Belgrade, Europe/Berlin, Europe/Bratislava, Europe/Brussels, Europe/Bucharest, Europe/Budapest, Europe/Busingen, Europe/Chisinau, Europe/Copenhagen, Europe/Dublin, Europe/Gibraltar, Europe/Guernsey, Europe/Helsinki, Europe/Isle_of_Man, Europe/Istanbul, Europe/Jersey, Europe/Kaliningrad, Europe/Kiev, Europe/Kirov, Europe/Lisbon, Europe/Ljubljana, Europe/London, Europe/Luxembourg, Europe/Madrid, Europe/Malta, Europe/Mariehamn, Europe/Minsk, Europe/Monaco, Europe/Moscow, Europe/Nicosia, Europe/Oslo, Europe/Paris, Europe/Podgorica, Europe/Prague, Europe/Riga, Europe/Rome, Europe/Samara, Europe/San_Marino, Europe/Sarajevo, Europe/Simferopol, Europe/Skopje, Europe/Sofia, Europe/Stockholm, Europe/Tallinn, Europe/Tirane, Europe/Tiraspol, Europe/Ulyanovsk, Europe/Uzhgorod, Europe/Vaduz, Europe/Vatican, Europe/Vienna, Europe/Vilnius, Europe/Volgograd, Europe/Warsaw, Europe/Zagreb, Europe/Zaporozhye, Europe/Zurich, GB, GB-Eire, GMT, GMT0, Greenwich, Hongkong, Iceland, Indian/Antananarivo, Indian/Chagos, Indian/Christmas, Indian/Cocos, Indian/Comoro, Indian/Kerguelen, Indian/Mahe, Indian/Maldives, Indian/Mauritius, Indian/Mayotte, Indian/Reunion, Iran, Israel, Jamaica, Japan, Kwajalein, Libya, MET, MST7MDT, Mexico/BajaNorte, Mexico/BajaSur, Mexico/General, NZ, NZ-CHAT, Navajo, PRC, PST8PDT, Pacific/Apia, Pacific/Auckland, Pacific/Bougainville, Pacific/Chatham, Pacific/Chuuk, Pacific/Easter, Pacific/Efate, Pacific/Enderbury, Pacific/Fakaofo, Pacific/Fiji, Pacific/Funafuti, Pacific/Galapagos, Pacific/Gambier, Pacific/Guadalcanal, Pacific/Guam, Pacific/Honolulu, Pacific/Johnston, Pacific/Kiritimati, Pacific/Kosrae, Pacific/Kwajalein, Pacific/Majuro, Pacific/Marquesas, Pacific/Midway, Pacific/Nauru, Pacific/Niue, Pacific/Norfolk, Pacific/Noumea, Pacific/Pago_Pago, Pacific/Palau, Pacific/Pitcairn, Pacific/Pohnpei, Pacific/Ponape, Pacific/Port_Moresby, Pacific/Rarotonga, Pacific/Saipan, Pacific/Samoa, Pacific/Tahiti, Pacific/Tarawa, Pacific/Tongatapu, Pacific/Truk, Pacific/Wake, Pacific/Wallis, Pacific/Yap, Poland, Portugal, ROK, Singapore, SystemV/AST4, SystemV/AST4ADT, SystemV/CST6, SystemV/CST6CDT, SystemV/EST5, SystemV/EST5EDT, SystemV/HST10, SystemV/MST7, SystemV/MST7MDT, SystemV/PST8, SystemV/PST8PDT, SystemV/YST9, SystemV/YST9YDT, Turkey, UCT, US/Alaska, US/Aleutian, US/Arizona, US/Central, US/East-Indiana, US/Eastern, US/Hawaii, US/Indiana-Starke, US/Michigan, US/Mountain, US/Pacific, US/Pacific-New, US/Samoa, UTC, Universal, W-SU, WET, Zulu, EST, HST, MST, ACT, AET, AGT, ART, AST, BET, BST, CAT, CNT, CST, CTT, EAT, ECT, IET, IST, JST, MIT, NET, NST, PLT, PNT, PRT, PST, SST, VST
Appendix G
Mindbreeze provides the possibility to use custom trained models, and custom catalogs for stop words and entity recognition for example.
To use custom resources, a particular naming convention and folder structure must be used:
|------------model_names [Folder]
|------------current_version.json [File]
|------------current_version [Folder]
|-------------------model [File]
Naming conventions for Custom Models and Catalogs
parent_folder [Folder]:
Can be any name allowed by the OS, can contain any number of supported models. This is the folder path that needs to be provided for the index configuration.
model_names [Folder]: 
This is a folder that is named after the containing models.
Model names must follow the following naming convention:
Resource type | Naming guideline | Description |
Compound Splitting Models | mindbreeze.models.nlp.char_ngram_hash_profile.wikipedia.<language> | language is the language code for the model (e.g. “en” or “de”). These models are used for compound splitting. Model files of this type must have a proto.bin extension. |
NER Entity Catalogs | mindbreeze.catalogues.nlp.lowercased_word_type.entity.<entityType> | entityType is one of the recognized entity types: location, organization, person, misc. Only words contained in this catalog will be recognized as entities. This can be used as a measure to reduce false positives. This is relevant for NER highlighting and Aggregation. Resource files of this type must have a .csv extension |
NER Stop Words Catalogs | mindbreeze.catalogs.nlp.stop_words.<langage> | language is the language code for the catalog (e.g. “en” or “de”). The words in these catalogs are ignored when doing NER processing. This is used to reduce false positives. Resource files of this type must have a .txt extension |
Stop Words Catalogs | mindbreeze.catalogs.nlp.lowercased_stop_words.<language> | language is the language of the catalog. Words in these catalogs are ignored by normal highlighting and "Did you mean". Resource files of this type must have a .txt extension |
current_version.json [File]:
as there could be many versions of models, this json file indicates which model version to load. This file must exist in the folder structure.
This file should contain the current version of the model to load, as follows:
{
"current_version": "<version>"
}
version can be 1.0.0 for example.
version_folder [Folder]:
This folder is named after the version of the model in question, 1.0.0 for example.
model_file [File]:
This is the model file to load. The file name and extension needs to follow the naming convention described above.


